Home › Forums › General Discussion › Wipers, relocated
- This topic has 19 replies, 10 voices, and was last updated 13 years, 8 months ago by
Dennis Brock.
-
AuthorPosts
-
February 12, 2012 at 5:05 pm #233974
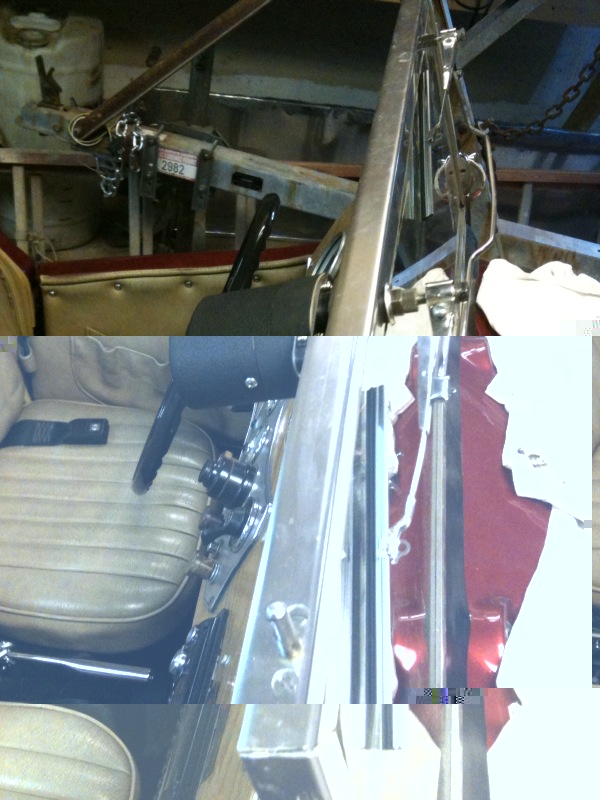
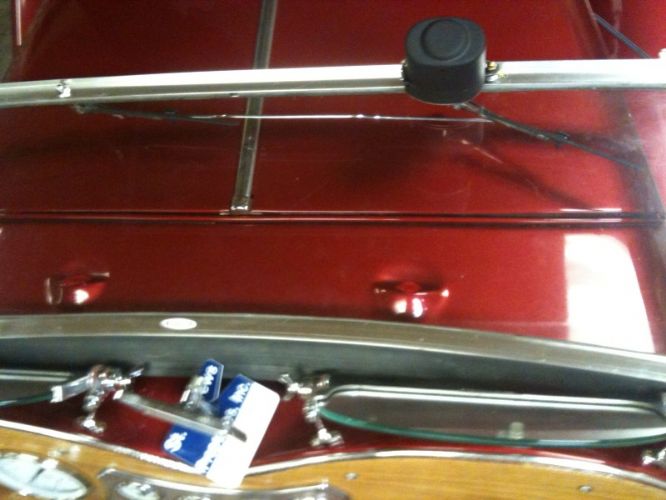
Went ahead and mocked up a set of original TD windshield wipers to a marine wiper motor I picked up last year.
Looks like it’s going to work. Not sure yet about the wiring though. Wish me luck, gentlemen.
 February 12, 2012 at 5:20 pm #249119
Looks pretty good. And original. Any idea where will the wiring go?
Allen Caron
VW based 53MGTD - "MoneyPenny"
"If one thing matters, everything matters" - from the book The ShackFebruary 12, 2012 at 5:45 pm #249120If I remember the wiring was on the right side ,,in side a chrome tube ?
February 12, 2012 at 6:32 pm #249121Original TDs have it routed inside the windshield frame. They also only use two wires, as the controls are on the wiper motor. I’ll need three 16-gauge wires at least (more likely 14s). They may fit inside the frame. If not I’ll route them outside and glue a piece of aluminum angle over them with silicone caulk.
edsnova40951.7781018519
February 12, 2012 at 7:15 pm #249122Very cool!
You continually raise the bar Ed!
Paul Mossberg
Former Owner of a 1981 Classic Roadsters Ltd. Duchess (VW)
2005 Intermeccanica RoadsterIf you own a TDr and are not in the Registry, please go to https://tdreplica.com/forums/topic/mg-td-replica-registry/ and register (you need to copy and paste the link)
February 12, 2012 at 9:37 pm #249123They should work better to clear off the windshield, coming from above rather than below. Looks good. It would be real nice to find a smaller wiper motor that didn’t protrude so much into the car.
mrlmd40951.9021064815February 13, 2012 at 7:49 am #249124The motor is set back a bit with spacers while I figure out how much (or if) to cut the shaft. Originally thought I could snug it up under the top lip of the windshield, but that looks unlikely now. Still, it’s pretty close to the original’s size, and will look more compact when I’m done.
February 21, 2012 at 10:23 pm #249125 March 12, 2012 at 9:25 pm #249126
OK, Picture this: Came back from Home Depot yesterday with a little through-bolt and an brass acorn nut, plus a spacer, to complete my wiper motor installation. You’ll recall I had everything working, the wires all routed, but was missing that last bolt that keeps the new wiper motor from twisting itself on the shaft.
Went to install the new bolt. Found I’d drilled the hole just slightly too small (or bought just slightly too big a bolt). No prob. Out comes the drill, I open the hole on both sides of the frame, stick the bolt in and…
Still NG.
So I’m doing this, spare time, after spending about 6 hours setting 80-lb retaining wall blocks and tamping crush run. The Depot trip was for landscape fabric and drain tile, mainly, and I was proud I’d remembered to grab my little stainless steel and brass bits for Bridget. But I’m tired. But it’s like 65 degrees out and the first day of Daylight-to-the-Savings time.
Anyway. So the bolt’s still hanging on something. I peer in the hole, which is in my dark garage, and notice some rubbery-looking bits blocking the way. Ah! must be my windshield gasket! Funny how I hadn’t seen that in there before… No matter, the drill is handy. Zip out the bits and shove the new bolt through. It’s too long, but no matter. That’s enough progress for today. I jump in the car and proudly run her down to the grocery store to pick up some stuff for dinner.
While there I’m approached by two separate admirers. The sun is shining. Life is good!
It was only hours later, as I was getting ready for bed, that it dawned on me.
I’d drilled through the wires.
Went out to check. Sure enough: no wiper action, no how.
So just got through taking the windshield apart, running (what’s left of) the wires back through, and reassembling. Took an hour and had a scare when the last bolt holding the windshield frame together (actually it’s a sheet metal screw, and that just might be another story) didn’t want to catch. Finally got it.
Still need to put the motor and wipers back and re-splice it to the switch. Got my year-old masking tape marks soaking in Liquid Wrench in an effort to get it loose.
Oh, and made one change: drilled a new hole outside the second mounting bolt hole. Now there’s no chance the wires will interfere with the bolts, and vice-versa.
March 13, 2012 at 4:40 am #249127Ed, don’t forget “TD Replicas: unmatched fun-per-$ ratio”
 March 13, 2012 at 8:14 am #249128
More like
“Eddie: Unmatched dumbass-per-brain-cell ratio”
But I’ve grown used to me screwing things up for no discernable reason.
March 13, 2012 at 3:35 pm #249129So: Liquid Wrench= +1 for getting old masking tape to let go. But Goof Off= +10. Keep it away from your paint though.
March 13, 2012 at 4:19 pm #249130I’ve used a heat gun to get old masking tape off , med. heat setting,
TDREPLICA Map
http://www.arcgis.com/home/webmap/viewer.html?webmap=7f9174ad614e43b680deba085b0abf48
March 13, 2012 at 9:32 pm #249131ED what are you going to do with the two humps where the old wipers where?
March 13, 2012 at 10:02 pm #249132Nothing for the foreseeable. I put some red duct tape over the holes to keep the water out. Will probably put some kind of round button plugs in before Carlisle.

Eventually I’ll cut the humps off and fill it from underneath with fiberglass. But not until I need a bunch of body work and paint.
BTW, got it back together, replaced the blown fuse, and we’re good to go. Then I put on the piece de resistance:
 March 17, 2012 at 7:57 am #249133
Would like to ge info on your wiper instalation. Source and price of motor, wipers and linkage on the front etc. Looks wonderful!
March 17, 2012 at 8:14 pm #249134I think this is the motor I got–AFI has one that looks like it but only an 80 degree sweep. This one is 110 degrees and that makes a difference; I can get the blades to park nice and high on the windscreen and still wipe well past vertical. Price should be $60-$70. You’ll see them listed for $130, but no point paying that. This one is also supposedly not waterproof, and recommended for interior cabin boat type applications. I figure it’s fine for automotive use. It does not look much like the Lucas model though.
This one does, however. The AFI-500 is very close to the right shape, and would be just about a dead ringer if you sprayed the cover black crinkle. But it’s also only good for an 80 degree sweep. (They say the originals had a 130 degree sweep. That would be best for actual wiping of the windscreen, imho. Moss has a repro on offer for $320, which was about $250 more authenticity than I was willing to buy.
Honest Charlie & other friendly hot rod part retailers have something similar for cheaper, with the added authenticity feature of having the switch on the unit, as Abingdon intended. The shaft looks thinner too, and that may be a good thing–as we’ll see below.
The wiper arms and linkage are early TD detritus from ebay. Think I paid either $22 or $28 for the rig. Had to mess with the right hand blade to get some spring tension and re-attach to the pivot with a bolt, as the old rivet had gone away. These are available from Moss as new repros. Looks like the whole mess will set you back about $95.
Getting the TD wiper arm on the boat shaft required that I drill out the collette that squeezes down on the shaft when the nut is turned. The drivers side goes on an idler arm available from Moss ($12), so that’s a direct fit. But the passenger side, which fits on the motor shaft, needed mods. The “hot rod” style wiper motor might be easer on that score.
Wiper blades and the little rubber keepers came from Moss ($14 each). Looks like Honest Charlie has my next pair though–these look about the same. And $5 is about right.
Getting it all to go on the windshield is covered here. Took the glass out and drilled the holes, trying to keep the motor shaft hole low enough so the motor is below the top of the windscreen when installed. (This is key to being able to fit the top back on after you’re all done). Then I put the glass back in and marked where the interference was. Took the whole assembly to a glass shop so they could grind notches in the glass. They charged $85. It’s something you could do yourself with a grinding wheel and some patience. I hear the glass gets red hot & it’s messy. Best to do a little, let it cool, a little more, etc. The pros have a water-cooled grinder.
Then just wiring. I was able to route mine through the frame, as original, but screwed up the first time by pulling it past the hole for the keeper bolt, with whose installation the wire then interfered. Disassembled, drilled a new hole for the wire, reinstalled and got it working last week.
It’s not working now though. Also have no high beams presently. And no horn. Will be chasing down those gremlins tonight and/or tomorrow, as I think they’re not directly related to this caper.
March 17, 2012 at 9:16 pm #249135…and fixed. Just put a new fuse block on my shopping list though.
March 18, 2012 at 4:43 am #249136West Marine has a good assortment of fuse blocks..
March 18, 2012 at 4:50 pm #249137Many thanks for all of the info!
-
AuthorPosts
- You must be logged in to reply to this topic.
