Home › Forums › MGTD Kit Cars › My Project › Building Alfred
- This topic has 228 replies, 23 voices, and was last updated 12 years, 1 month ago by
Steve Struchen.
-
AuthorPosts
-
March 19, 2013 at 10:33 pm #253129
Looks good. Sorry for your crank troubles. Glad you got it now rather than way later.
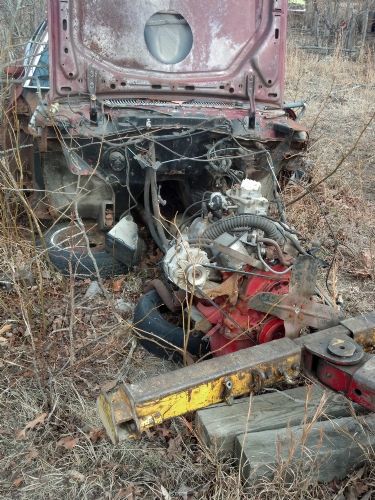
March 19, 2013 at 11:44 pm #253130This was the engine when I bought it. The entire front of the car was gone except for the hood and the engine. I took a chance because the engine turned just by turning the fan by hand. It worked out because the engine does run and when I took the pan and timing cover off it was spotless inside. Must have been a recent rebuild.
 March 20, 2013 at 12:24 am #253131
I did not see a jamb nut(s) on the turnbuckle. My eyes or the photograph or not needed?
March 20, 2013 at 8:13 am #253132There’s a jam nut on the one end that has right hand thread. Can’t put one on the end that’s left hand thread.
March 20, 2013 at 8:23 am #253133One’s enough. It won’t want to turn by itself so to make it wider/tighter.
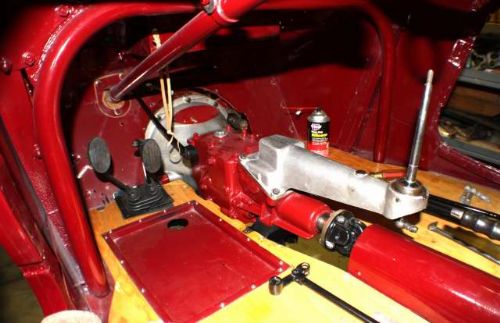
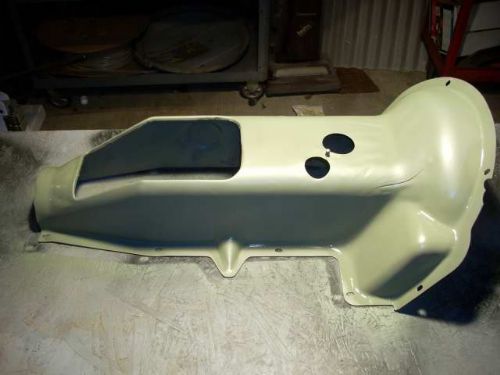
March 22, 2013 at 9:47 am #253134I really want to use a manual shift trannie instead of an automatic. As you all know, there is not enough room in these kits for three pedals (and my size 11’s). I’m strongly considering cutting out the entire transmission hump, just like in an original T, and building a smaller hump. I don’t know if I want a removable hump or not but I definitely want a narrower one. Has anyone else done this? This is what Morris Garages did in this area:
 March 22, 2013 at 10:45 am #253135
One thought, in case you haven’t already thought of it, is to cut the tunnel out and then cut a section out of the middle (however much you want to narrow it) and then glass it back together and then glass it as necessary back to the floor or as you mentioned…make it removable. Will save a lot of work over building a whole new tunnel. Just a thought.
SamMarch 22, 2013 at 11:56 am #253136Have considered just taking a slice out. Also considered taking some flexible poster board and creating a form to glass over. I have plenty of glass mat available since I bought one 50′ roll on-line for same price as two lousy packages at my local boat store.
March 22, 2013 at 1:28 pm #253137This has been really fun to follow and so far over my head that I could never hope to do it. Im looking forward to following it to the end.
March 22, 2013 at 5:17 pm #253138If it were me I’d consider a spun aluminum wok lid for the bell housing cover. The rest is pretty squared off and could be made out of a re-purposed “BRIDGE OUT” sign or other easily-obtainable aluminum stock.
If the actual transmission is small enough that the existing tunnel is the problem, width-wise, I’d say it’s an absolute must. But are you mocked up with a 5-speed?
March 22, 2013 at 6:06 pm #253139Ed, If using a wok lid, wouldn’t there be a danger of wanting to go for another ride shortly after finishing the last. How would one ever get any work done? 😀
March 22, 2013 at 8:16 pm #25314020+ years, three pedals, size 13’s…Practice.
Bill Ascheman
Fiberfab Ford
Modified 5.0, 5sp., 4:11
Autocross & Hillclimb
"Drive Happy"March 22, 2013 at 9:03 pm #253141Room for two, now I need to make room for the gas pedal.
Where does the wok go?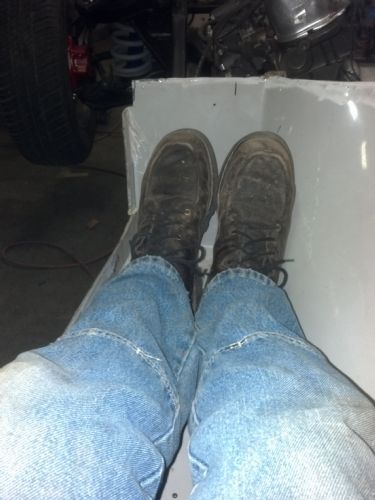 March 22, 2013 at 10:49 pm #253142
No gas pedal, bro. Just a little caster wheel on a stick. That’s in front of the wok lid.
March 23, 2013 at 9:44 am #253143My BCW Chevette based has an indention in the hump in the gas pedal area. That gives about an inch or so more width to this space. Also keep in mind that the pedals do not fit directly against the firewall.The available space increases as you move away. How much room do you have between the hump and the transmission? Any extra space would allow you to make the indention I referred to above. It will still be tight at best.
March 23, 2013 at 6:33 pm #253144In the photo of my feet, I’m sitting on the kit’s seat platform and there are a few inches between my soles and the firewall. There is maybe 1 1/2 inches of space to the left of the transmission. Just enough to install a skinny gas pedal. I’m also going to move the left side panel out by about 1/2 inch towards the double wall. Every little bit will help. Not afraid of cutting up and moving fiberglass around. Sure is easier than welding rusted out floor panels.
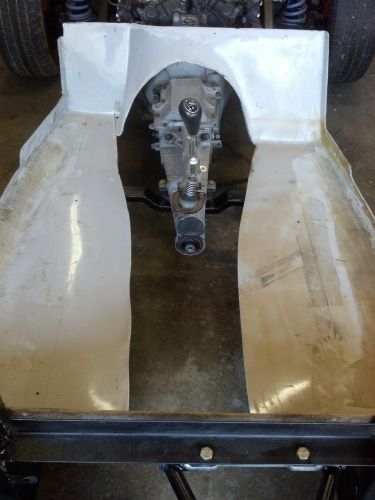
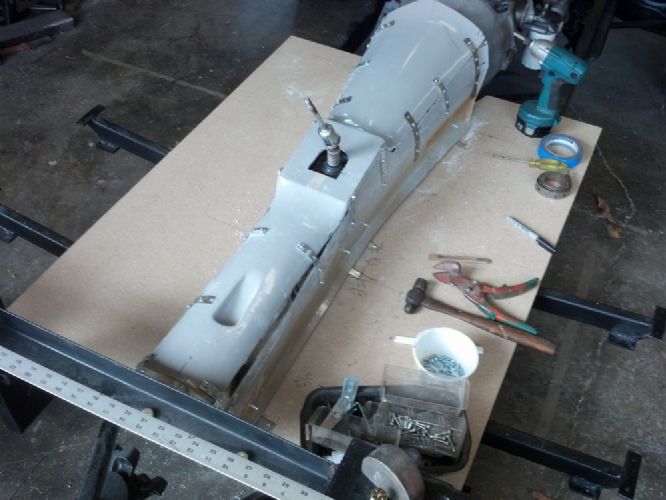
April 8, 2013 at 9:10 pm #253145OK, finally got enough nerve to cut the old hump out and start with fiberglass surgery. This is the pan without the hump. I’m going to get a few inches back next to the seat also. Notice how lost a standard trannie looks in a place where an auto was meant to be.
Ready for my first cut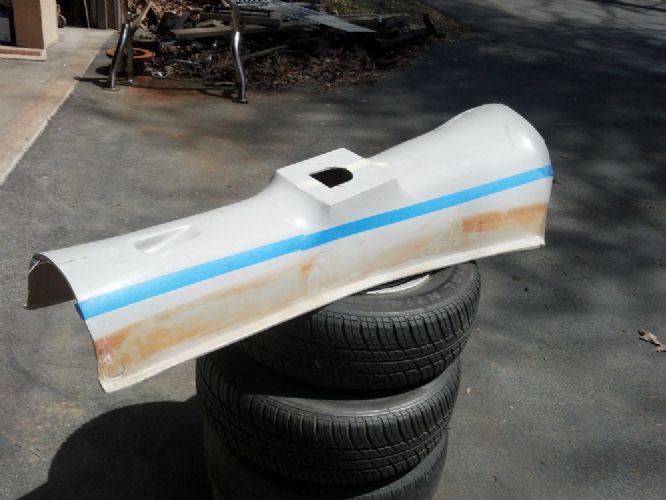
Cut into three slices, eventually I’ll have five pieces.
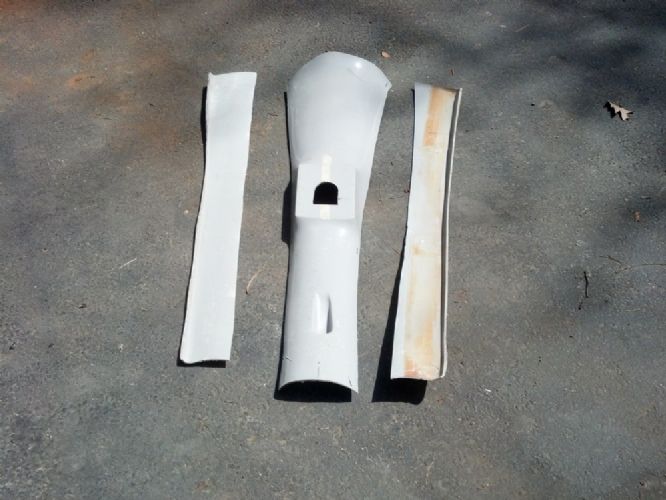
Here’s my Frankenhump….ready for first glass.
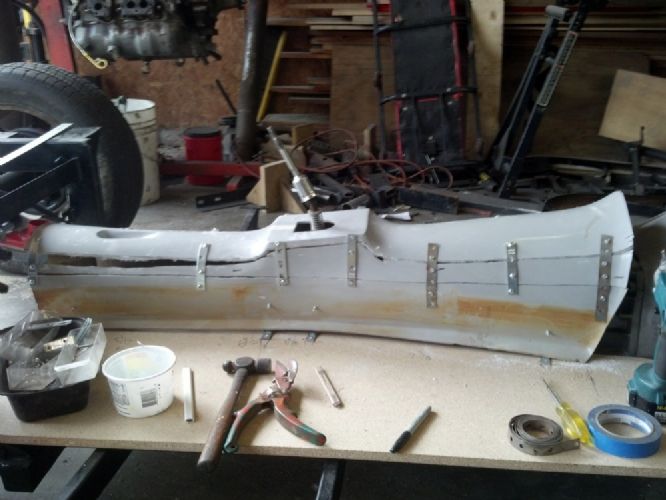
Much narrower…..
 April 8, 2013 at 9:24 pm #253146
looking good !
April 8, 2013 at 9:35 pm #253147Yeah. That is going to work. Wonder why they made that tunnel so bloody gigantic…
April 8, 2013 at 9:53 pm #253148When I first cut it, it looked like a mistake, but after the second slice (now in five parts) it just fell into place and looks like it’ll end up like it was meant to be that shape all along. The one negative with this is that it will be nearly impossible to remove trannie without pulling it all out along with the engine. But the front clip is so easy to disassemble that pulling the engine will never be hard.
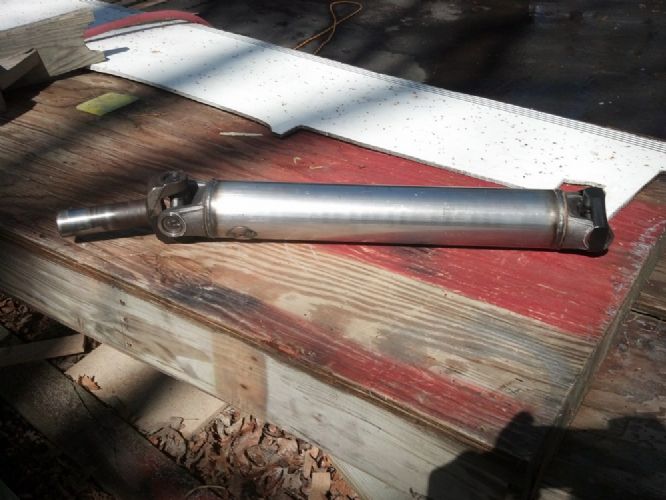
April 12, 2013 at 8:34 pm #253149Drove to Baltimore today to get a custom driveshaft made. Told them I have an 85 mile drive and they made one from scratch in one hour. Place is called A-1 Driveshafts and I can definitely recommend them. All new except for my front transmission shaft, included new U-joints, all done for $200. Not bad.
 April 21, 2013 at 10:50 pm #253150
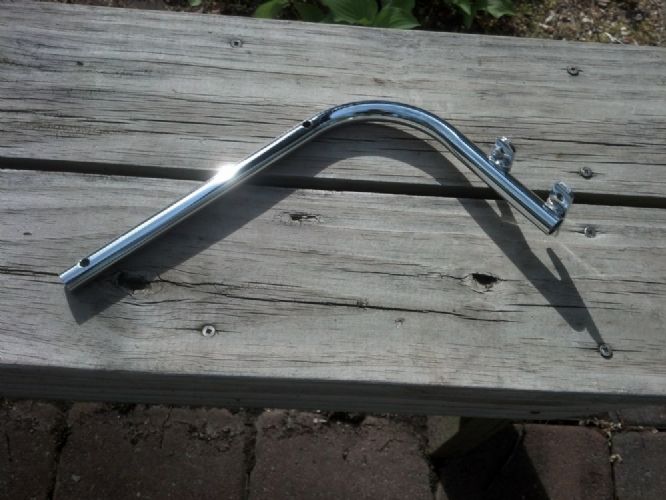
I found this in the pile of stuff that came with the kit. What is it? Does it even belong in the kit? There’s only one.
 April 21, 2013 at 10:52 pm #253151
I have one guess: Holds license plate and light?
April 22, 2013 at 3:31 am #253152I’ve been looking for the one I took off mine. Can’t find it and can’t finish the back end until I do.
Bill Ascheman
Fiberfab Ford
Modified 5.0, 5sp., 4:11
Autocross & Hillclimb
"Drive Happy"April 22, 2013 at 3:36 am #253153You can just barely make out the bracket in the first post in ” Gone and Done It”. The weight and vibration of the plate caused stress cracks in the side panel it’s mounted to, so I placed a support leg on the outer corner of the plate to the fender to keep it rigid.
Bill Ascheman
Fiberfab Ford
Modified 5.0, 5sp., 4:11
Autocross & Hillclimb
"Drive Happy" -
AuthorPosts
- You must be logged in to reply to this topic.
