Home › Forums › MGTD Kit Cars › My Project › Building Alfred
- This topic has 228 replies, 23 voices, and was last updated 12 years, 1 month ago by
Steve Struchen.
-
AuthorPosts
-
July 12, 2013 at 9:53 pm #253204
Gabor, Please tell me that you are going to come to Virginia Beach this October for the 4th Air and Auto Classic Show. Last year, Bill (billnparts), Ed (edsnova), Shu. and I were there and had a great time. Bill’s wife, Patti even drove her new BMW down all the way from Pa. I’ve gotta see this build of yours.
July 26, 2013 at 9:13 pm #253205Update on my progress.
Made most of the spare tire bracket. Can’t finish it until I have the actual wheels that I will use.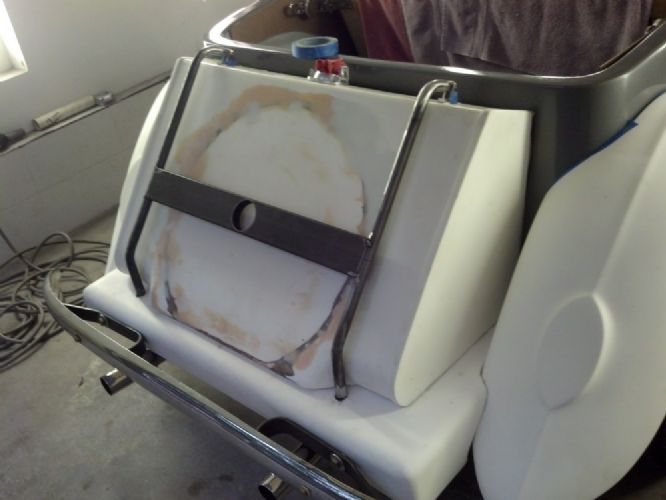
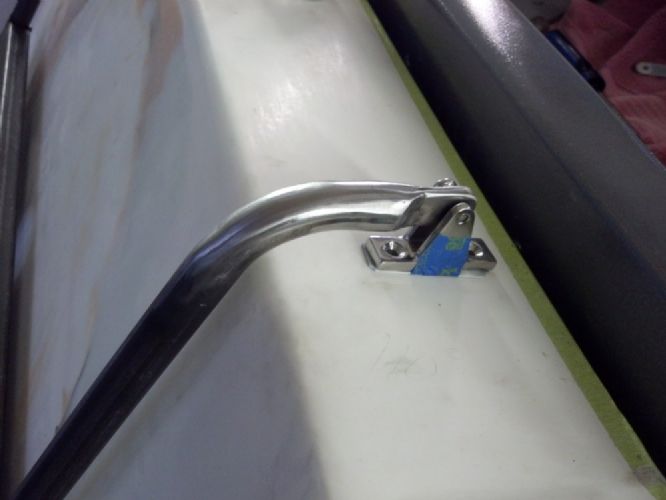
Made headlight brackets. If they look different from each other, it’s because the right one is 1/2 inch longer, nothing is even, just like the rest of the car.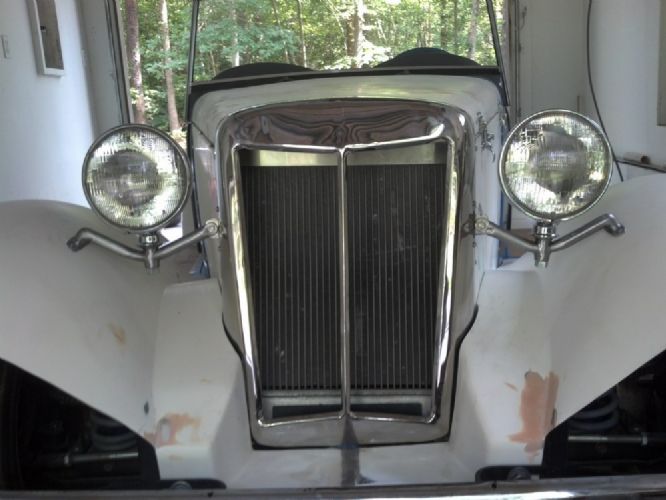
Lastly, here is my instrument panel. Made on a waterjet by a friend…
You might also notice that the two wings are now joined into one. I couldn’t get the two to meet in the middle, wasn’t even close, so I ground off the lip underneath and spanned the gap with a thick piece of fiberglass. The repair on the wings was to get rid of cracks in the gelcoat. Even though the car was never together, there were a lot of gelcoat cracks. Over a hundred on the hood alone.July 26, 2013 at 9:22 pm #253206I definitely would like to check this car out in VA. in Oct.
It is most impressive.Bill Ascheman
Fiberfab Ford
Modified 5.0, 5sp., 4:11
Autocross & Hillclimb
"Drive Happy"July 26, 2013 at 9:53 pm #253207Looking good, G! Nice job on the center cluster.
Did your car not come with headlight brackets? Or did you just want to make tubular ones? Those look very TD-ish.July 26, 2013 at 10:19 pm #253208Nice work! Love seeing the progress!
Paul Mossberg
Former Owner of a 1981 Classic Roadsters Ltd. Duchess (VW)
2005 Intermeccanica RoadsterIf you own a TDr and are not in the Registry, please go to https://tdreplica.com/forums/topic/mg-td-replica-registry/ and register (you need to copy and paste the link)
July 27, 2013 at 8:22 am #253209The car came with a pair of stamped, galvanized headlight brackets that I really did not like. I disliked the look, the flimsiness, the angles were all wrong, and also disliked the way they attached to the wings. These were made from 1/2 inch cold water pipe and 1/8X1 flat stock. Glad I did it because the angles on each needed to be matched to each side. Nothing on this car is predictable or accurate. Example: One door is 1/2 inch longer than the other. Everything from one side to the other is that way.
July 27, 2013 at 1:28 pm #253210Gabe I feel you pain.
Allen Caron
VW based 53MGTD - "MoneyPenny"
"If one thing matters, everything matters" - from the book The ShackAugust 11, 2013 at 8:52 pm #253211Started on the internal wiring. I’m going to have a fold down fuse panel with all wiring in and out going through a set of terminal blocks. First I removed all tape and most of the connectors of the harness coming from the fuse panel. After laying it out on the board, I screwed the components in place and cut all the wires to about 12 inches. I then connected each wire to it’s proper spot on the termi block..
Next I’ll the same with the firewall connector harness and then the instrument panel. Stay tuned….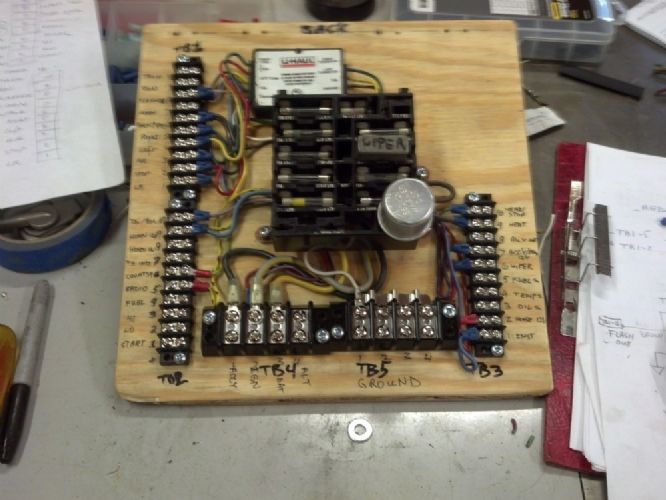
The important part is that I preplanned every wire and drew every subsystem before I cut the first wire. Just to make it a little harder, I could only find a 75 wiring diagram, had a 74 engine and a 76 donor car. So the color codes were only 90% the same, and there was only two actual errors in the factory wiring diagram. My number one rule from a life of engineering: never trust the documentation.August 11, 2013 at 8:59 pm #253212Very smart. You show it every time you post.
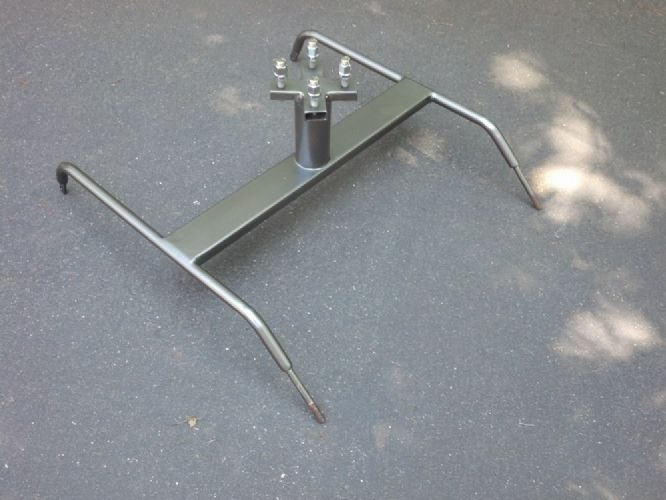
August 26, 2013 at 8:11 pm #253213Finally finished the spare tire rack. Had to wait until I have my wheels and tires so I would know how tall to make it. Still only have four wheels, so I am looking for a spare. Ended up using 16″ 2003-2006 Ford Focus wheels and 205/55 R16s. They were the only only ones with a modern offset that would clear the Mustang ball joints. I stayed with the four bolts because the five bolt spindles for a Mustang II are wider than the four bolt. Can’t afford any width increases since the M II is already pretty wide.
 August 27, 2013 at 7:00 am #253214
That car just becomes more impressive with each posting
Bill Ascheman
Fiberfab Ford
Modified 5.0, 5sp., 4:11
Autocross & Hillclimb
"Drive Happy"August 27, 2013 at 7:25 am #253215Thanks for the feedback. At every step, I look at CMC’s solution and think about how I would do it instead. Of course my solutions might add labor, but I usually come up with something that’s not expensive. This rack, for example, has less than $20 of new parts and material in it. It’s fun not to have limits like when rebuilding an existing car.
August 27, 2013 at 10:41 am #253216Nice looking spare tire rack,
 could you tell us what material you used and how did you get the headless bolts in the ends and attached? Where the tire mounts to the rack looks sturdy too!! August 27, 2013 at 4:05 pm #253217
The pipe was 1/2″ black water pipe, I think they call it schedule 40.
The cross piece is a section of 1X3 rectangular tube. The main tube is a
section of 2 1/2 exhaust. I used a 2 1/2 hole saw to cut all the way
through the 1X3, inserted the exhaust pipe and welded front and back.
The cross pieces were made from 1X2 tube, drilled an tapped for the
1/2-20 X2 bolts to be the wheel studs. . The headless bolts were made
from 1/2X5 bolts that I put thread end first into a drill and the used a
grinder, while the drill was spinning to cut the heads down small
enough to fit into the pipes. Poor man’s metal lathe. I drilled holes
into my chassis frame first, inserted the bolts in there and into the
tire frame. This was to perfectly align the two frames together. I then
tack welded the bolts into the rack, removed it and finished welding. I
then used a hand grinder to pretty up all the welds. It was inspired by
looking at a real TD and coming up with a lighter version.
Here’s the 52 TD version: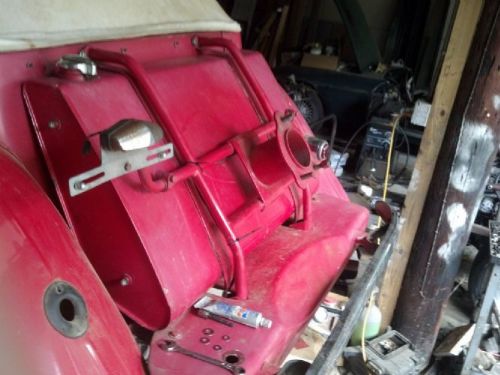 August 27, 2013 at 8:39 pm #253218
Very nice work. Don’t forget your license plate bracket! 🙂
August 27, 2013 at 8:54 pm #253219I decided to use the CMC/Fiberfab chrome plate hanger.
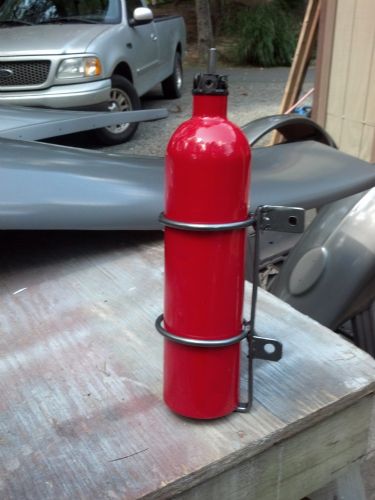
September 2, 2013 at 9:28 pm #253220A nice half day project. A radiator overflow bottle by Kidde.
 September 23, 2013 at 10:26 pm #253221
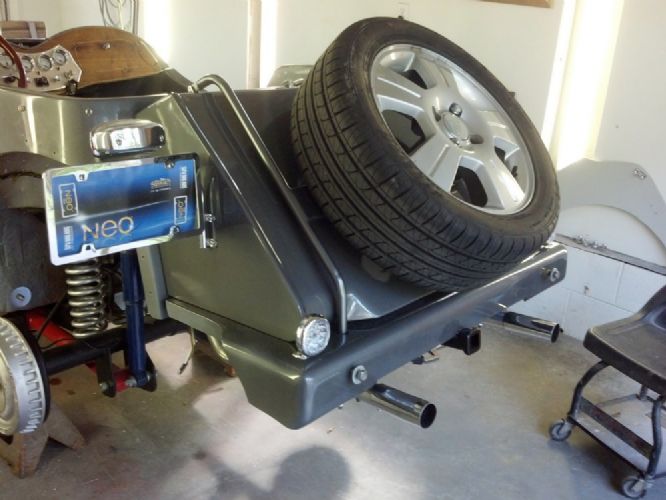
Spare tire bracket finally finished and mounted, with spare wheel. Also installed backup lights and license plate bracket and lights.
 September 24, 2013 at 3:36 am #253222
And I see a trailer hitch peeking out from down there. That is really going to be a nice ride.
Bill Ascheman
Fiberfab Ford
Modified 5.0, 5sp., 4:11
Autocross & Hillclimb
"Drive Happy"September 24, 2013 at 7:43 am #253223That’s a small 1 1/4″ ATV size hitch, mostly for putting a rack for carrying stuff. It was easy to add at this point, even if I don’t have any specific plans for it.
September 24, 2013 at 11:42 am #253224Gabe, you do absolutely marvelous work… The “devil is in the details” and you seem to be a master there…
KentT2013-09-24 12:35:27Early FF TDr on 69 VW pan
Slowly coming back from the ashes...September 24, 2013 at 12:09 pm #253225Putting the term “box” back into glove box…..
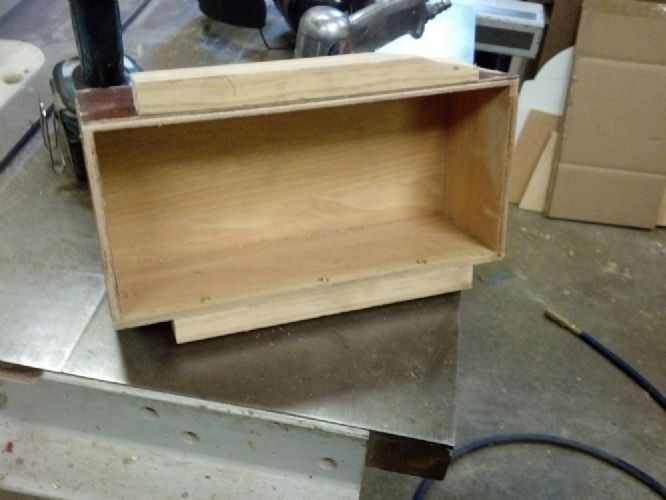
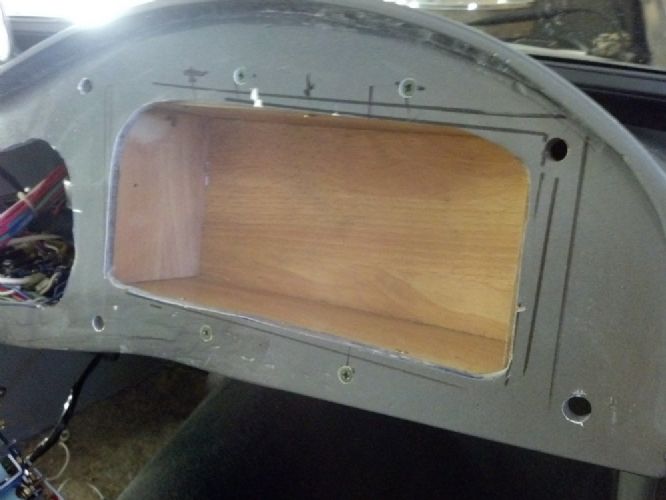 September 26, 2013 at 7:30 am #253226
Time to put welting on dash. Since I already put it all together to check on fit, first step is to take the whole dash apart again.
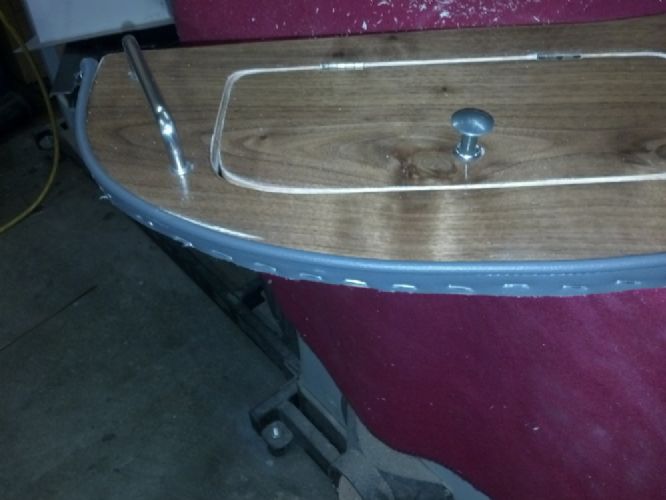
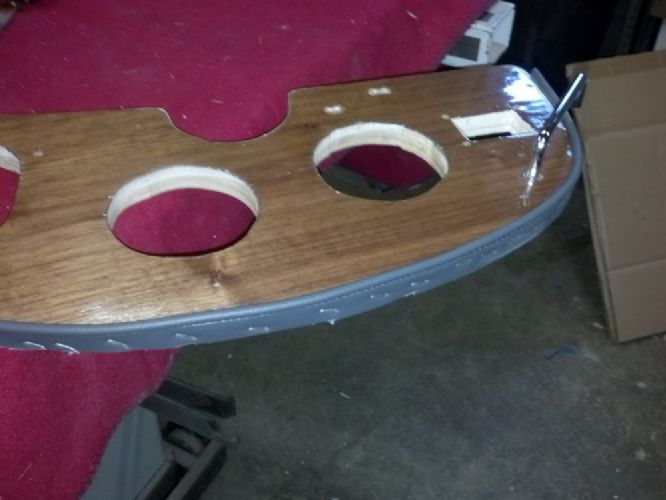
And here it is installed back in car.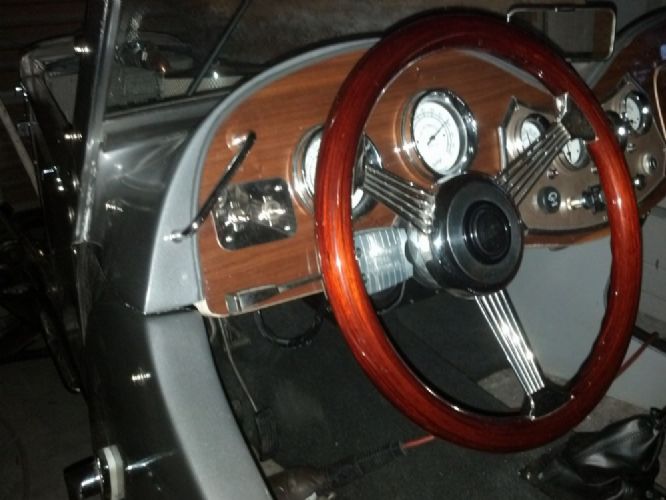
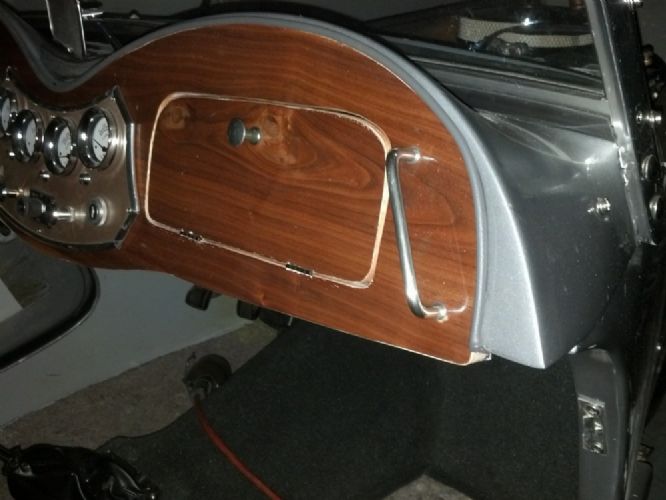
I had to add a grab handle on the driver side also to help get my 65 year old butt out of the car. I guess that’s what you call customization. I opted not to have the metal strips around the dash since it was only needed to hold the fabric covering on the original dashes. The edges of this dash are lined with oak veneer.
September 26, 2013 at 9:02 am #253227Nicely done!
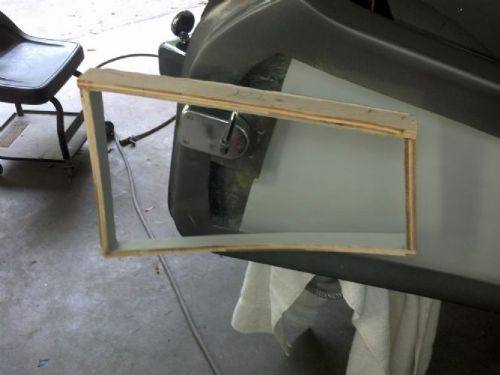
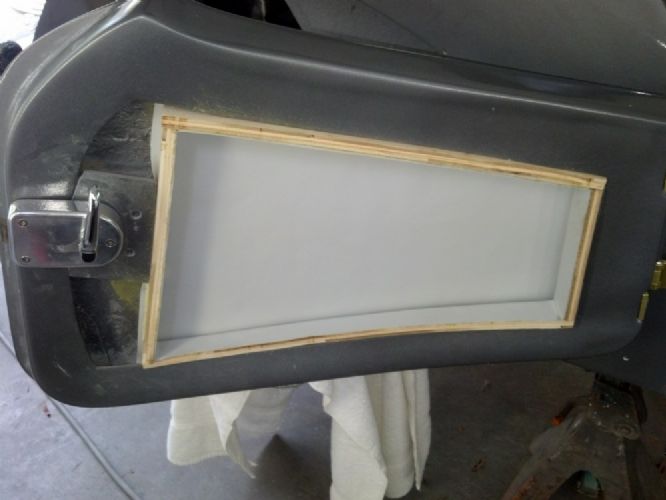
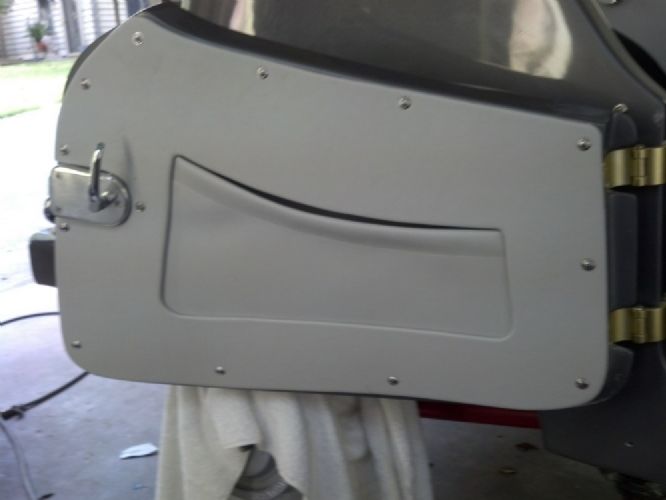
September 26, 2013 at 7:42 pm #253228Decided to make use of the 1 1/2 inches inside the door for storage. First I made a frame. It was interesting, with every curve different and every angle too. Vinyl was glued to inside of door and frame just fits tightly, so no need to attach it anywhere. Outer panel holds it all in place.
-
AuthorPosts
- You must be logged in to reply to this topic.
