Home › Forums › MGTD Kit Cars › My Project › Chevy 2.2L dutchess
- This topic has 139 replies, 19 voices, and was last updated 7 years ago by
 billnparts.
-
AuthorPosts
-
March 13, 2013 at 9:22 pm #240988
Please disregard previous post.
I’ve been driving the Dutchess as my daily since Dec.
Runs great. I’m still adjusting MPG.
I keep telling my self, “Excess horsepower will get you out of more problems than it gets you into.
But now that I’m on the road I need to get my wheels corrected. The assembly book says to not run the stock Chevette 13 inch wheels. Not enough clearance and a not right look.
I agree. I’ve flattened the new pipes on parking lot speed bumps & I hate the kiddy-car look.
I have a set of 5 vintage wire 15X5.5 wheels and knockoff adapters for a Jag with 5 on 4.25 bolt pattern. I could weld up & redrill. But wire wasn’t a factory option in ’52. (Originality you know)I bought a Toyota Yaris wheel (15X5 inch 4 on 100) But the Chevy axle is hub-centric! The hub hole in the yaris wheel is about 1mm too small. I don’t want to take metal off the wheel to get it to match (Remove about 66% of metal from a stress point..
 ) Besides the wheels won’t fit in my lathe. I could cut the hubs & brake drums I suppose. I’d have to mike the thickness.
So my question(s) are;
1- What was the OEM wheel size for the ’52 TD?
2- What will bolt up to the Chevette?
3- Do I have to stay hubcentric?I was trying to figure out a way to get to Carlisle but it looks like I’ll be stepping off the “Office” and onto another project almost at once.:-)

Fun story. I was at Moss with the Dutchess getting some Lucas authenticity when a gentleman with a BEAUTIFUL real TD pulled in right beside me. His comment, “Your restoration looks really good. Any rust problems?” I said no.
No trees were injured in the making of this message, but some electrons were inconvenienced.
March 13, 2013 at 9:23 pm #240989:P:P:P:P:P
No trees were injured in the making of this message, but some electrons were inconvenienced.
March 13, 2013 at 9:57 pm #240990TD’s OEM wheel is fifteen inches, standard tire size was 5.50 x 15.
I believe the stock wheel width is four inches.
And the bolt pattern is 5 x 5 3/4″Closest tire today is a 165-15.
Here’s a cool wheel/bolt pattern cross reference:
And here’s a way to find just about any info you are looking for. I use it all the time. Matter of fact, I used it tonight. 😉
PMOSSBERG2013-03-13 21:59:12
Paul Mossberg
Former Owner of a 1981 Classic Roadsters Ltd. Duchess (VW)
2005 Intermeccanica RoadsterIf you own a TDr and are not in the Registry, please go to https://tdreplica.com/forums/topic/mg-td-replica-registry/ and register (you need to copy and paste the link)
March 13, 2013 at 10:34 pm #240991While it is true that wire wheels were not a MGTD factory option in ’52, a great number of MGs left the showroom floor with wires on them. And so many owners put them on shortly after buying with the factory steel wheels that they became part of the MGTD look even if not “factory”. They (silver painted 4″, 48 spoke wires with tubes and bias ply tires) were offered by MG as a dealer upgrade. I don’t believe that even the most snobby elitist purist “real” MG owner (if there is such a person) would look down his nose at you because you had wire wheels on a replica ’52 MGTD. If you like the look, and you’ve got them, I would say put ’em on. (Jag wheels are larger than the MG wheels.)
You may want to think carefully about welding on your cast iron brake drums. It is my understanding that welding may cause stress and potential catastrophic failure with no warning. Can you buy new blank drums and drill and tap? Or, just drill and press if you would be using studs?I ended up putting Triumph chromed 72 spoke wire wheels on my (VW) TDr and love them. They certainly draw attention. I get lots of compliments.Does anyone know if points are knocked of a “real” TD at the big national car shows if it sports 48 spoke, painted, knock off, wire wheels with period correct 2 eared spinners?It is my opinion that 48 spoke wire wheels are too weak for todays radial ply tires (which also did not exist in 1952.) I would suggest a minimum of 60 spokes or better yet 72. Dayton makes aftermarket 100 (I think) wires, but they have bit of a different look. Please realize that these are all just my understandings and opinions, and are not necessarily fact backed.March 13, 2013 at 11:09 pm #240992Roy,
Thanks,
I wouldn’t be trying to weld on the drums…I would be welding up the machined steel hub adapters for the knockoffs and drilling new holes for the 4 on 100 that the Chevette has. That way I would also be able to cut the 57.1mm hubcentric hole that the Chevy needs.
The wheels are 15 X 5.5 inch so they match in size. The offset also matches with the Chevy @ #19 (4 3/8 inch). So I think the solution is to go with the maintenance hassles of spoke. I had spokes on my MGA 1600 and they were a hassle every time I bought tires.No trees were injured in the making of this message, but some electrons were inconvenienced.
March 14, 2013 at 6:25 am #240993http://www.truespoke.net/
Just a thought. PMOSSBERG2013-03-14 08:30:00Bill Ascheman
Fiberfab Ford
Modified 5.0, 5sp., 4:11
Autocross & Hillclimb
"Drive Happy"September 3, 2013 at 11:17 pm #240994long time no update…..
My Dutchess has been my daily driver for about 4,000 miles now.:-)
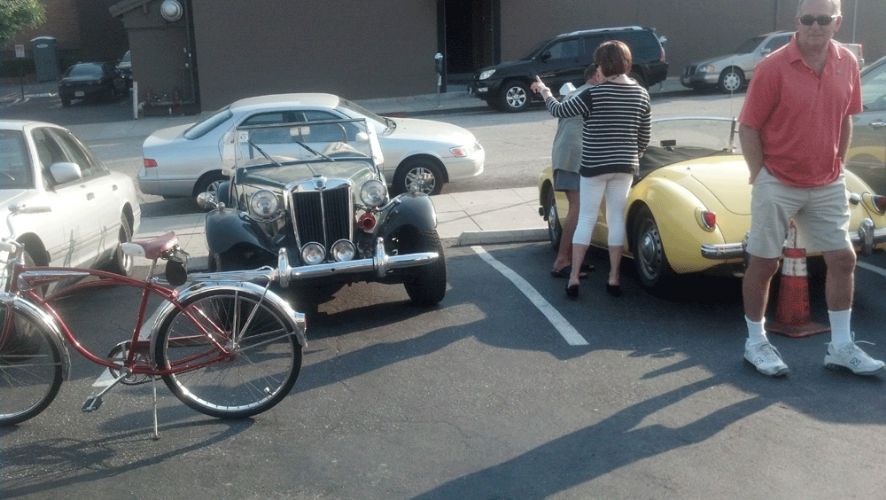
Took a friend to dinner and ended up in an impromptu car show out front.
True story, met up with a friend to go to the club, we each drove our own car. his was a Mercedes CL63 AMG ($400,000.00) I was in the Dutchess. After the usual honks and waves from people on the freeway we arrived at the Magic Castle. Mike was ahead of me in line at valet parking. the attendants rushed past Mike to help me.
Mike was not happy. “Nobody ever honks and waves at me…” I suggested he get a cheaper car and he made me pay for the drinks.:lol:While driving I noticed a rattle clunk from the rear. Mostly when pulling away from stop. crawled underneath and hummm….
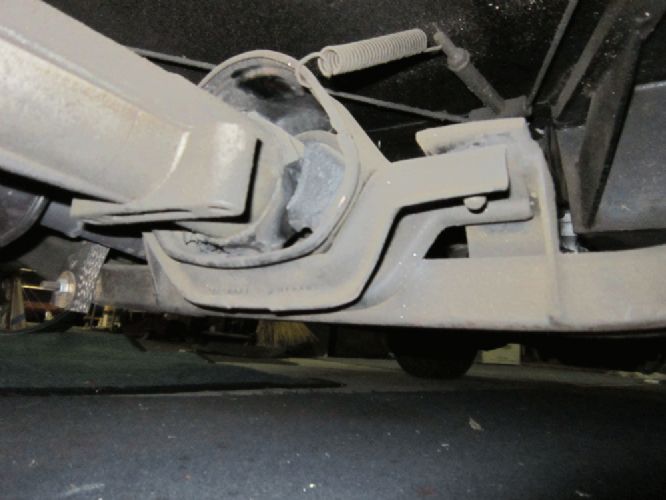
Isn’t there supposed to be some rubber in there?

So I got in touch with Rick Drake (the only man on the planet who has some of these) and he sent me instructions for R&R of the center support. And told me he had only two left.:o
It seems that Rick went down to South America and had a bunch made (cause he’s into Chevettes) and brought them back. He’s been selling them ever since. (current price with shipping $294)
I think this will fix some of the rattle.Had some overheat issues but tracked them down to pinhole in radiator. Fixed that, fixed overheat.
Still have to machine new hub adapters for knockoffs. So I’ve still got the kiddycar wheels on her. Soon.
Added vent to driver’s side to help cool my feet.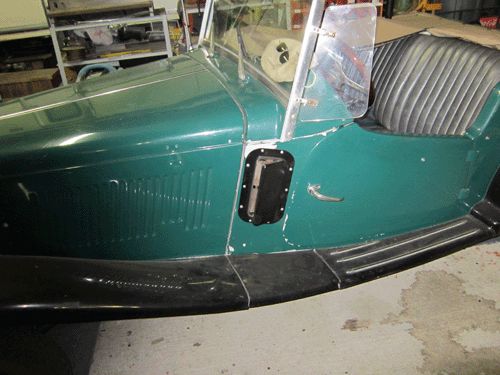
I stole a vent off a postal jeep wreck.
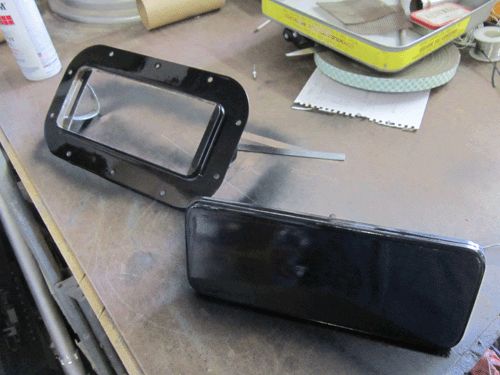
hacked a hole in the car
 Using the RotoZip.
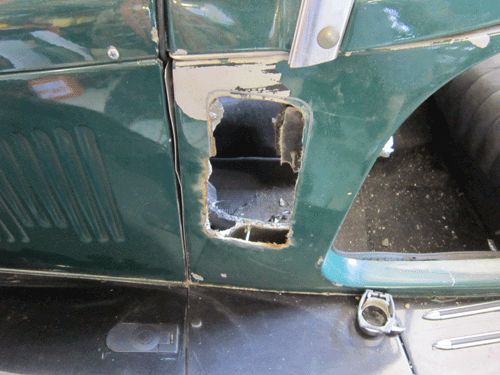
All for a good cause.
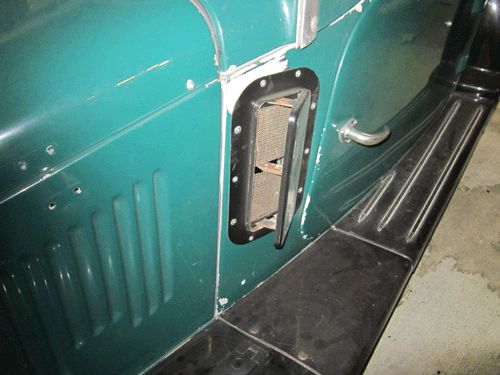
That’s all for now. Gotta fix dinner.:D
No trees were injured in the making of this message, but some electrons were inconvenienced.
September 4, 2013 at 7:30 am #240995To look up specs of nearly any type of car, this web site is priceless:
http://www.automobile-catalog.com/
PMOSSBERG2013-09-04 11:09:44September 4, 2013 at 12:39 pm #240996It might just be me but the vent looks like it belongs there.hmmmm nice addition.
TDREPLICA Map
http://www.arcgis.com/home/webmap/viewer.html?webmap=7f9174ad614e43b680deba085b0abf48
September 15, 2013 at 8:15 pm #240997Once again the forum saves the day!!!

I’ve been having a recurring problem with the passenger side door latch. The pot-metal cam inside keeps popping off the steel lever arm. when that happens you cannot open the door from the outside and it’s difficult to open from the inside as well.
So I pulled it out and set to fixing worn pot-metal to steel. I’ve decided to try rivets;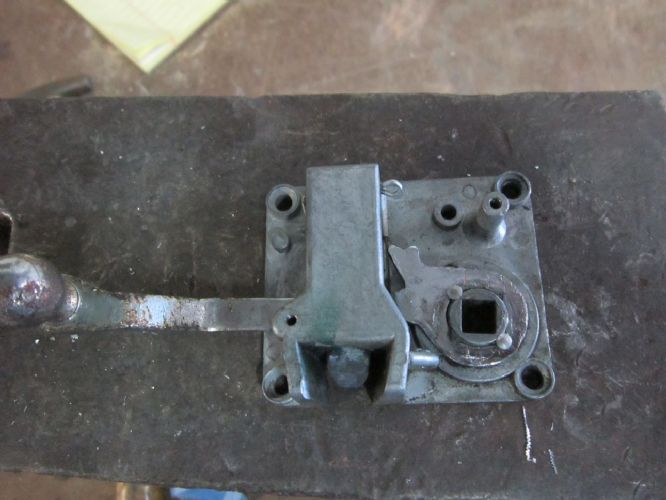
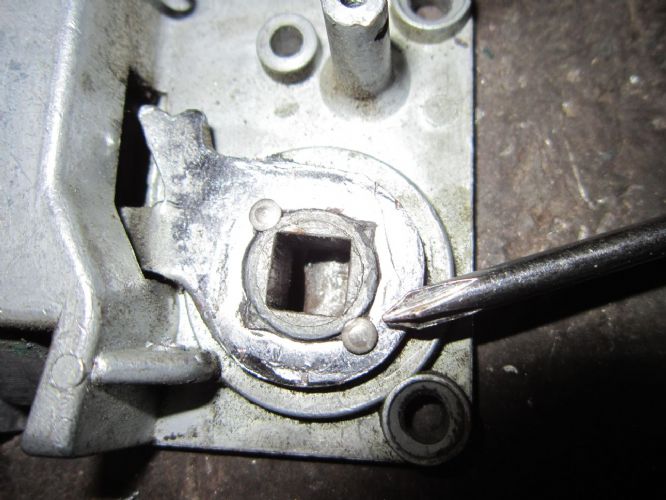
we’ll see if this holds.
But next…
I’ve not been happy with how the doors latch. They only have this one little notch to catch in and the doors seem to always be on the verge of popping open…So to the bat cav…I mean TD forum. Wadda ya mean my doors aren’t closed!!!!:o
Once again someone else has had these problems and posted a solution to the forum.
I wasn’t sure what that round hole in the latch was for. My car wasn’t using it.
It seems I’ve ducked the bullet again.Thanks to everyone who contributes to this Forum
 There is more brain power here than at NASA…well maybe just as much?
Keep up the good work.No trees were injured in the making of this message, but some electrons were inconvenienced.
September 15, 2013 at 9:47 pm #240998Welcome!
repost from my blog on door latch.September 15, 2013 at 11:01 pm #240999I love a happy forum member!
Paul Mossberg
Former Owner of a 1981 Classic Roadsters Ltd. Duchess (VW)
2005 Intermeccanica RoadsterIf you own a TDr and are not in the Registry, please go to https://tdreplica.com/forums/topic/mg-td-replica-registry/ and register (you need to copy and paste the link)
September 19, 2013 at 5:11 am #241000okaaay..
The rivets didn’t hold….
But while I’m in there making these doors my own…
Has any one cut out a pocket in the door? like on the MGA?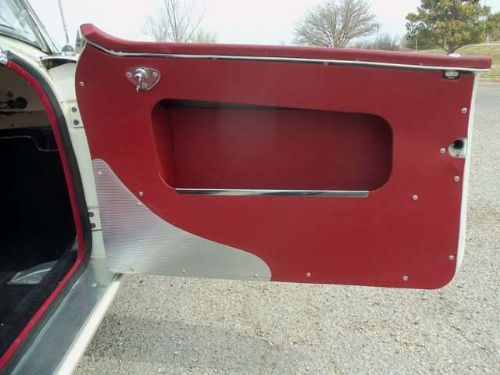
I would think this would make a dandy stowage.Any thoughts?
No trees were injured in the making of this message, but some electrons were inconvenienced.
September 19, 2013 at 7:04 am #241001Since MiGi doesn’t have the normal TD door pockets, these are on my winter to-do list. I think that the ones you show were also used on AH & Triumph.
September 19, 2013 at 9:27 pm #241002Thought about doing it. There is a nice hollow in the doors. In my case I had stock (Moss)-looking panels made with some “give” on the inside so the junk in the pockets could bulge inward & out of sight.
You could make much deeper storage by incorporating an old (or new) laptop carry case into the panel. The depth is about right and the laptop cases have a nice array of zippers and flaps that could easily be incorporated into a real trick door panel, imho.Jag XK-120 had something a bit like it.The only potential drawback is if you need to pull the doors straight so the front edge is flush with the body. On TDs this is often done with a threaded rod and turnbuckle, the rods affixed to the wood in two corners and tightened with the turnbuckle to bend the door straight. The turnbuckle would go right where your pockets are.September 19, 2013 at 9:48 pm #241003Ed, I have had the laptop cases on both doors of MiGi since you first saw her. They work well but look just a bit funky. I guess not too bad though if you didn’t notice.
October 1, 2013 at 11:37 pm #241004the door latch arrived from MG Magic and I installed it and shimmed up to latch completely. I’m much happier knowing my passenger won’t be falling out.

AND my rear-end support bushing arrived from Rick Drake (he’s got only one more. Chevette guys?) in Washington state. (425-742-4122)
So up on jacks and pull that pesky rear-end…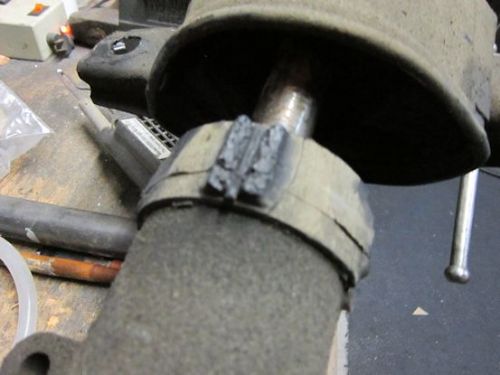
Yep that rubber piece is sorta gone.
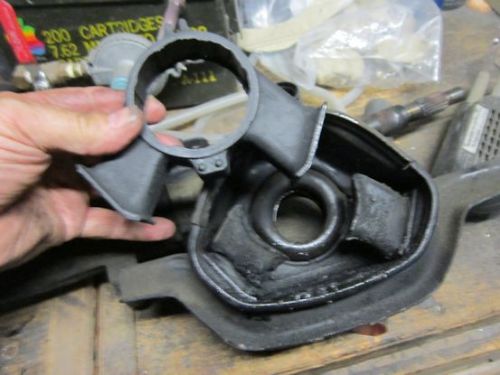
It doesn’t look much like the new one.
Oh Oh.. there’s another problem…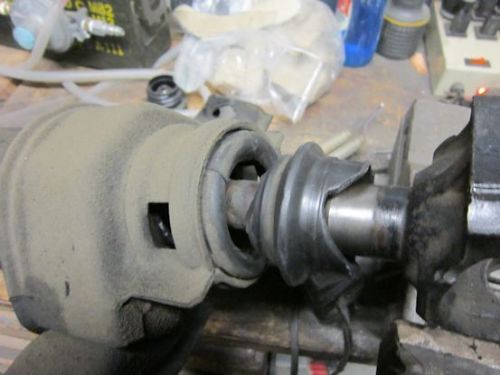
That bearing carrier ain’t suppose to look like that!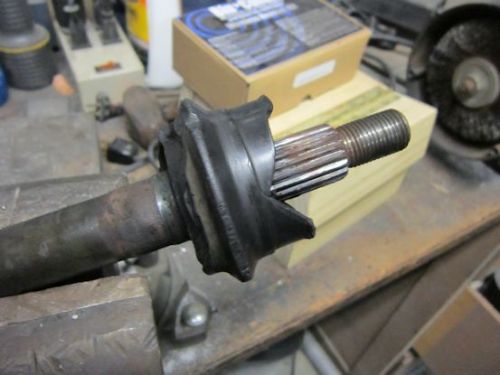
I’d better pull that off.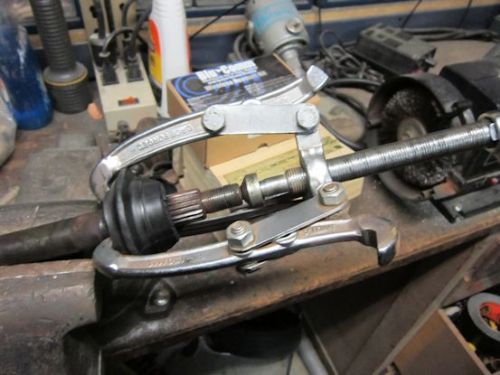
The puller sucked it right off.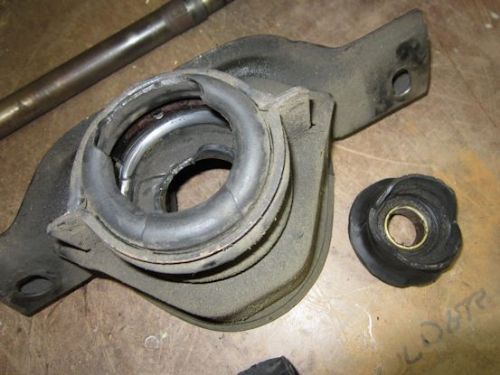
Yep that baby’s shot.
I wonder if Rick has one? I just called…maybe, he’ll look tomorrow.If anyone has any leads for this goodie, please let me know.
I would hate to have to do a rear-axle swap because of a lousy bearing…
No trees were injured in the making of this message, but some electrons were inconvenienced.
October 2, 2013 at 11:18 pm #241005I talked to Rick and he’s sending me a replacement center support. So with luck, back on the road by the weekend.
No trees were injured in the making of this message, but some electrons were inconvenienced.
October 7, 2013 at 10:19 pm #241006HUZZAAA!!!!!
Put the new center support in Piece O’ Cake.
Put the new bearing carrier in place. Piece O’ Cake.
Put the differential extension in place….What the !@#$%^&*)(_!!!
The Dutchess Chevy frame has no room to install the extension without pulling the axle.
I ain’t gonna pull no rear axle!Censored dialog
I got that sucker in. (After two hours).
Pulled it out of the hanger and ripped down the runway.
Smooooth, Quiiieeeeet, Faaaast!
You know I think that the center support was NFG when I got the car. I never checked. That clunk-clunk-clunk on start out was just what she did. But no more.:D:D:DNo trees were injured in the making of this message, but some electrons were inconvenienced.
October 7, 2013 at 10:44 pm #241007Great stuff! Glad to hear about all the successes!
“…just what she did.”
Ya, I can relate to that. The first time I drove my ’65 Plymouth to the Chryslers at Carlisle show, I ended up dumping trans guts all over Clay Street (approach street to the fairgrounds). Turns out the auto trans had been slipping….really bad…and the highway run the day before had tired her out for good. But that’s how she was when I bought her. I thought it was “…just what she did.”
Paul Mossberg
Former Owner of a 1981 Classic Roadsters Ltd. Duchess (VW)
2005 Intermeccanica RoadsterIf you own a TDr and are not in the Registry, please go to https://tdreplica.com/forums/topic/mg-td-replica-registry/ and register (you need to copy and paste the link)
October 8, 2013 at 8:19 am #241008Good on ya, John! Send pics!
January 3, 2014 at 12:39 am #241009I’ve been futzing with the computer on the Dutchess and had called Mykk over to check the tune and after a little more checking we discovered two things; one, I had a vacuum leak somewhere and, two, the air entering the engine was at 120 deg. F above ambient.

The first was solved by figuring out that the 2.2 L Chevy does not have positive crankcase ventilation. And I had hooked the vent on the valve cover up to a half inch vacuum port. Big vacuum leak!
The second would require a cold air intake system. With my tilt front end I couldn’t put a port out the side and get a good seal without a lot of work.
So I went looking for another route..The space to work with was between the intake and the radiator;
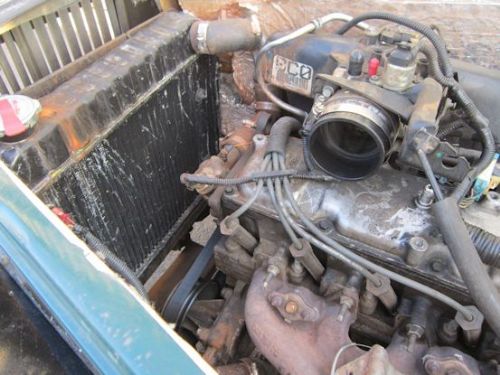
Gosh what a mess I hadn’t realized how filthy she is.

Anyway…
poking around under the bonnet I figured out that there was a 3/4 inch slot above the radiator to the front. By removing a little wood from the 2X4 inside the radiator shell I got almost 2 inches of room.First I went to the auto parts store and browsed through their air filter supplies. I knew the intake of the throttle body was 7 square inches in area so I figured anything more than double that in filter area should work. I found a STP filter #SA3916 that was 7 inches by 5 inches (35 square inches area):-) Should be enough.
I did a little paper design work and went to work bending metal.
I used .035 6061 T2 aluminum.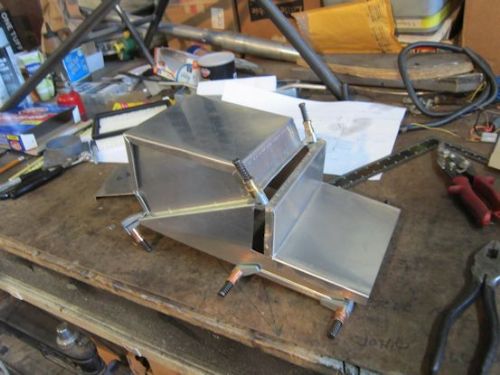
First assembly.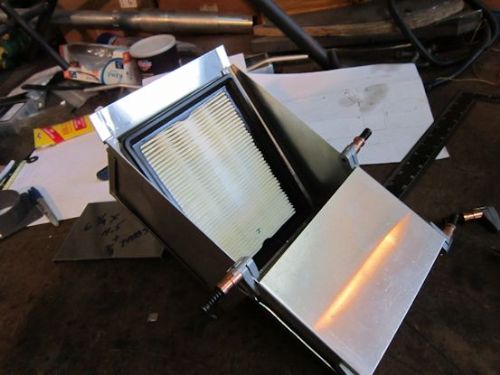
Filter goes here.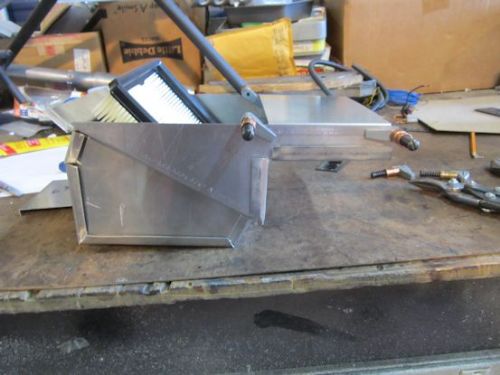
Side view.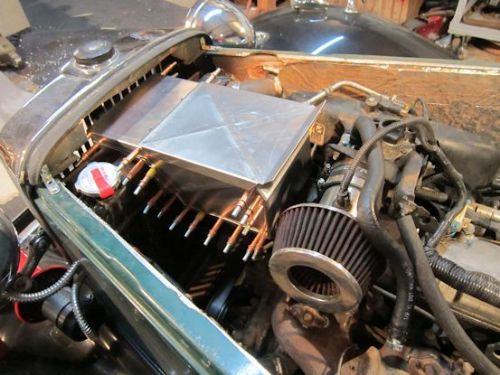
Klecoed together and approximately in place.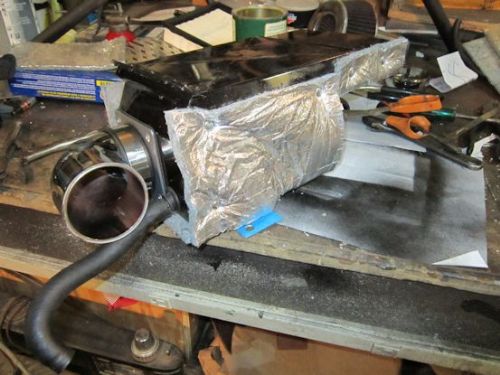
Painted with insulation and hoses.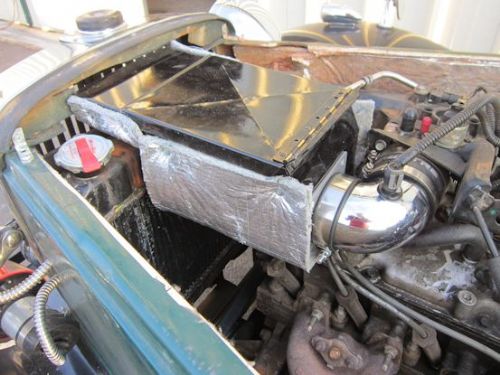
Installed and hooked up.
Now all I need is for Mykk to come back and hook up to the computer and let me know what temperature is coming through the box now.
while all this was going on I made several runs to the auto parts store. I was about to hop into the Dutchess on my way back to the hanger, when the guy parked next to her said,”is your car leaking?”
I said “I don’t think so.” but I walked around to the passenger side and there was this big puddle of oil!

Turned out the brass 1/4 inch oil adapter for the Oil pressure sending units (2) had cracked and failed!
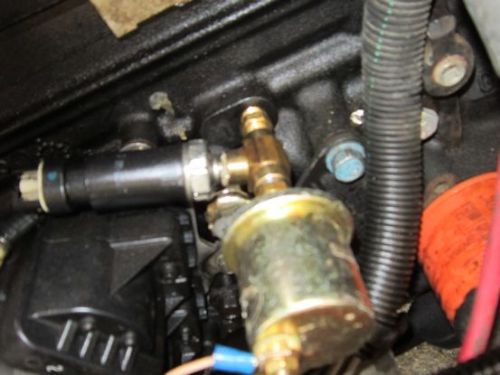
It was the close pipe fitting between the ‘T’ and the block. I think the weight of the two senders (One for the computer and one for the gauge) was too much and the bouncing of the chassis broke it. I’ll have to make a bracket to take the weight.BUT…She’s my daily driver and too much fun!

No trees were injured in the making of this message, but some electrons were inconvenienced.
January 3, 2014 at 2:08 am #241010Nice work on the airbox. It’s amazing how continually ongoing these projects are.
Bill Ascheman
Fiberfab Ford
Modified 5.0, 5sp., 4:11
Autocross & Hillclimb
"Drive Happy"January 3, 2014 at 10:16 am #241011Very nice, and very much relevant to one of my last remaining (theoretical) Soob swap issues. Thanks for posting.
Wait: “the 2X4 inside the radiator shell”?January 3, 2014 at 10:25 am #241012Ed, I think you can see it in the 2nd to last picture he posted. Looks like it’s purpose was to route the air through the radiator (in addition to some stiffening purposes).
-
AuthorPosts
- You must be logged in to reply to this topic.
