Home › Forums › MGTD Kit Cars › VW Based Kits › Rust, rust, rust replacing ploor pans
- This topic has 27 replies, 8 voices, and was last updated 16 years ago by
 edward ericson.
-
AuthorPosts
-
January 2, 2010 at 11:58 am #232855
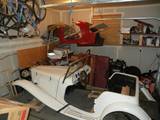
I Have new seats and carpet kit to install in my Migi. never having all four corners up in the air I have never seen the entire bottom of the car. I was able to see a few small rust holes from beside the car and knew I would need to clean those up and patch them before installing the new carpet, pad and seats. I removed the old seat, battery and seat bases. Then I pulled up the old carpet to find a plywood panel I never knew was there. I unbolted the plywood panel to find that the previous owner had laid down what appeared to be fiberglass floor matts. I cut out and pulled up the fiberglass mats to find, not a few small wholes but a floor pan like swiss cheese. how depressing, what i thought would be a small patch job and undercoating will now be now an entire floor pan replacement. Frankly i’m not sure how my 215 lbs wasn’t falling thru the floor when I drove. I looked at my son and said “You know What this means, we are going to pull off the whole body” He said “on new years day?” I said “are we going to wait til spring when we should be driving it to shows?” So we started to unbolt rear engine cover brake rod, steering column, all the pan bolts rear bumper and all wiring that goes th the engine and master cylinder and all frame grounds. We really husled and about 4 hours later we enlisted two burley neighbor boys to lift the body and place it on furniture dollies so we could roll it into the other bay. I am attaching a picturre of the pan and the hull removed sitting on dollies. I found complete floor plan halves on line for $149.00 I will be ordering them today and keep you posted on our progress. I have also included a photo of the adjustable front end I installed and described in a previous post.
Will
Washington Will 40200.5617939815 January 2, 2010 at 12:45 pm #240410Here’s some pics The rest are in my gallery. If you look closely you may see a flying TD!
 Washington Will40180.5335416667January 2, 2010 at 12:50 pm #240411
Hey I just got another star, movin’ up in the world!
January 2, 2010 at 12:58 pm #240412The photos in the gallery uploaded very small so here’s a link to the photo bucket.
http://s823.photobucket.com/albums/zz152/washingtonwill/?new est=1
Will
Washington Will40180.5417476852
January 2, 2010 at 2:37 pm #240413I have a suggestion — since you have it stripped down to the pan you should move that e-brake lever back to between the seats. It makes it look better and is much more practical.
Phil
January 3, 2010 at 12:32 pm #240414Paul you are right when cutting on a frame you do effect the integrity patches must be of sufficient guage and welded back in properly. My buddy and I just restored a 59 volvo (looks like a stretched out beetle) and we put a 4.3 chevy vortec V6 with a 700r4 trans in it we also replaced the rearend with a ford ranger rearend that we cut and narrowed 3″ . We istalled a vw bus steering column and had to use a couple of extension rods and universals to route the colum past and under the engine. We installed power steering and power brakes. She is a thing of beauty. Well any way my point was the volvo is a unibody with a frame extension in the front we had to do a lot of cutting and modifications to make everything fit. Now I don’t want to take all the credit my buddy is 73 and has been building show winning hotrods for around 50 years. I am mearly the sorcerers apprentice. I am very fortunate in that he helps me (without charge), with anything thats over my head and I work it off by helping with his projects. He just started a model A pick up,which i’m going over to help him with today.
January 3, 2010 at 9:13 pm #240415You go, Will! After that Volvo project, the MiGi e-brake relocation should be a piece of cake. I’ll be eagerly awaiting word of your progress, and hope it’ll help me know what to do when the time comes (next winter, maybe).
January 3, 2010 at 10:30 pm #240416Great news Will. My Duchess has a bench seat so moving the e-brake is not an option. But I look forward to your pics anyway. Always more to learn.
And I know the Volvos well. I learned to drive on a 1966 122 station wagon. And I currently own a 2009 S80, 2009 C70, 1999 S80 and 1996 850. The first two are my and my wife’s daily drivers. The old S80 is for my daughter, who will be driving in a few months. And the 850 is for sale.
I’d love to see pics of your 544 project.
PMOSSBERG40185.0119097222
Paul Mossberg
Former Owner of a 1981 Classic Roadsters Ltd. Duchess (VW)
2005 Intermeccanica RoadsterIf you own a TDr and are not in the Registry, please go to https://tdreplica.com/forums/topic/mg-td-replica-registry/ and register (you need to copy and paste the link)
January 4, 2010 at 11:54 am #240417Will, in 1960’s, I built a Volvo B18 with 289 Ford V8/3 speed automatic.
The donor was wrecked ’66 Galaxie 500 XL. I had a retired mechanic neighbor who was Volvo nut. I bought a B18 roller (no motor/trans) from him for $200. I paid $200 for the engine and trans at the local junkyard. Those were the days!!!
I’ve always wanted to find a nice, rust free Volvo 122 to do the same thing too, but I’m getting too old and have too many projects now that aren’t getting done.
January 4, 2010 at 10:13 pm #240418Mark and Paul, The volvo we just did the 4.3 Vortec conversion with was a 1959 PV 544 Just like this one I copied from on the web. This is not our car but is ironicly the same color. The mechanicals are all done and she runs “mean” but she still needs paint and interrior. We did set her up with 6 way power seats out of a chrysler lebaron, which are a nice improvement but they like the rest of the upholstrey still need to be recovered. Next time I’m down to the shop I’ll snap some photos of our handy work and maybe the “model A” pickup we just started. We had to set the volvo aside for now as my friend is trying to get this “model A” done for a friend’s dad who is dieing of cancer and just wants to drive it before he goes. We have a small army of friends pitching in to put the rush on this one.
January 5, 2010 at 7:43 am #240419Thanks for the photos Will, of the Volvo and your e-brake work.
I’m sure you are fully aware of this, but it bears mentioning anyway…when you weld in those new pans…remember there is a fuel line running along the bottom of that center tunnel, usually along the right side of the tunnel.
PMOSSBERG40185.0070717593
Paul Mossberg
Former Owner of a 1981 Classic Roadsters Ltd. Duchess (VW)
2005 Intermeccanica RoadsterIf you own a TDr and are not in the Registry, please go to https://tdreplica.com/forums/topic/mg-td-replica-registry/ and register (you need to copy and paste the link)
January 7, 2010 at 12:13 am #240420Hi Gang,
If you returned here looking for the posts about moving a VW E-Brake lever, they have been moved to a new thread:
https://tdreplica.com/forum/forum_posts.asp?TID=864&P N=1&TPN=1
Paul Mossberg
Former Owner of a 1981 Classic Roadsters Ltd. Duchess (VW)
2005 Intermeccanica RoadsterIf you own a TDr and are not in the Registry, please go to https://tdreplica.com/forums/topic/mg-td-replica-registry/ and register (you need to copy and paste the link)
January 22, 2010 at 1:34 pm #240421Ok I got my new pan halves. picked them up at Aircoolin’ a vw parts place in covington Wa. They owner troy is a VW nut and was a great help he has a huge inventory of new, used and refurbed vw parts. Here are some shots of the tunnel with the rusty pans stripped. You can check out Troy at http://www.aircoolin.com
Will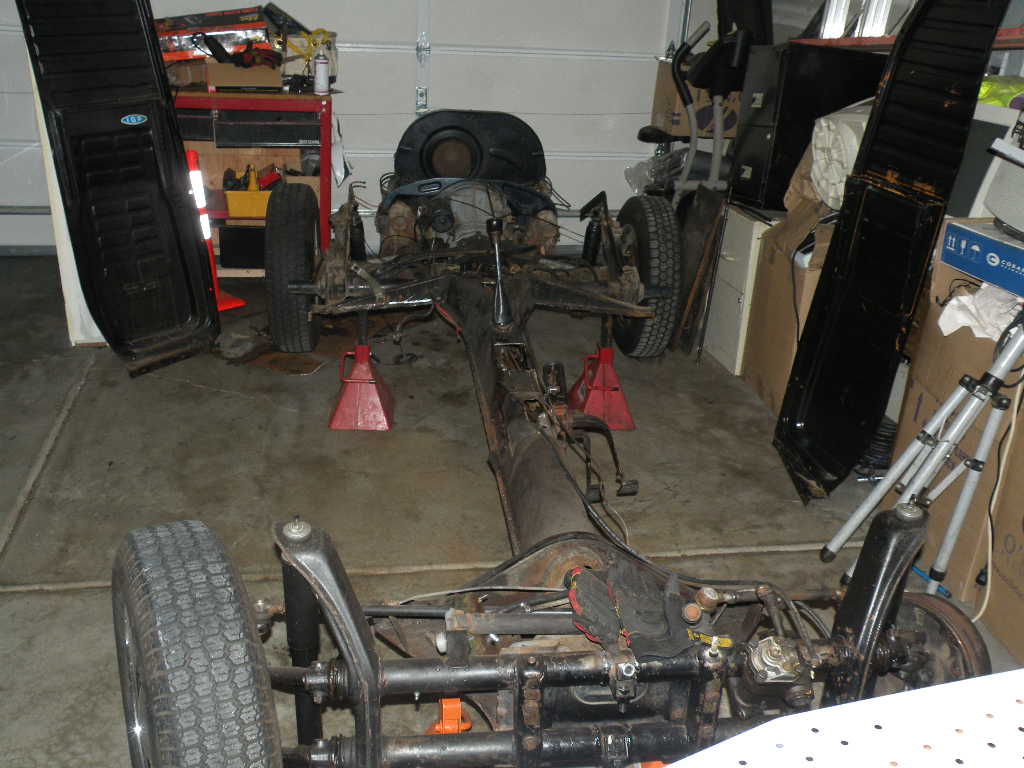
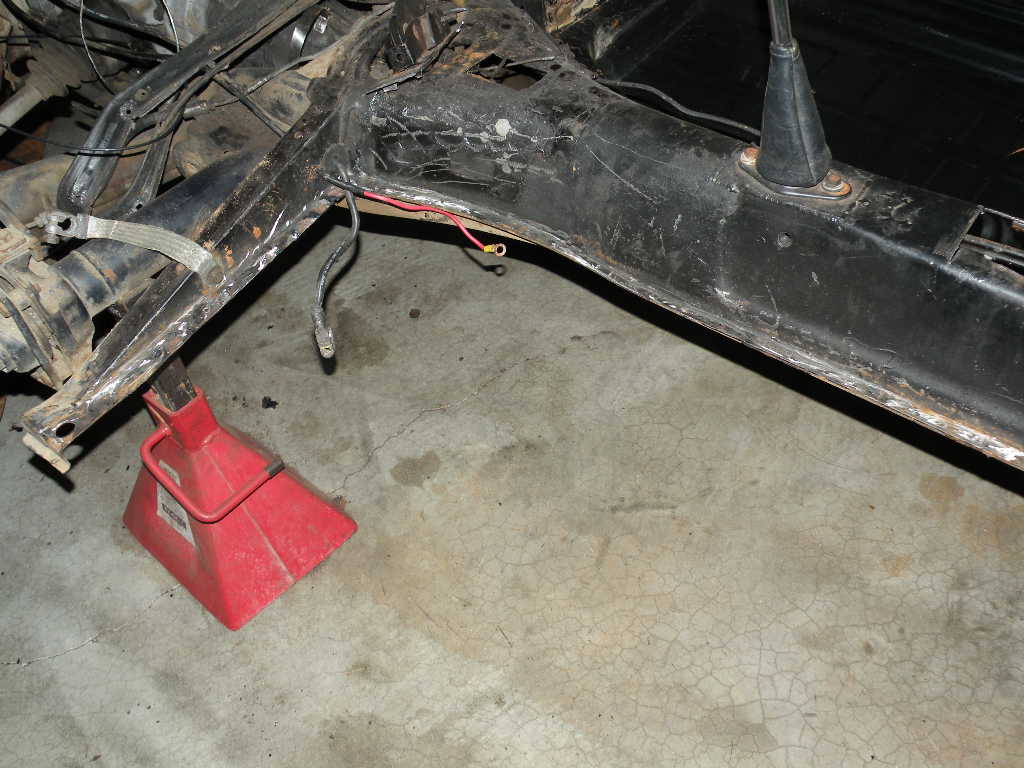
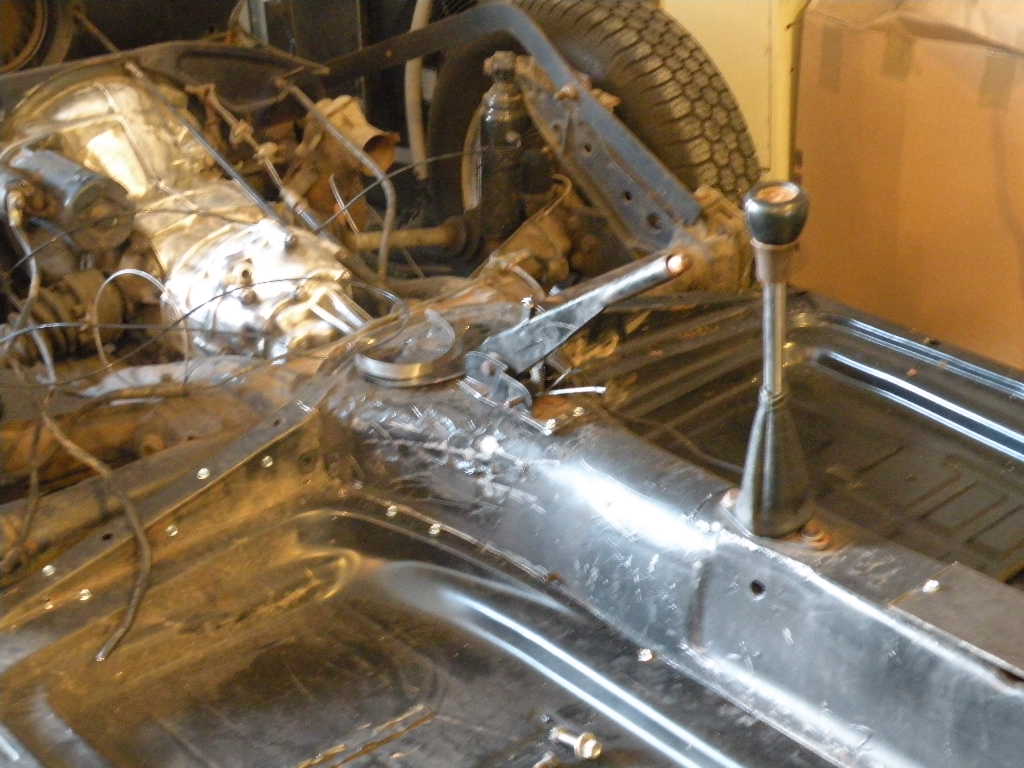
Washington Will40200.5804976852January 22, 2010 at 1:36 pm #240422Heres some shots of the new pans and some of them setting in place. They will be plug welded so I had to take an air punch and punch holes along the edge every 2 to 3 inches. then they will be screwed in place with self tapping screws every 3 or 4 holes to hold them in place and minimize warping during welding. We will weld a spot at every hole and afterward remove the screws and do the same there.
Will
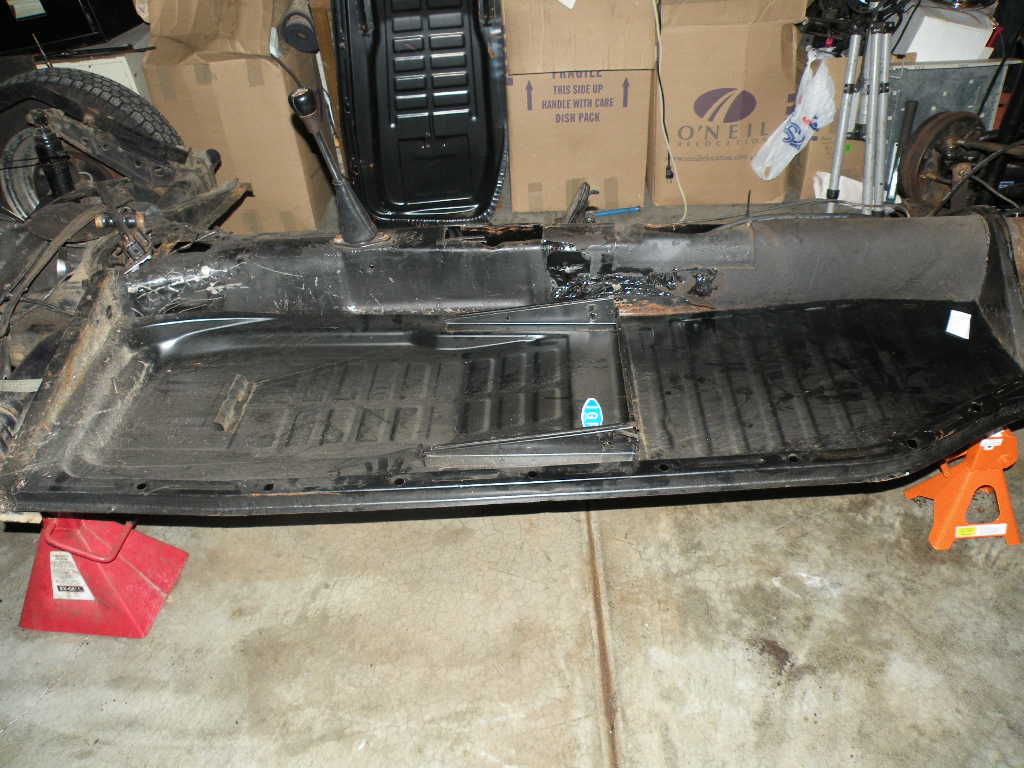
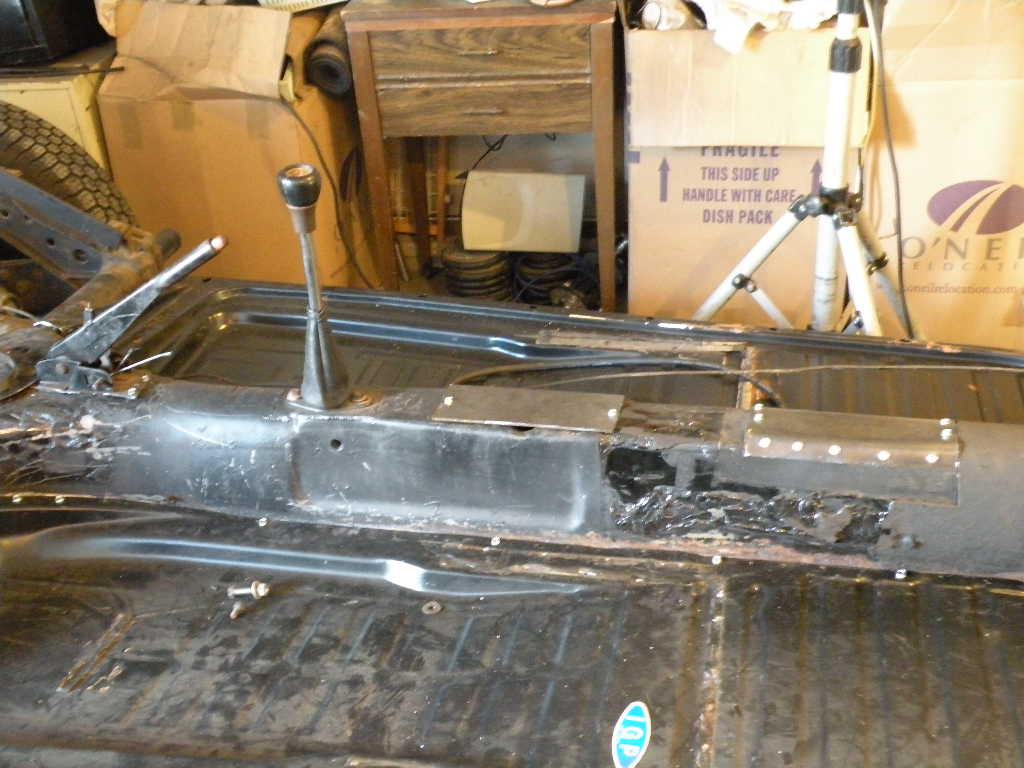
Washington Will40200.5841666667January 22, 2010 at 1:38 pm #240423Ok Pans are in place and screwed down. patches to the tunnel and e-brake are also screwd in place and will be plug and seam welded. fortuately I did notice before I made a mistake that the plate over the old e-brake whole will have to be welded last as the pan has to be welded before the pedel assembly can be put back on and the only access to the pedel assembly bolts is through the whole in the tunnel. After replacing the pedel assembly the plate will be plug and seam welded. note the plate over the old shifter whole, this part of the tunnel is rounded and I had to fabricate it by bending the near edge on my vice, then screwing the top and one side in place. I then took vice grips and bent the eighth inch plate down as far as I could and finished tapping it into place with a mallet. Then screwed it down all the way around. I will pull the screws one by one as we plug weld it. We will also seam weld it all the way around this and the eighth plate should give it plenty of strength. A friend is bringing his mig welder over on Sunday to do all the welding. I will post more shots then.
Will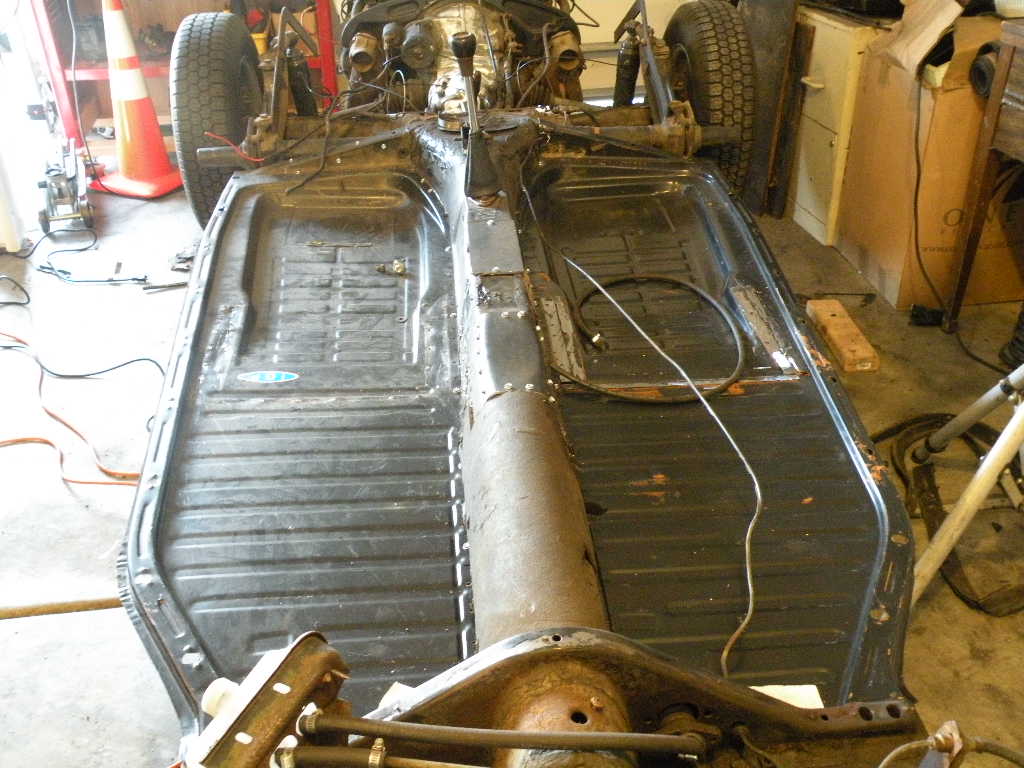
Washington Will40200.5942708333January 22, 2010 at 2:30 pm #240424If any one noticed there are seat brackets on the pans in the second set of photos and in the last set I have removed them. Here’s some advice, take it for what its worth the passenger side was removed according to some advice I was given, which was to lightly drill the spot welds on top of the seat brackets and pop them off the pan. note the pans are very thin and as hard as I tried to be careful I still drilled through in 3 spots. Its not a big deal but on the driver side I took an angle grinder with a a cut off wheel and cut them as close to the floor as possible then took the same grinder with a grinding wheel and ground them down smooth. This method left no holes and even though they are raised up maybe a sixteenth of an inch they will easily be covered by the sound deadener padding under the carpet. So this advice will be worth every penny you pay for it! My preference is the grinder, don’t let anyone tell you that drilling spotwelds is an easy or accurate task.
Will
January 22, 2010 at 9:02 pm #240425Will, that looks great. Thanks for the informative posts. Good luck with the welding. Hope to see it all done & back together soon.
January 22, 2010 at 10:57 pm #240426This is great stuff and will be a big help to anyone undertaking the same project.
I built my car in 1982. In a single car garage. Alone. In the dark…metaphorically speaking. I had my tools and an assembly manual. Amazingly, after nine months, i fired her up and backed out of the garage. And 27 years later, nothing has fallen off!
It was cool that I could call Classic Roadsters Ltd. at just about any time of night and actually find someone in the shop to talk me through my latest obstacle.
PMOSSBERG40201.4257407407
Paul Mossberg
Former Owner of a 1981 Classic Roadsters Ltd. Duchess (VW)
2005 Intermeccanica RoadsterIf you own a TDr and are not in the Registry, please go to https://tdreplica.com/forums/topic/mg-td-replica-registry/ and register (you need to copy and paste the link)
January 23, 2010 at 6:40 pm #240427Paul, I would say you have quite an accomplishment there. I have learned in the short time i’ve been into this and by the number of cars I looked at before and since I bought my kits that many people never finished and many of those who did, did not do as good a job as you did. Even though it went through a couple of hands before I got it, the builder of our migi and the gentlemen to follow didn’t do a very good job and we will have completely reconstructed her by the time we finish. On the glass half full side, thats what my son and I wanted to do and will get much pleasure in doing so. We are welding tomorrow and will start painting and reassembly next week. More photos to follow.
WillJanuary 24, 2010 at 1:22 am #240428Thanks.
I was 24 when I built my Duchess so maybe i didn’t know any better. Instead of giving up where a lot of people probably gave up…I just pushed through.
The garage was my dad’s, who had to park outside for nine months. And it really was a single car. The Duchess body parts could not stay in the garage while I worked on the chassis. They were all down in the basement. The huge box that everything came in served as my work bench.
And the last straw…it was a condo complex. The homeowners association just loved that this guy’s son was banging away in the garage night after night. The best was probably the steel cutting hole saw and jig saw, cutting the new holes for the pedals and stick shift. What a racket. Funny now…but must have been a real killer for the neighbors! Safe to say that that night generated the most complaints. Dad had to promise that would never happen again. Of course, luckily, it didn’t have to.
Paul Mossberg
Former Owner of a 1981 Classic Roadsters Ltd. Duchess (VW)
2005 Intermeccanica RoadsterIf you own a TDr and are not in the Registry, please go to https://tdreplica.com/forums/topic/mg-td-replica-registry/ and register (you need to copy and paste the link)
January 24, 2010 at 9:47 am #240429Hilarious, Paul.
So when you first rolled her out of the garage–the garage in which no car had been when you got started–what did the neighbors say then?
January 24, 2010 at 10:23 am #240430Paul, that is a funny story and easy to imagine. We don’t live in a condo and I have all the neighbors “paid off”with Home made beer, I also brew some really good beer and always have some on tap. It isn’t rare to have a neighbor stop by to check out our projects and have a frosty mug, I am not sure they are really that interested in the cars
 , but any way, last week we got a new neighbor and when i went to introduce myself he said “Oh you live over there I heard all the grinding going on, What are you building?” Condo people aren’t usually that forgiving! Amazing you and your father made it through, But I guess what is even more amazing is that you still have the car. You must know that car inside and out. How long did it take to get it just the way you wanted it? I mean have you changed it along the way or is it still the way you built it? Thanks for sharing.
P.S. I now know we are about the same ageWill
January 24, 2010 at 1:57 pm #240431Ed – Most of the ones that cared either way were still annoyed. The few that took an interest, thought the end product was pretty cool.
Will, other then normal maintenance, I’ve only done two things. After about ten eyars with the stock VW engine, I built a mild dual carb 1641cc. Has about 85 hp, enough to move it along.
And I’ve had to do major brake work a couple times. Duirng the long cold, wet winters, she sits out back in an uninsulated, unheated shed. The drum brakes don’t like all the moisture and like to freeze up. I’ve got plans to go discs on all four corners, I’ just “never got around to it”.
I credit most of the longevity to Classic Roadsters’ design. But apparently I did a pretty good job following what is a very detailed assembly manual.
Paul Mossberg
Former Owner of a 1981 Classic Roadsters Ltd. Duchess (VW)
2005 Intermeccanica RoadsterIf you own a TDr and are not in the Registry, please go to https://tdreplica.com/forums/topic/mg-td-replica-registry/ and register (you need to copy and paste the link)
January 27, 2010 at 11:38 am #240432What a great story. I hope someday to do the same with my two boys. One just left for some vacation time down in fort benning georgia, so it will certainly be a while the other is still in high school. Great story.
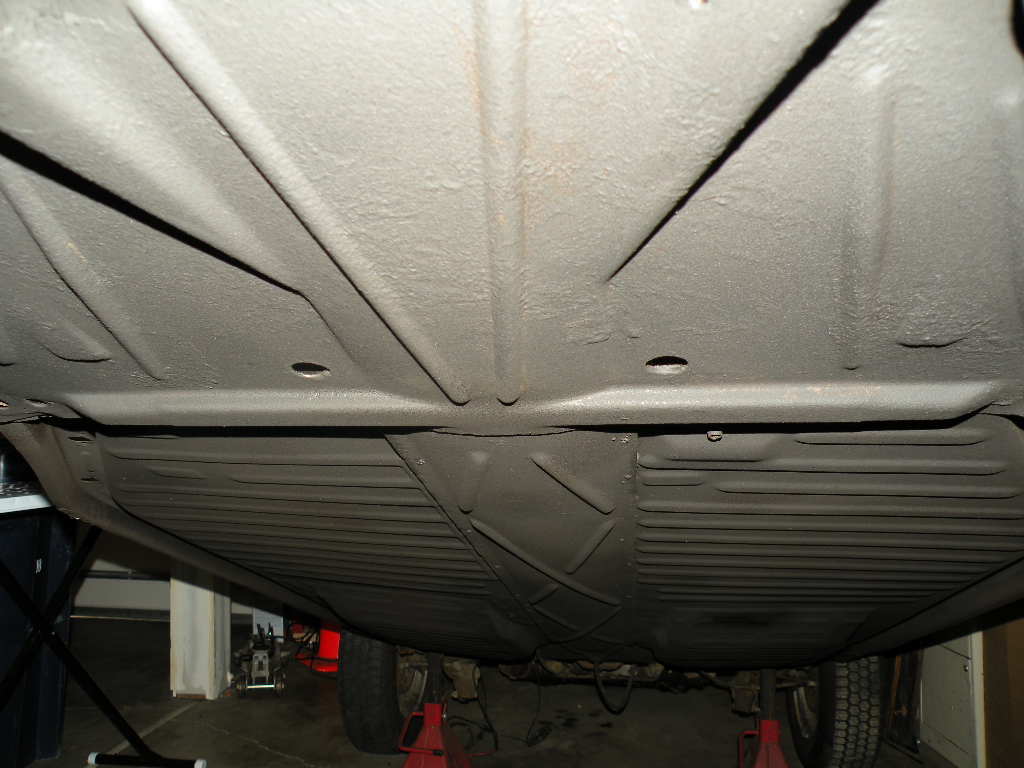
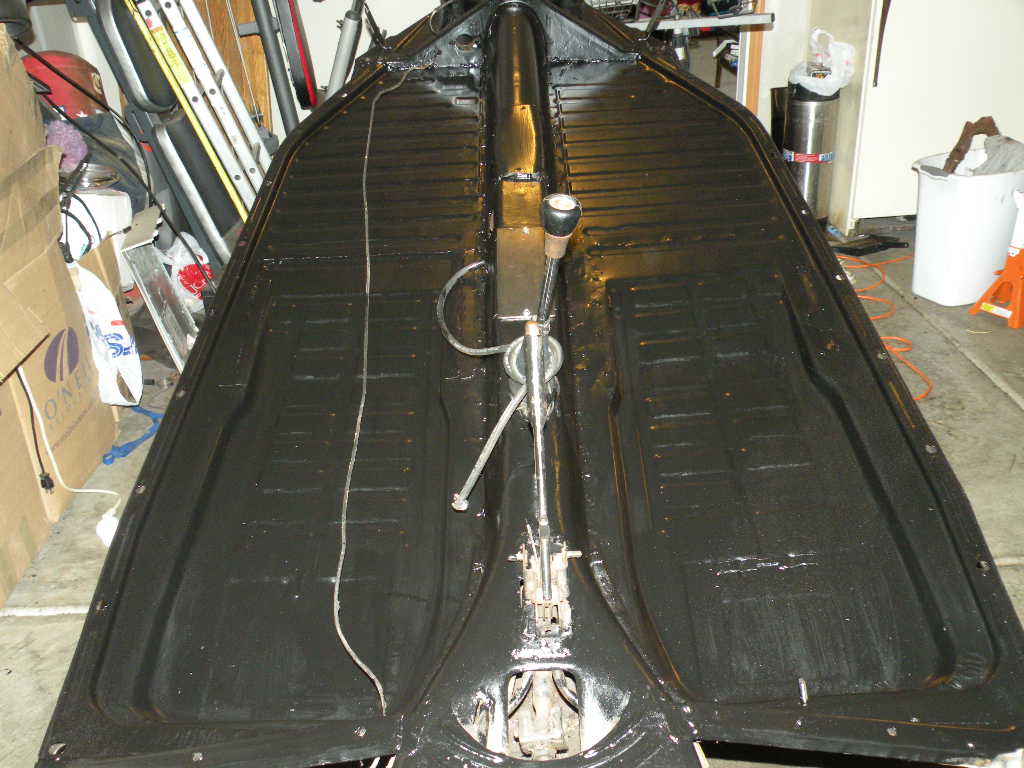
February 3, 2010 at 4:40 pm #240433Here’s a couple shots of the new pans in place after welding, two coats of rustproofing frame paint top and bottom and 2 coats of rubberized undercoating.
-
AuthorPosts
- You must be logged in to reply to this topic.

