
Home › Forums › MGTD Kit Cars › VW Based Kits › converting front brakes to disks
- This topic has 7 replies, 4 voices, and was last updated 12 years, 4 months ago by
 billnparts.
-
AuthorPosts
-
December 19, 2013 at 10:41 pm #235013
Hi all,
Just finished converting Abby to front disk brakes…simple job with a few “gotcha’s” along the way. Here’s some pic’s of my progress… I bought a front disk conversion kit from SOCAL about 2 months ago; about a month ago, I had the local VW mechanic/scrap dealer press in the inner and outer bearing races, and then the project waited until a fine sunny day when Royal’s wife was out of town and Royal was itching for a project…so I invited him over to “help” with the kit install.
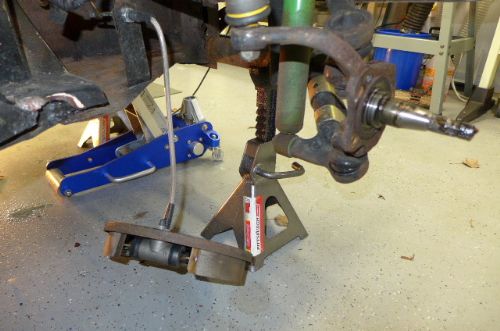 Off with the drums …and in the mean time, get the new master cylinder gravity bled…
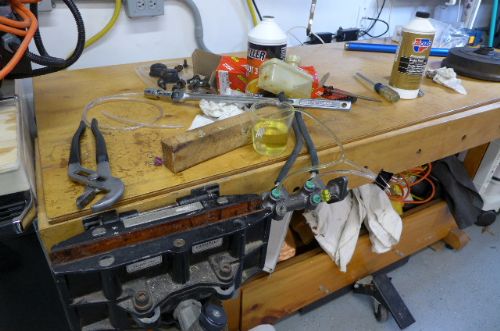 gravity bleed worked well — did not have to spend a lot of time pushing in the piston with a phillips screwdriver…now on to installing the caliper backing plate and the wheel disks –
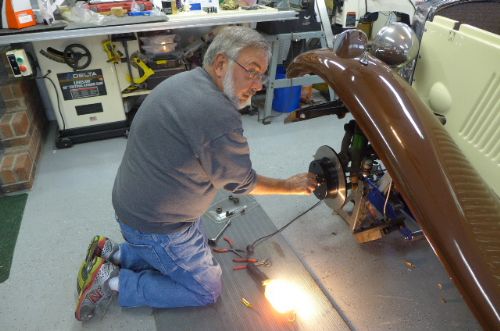 …now the caliper assay…
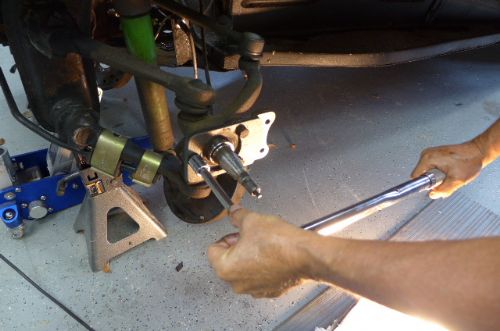
 I used lots of brake cleaner to get the disks cleaned up and to get a lot of the residual brake fluid picked up.
 …Roy was a big help — he kept finding ps where I let some brake fluid drip…
 …but for the most part, Roy provided “supervision and guidance”…
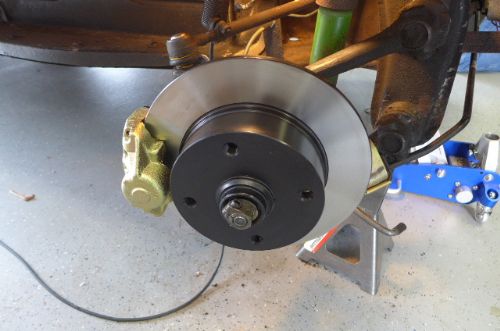 Got both sides done, got the master cylinder installed, got the excess fluid picked up, gravity bled the wheel cylinders (2 bleed valves per front wheel – started with the bottom bleed valve – and 1 each on the rear wheel cylinders)Went for a quick drive, and found that the brake pedal was “sinking” toward to floor…Found that one of the 2 brake switches on the master cylinder was leaking around the threads and we could not get it to tighten up enough. I had a spare for the other TDR that I had purchased on line when I purchased the new master cylinder. Turns out that it was leaking out of the electrical lug. As it turns out, I had an old switch in the pile, so we installed it. I took the car for a test drive and it was GREAT. Good brakes that make the car stop as well as it goes.
 sI got back in the driveway and Roy said “your left brake light is out” Actually, both brake lights were out — the final brake switch held pressure but was electrically dead. I put the car away, called my friendly NAPA dealer, and ordered a good quality switch — picked it up at 8 AM the following morning, installed it, and all is well.Three points that are worth passing on:1. Don’t forget the spare can of brake fluid — and know if you need DOT3 or DOT4 or you will spend countless hours arguing with your friend and surfing the web to find out what DOT the car needs.2. Have lots of spray brake cleaner on hand.3. IF possible, and if you are changing out the master cylinder, get it bench bled the night before the big project day.4. Have lots of paper towels on hand.5. Expect things to go wrong. But after all, these are our “extra” cars, so that’s ok…6. I found that the grease caps that I took off of the brake drums on the front were just a little too tight for the new disk rotors. I had to sand them down a bit and then had to use some well placed hammer blows to get them on.7. Then I found that after test driving the car, the wheel bearing loosened up in seating themselves, so I had to pry off those grease caps — with a lot of cussin’ since the were hammered on to stay…8. You may want to avoid that problem and order some replacement grease caps when you order the brake kit.Now that it is all said and done, it was a pretty easy, frustrating and fun project…could not have had such fun doing this job without some unsolicited advice and comments about my technique and help from Roy.I highly recommend changing out the drums on the front of your VW-based cars. Let me know if I can offer any other suggestions while this project is still fresh on my mind. Later, JackDecember 20, 2013 at 8:59 am #259087
Great tutorial, Jack. I’ve got a set of front disks awaiting install on Bridget, and this helps a lot.
Question on the bearings: did the shop use the same (or same size/ part number) bearings in the disk setup as were in the drums?Also, who packed them with grease? I ask because, last year one of my fronts started coming apart so I replaced the bearings, repacking them. Greasing wheel bearings is one of the (many) mechanic-type things I seem to not do as well as needed. So I’m always looking for pointers.December 20, 2013 at 8:07 pm #259088The difference between DOT3 and DOT4 is boiling point. DOT4 is higher. You can replace/ mix DOT 4 with DOT 3 but not the other way around. Do not mix either with DOT 5 as that is a silicone based fluid.
Bill Ascheman
Fiberfab Ford
Modified 5.0, 5sp., 4:11
Autocross & Hillclimb
"Drive Happy"December 20, 2013 at 10:17 pm #259089Thanks Ed, Bill —
Ed, the bearings from SOCAL were listed as: This “wheel bearing” kit comes complete with all the items necessary to install new drums or rotors on a late model spindle (Bug/Ghia ‘6/’68-’79). So I’d say that the wheel bearings provided fit both the wheel drum and disk rotor…??? As to greasing the bearing, I just put grease in my palm and “stuffed” it into the bearings. But now Roy is suggesting that I may have been a little “light” in my greasing, so I’ll pull the rotors and re-grease the bearings one more time — especially since the rotors loosened up after driving the car of 50 miles or so — to the point of having to retighten the nuts holding the rotors onto the spindles…tomorrow’s project before heading out for a country drive……Bill, to add to my confusion, I got mixed up between “silicone” brake fluid and “synthetic” I did not know that the DOT5 was Silicone based and can’t mix with the “standard” brake fluids. We seem to be getting much more complicated with each passing model year. Why is there still DOT3 on the market if DOT4 is better and usable in all vehicles? Why add to the confusion by labeling the silicone DOT5 — which most people would see as a progression from DOT3 to DOT4 and then DOT5?Ugh — I’ll stick with some good ol’ DOT4 ,be it synthetic or regular, I guess…???JackDecember 21, 2013 at 3:38 am #259090This is what keeps all the engineers employed……yes, just stick with the DOT4.
Bill Ascheman
Fiberfab Ford
Modified 5.0, 5sp., 4:11
Autocross & Hillclimb
"Drive Happy"December 21, 2013 at 10:08 am #259091Thanks, Jack. That’s what I wanted to know.
On the greasing: simplest thing in the world; I can tell you how to do it all day. But twice in my life now, wheel bearings I packed have failed.Oh well: practice.December 21, 2013 at 11:44 am #259092billnparts wrote:The difference between DOT3 and DOT4 is boiling point. DOT4 is higher. You can replace/ mix DOT 4 with DOT 3 but not the other way around. Do not mix either with DOT 5 as that is a silicone based fluid.Bill, help me understand. If you add DOT4 to DOT3, wouldn’t the end result mixture be the same as if you added DOT3 to DOT4? I’m a bit confused… is it because of which fluid the system was orignally designed for?I understand the DOT5 issue since the chemicals must be compatible, but this DOT3 and DOT4 seems to be different…Early FF TDr on 69 VW pan
Slowly coming back from the ashes...December 21, 2013 at 7:22 pm #259093The DOT3 won’t take high temperature as well as the DOT 4. You can get the brakes hotter before the fluid boils. If you have DOT3 now, fine. If you have DOT 4, don’t use DOT3.
Bill Ascheman
Fiberfab Ford
Modified 5.0, 5sp., 4:11
Autocross & Hillclimb
"Drive Happy" -
AuthorPosts
- You must be logged in to reply to this topic.