Home › Forums › MGTD Kit Cars › VW Based Kits › Steering box access/adjustment
- This topic has 13 replies, 9 voices, and was last updated 12 years, 1 month ago by
 edward ericson.
-
AuthorPosts
-
December 9, 2013 at 11:13 am #234997
Has anyone else run into this problem?
I had to replace the original steering box when I rebuilt the car and it turns out the new one is taller than the original.
And, it turns out that I have no clearance to adjust the steering.
I have about 3 inches of slop in the steering wheel and really need to make the adjustment but I can’t access the adjustment screw.Plus, I can feel a slight bulge on the top of the fender where the adjustment bolt hits it from underneath.
Because I think eventually it’s going to crack the paint and maybe even the fiberglass, AND I’m sure I’ll need future access for further adjustments, I’m thinking of drilling a hole in the fender (I cringe just saying that) and covering it up with a black plastic plug.
Has anyone run into this before? What was your solution?
December 9, 2013 at 11:52 am #258937Wish I could help Rocky.
I looked at the registry and see you have a “Custom Classic Duchess”, built by American Custom Cars, and we think it is from a Classic Roadsters Duchess kit.But I don’t have that access issue on my Classic Roadsters Duchess.Paul Mossberg
Former Owner of a 1981 Classic Roadsters Ltd. Duchess (VW)
2005 Intermeccanica RoadsterIf you own a TDr and are not in the Registry, please go to https://tdreplica.com/forums/topic/mg-td-replica-registry/ and register (you need to copy and paste the link)
December 9, 2013 at 12:26 pm #258938I don’t have a VW so I’m just a bystander here..but, how hard would it be to pull the steering box and do your adjustment outside of the car? And then when it’s out, can you grind of some length of the adjustment screw?
December 9, 2013 at 12:27 pm #258939On my old FF Migi (pre-MiGi II) kit, the single-piece grille and front splashpan sit directly on top of the steering gearbox, as you describe. My fiberglass has small hairline stress cracks from that…
Because I removed the nose of the car to put a chrome grille shell on it, I was able to adjust the play out (or at least MOST of it) before reinstalling it.I thought of using a hole saw to cut an access hole while I had it off, and then sealing it with a black rubber grommet-type plug, but didn’t do so. Hopefully I don’t regret that down the road…Early FF TDr on 69 VW pan
Slowly coming back from the ashes...December 9, 2013 at 2:05 pm #258940MiGi had a hole like you guys are describing. I have had to adjust my box and make use of it. I did fabricate a cover for it which I glued on. (It, the cover, started its life as the top to a rattle can of paint.)
Definitely not the prettiest thing in the world, – but functional.December 9, 2013 at 2:05 pm #258941Rocky, my car must have had a similar problem. The PO cut an access hole above the steering box and then covered it with a stainless steel plate with a hole in it to get at the adj. screw/nut. What you mentioned with the hole and plug should work ok as well.
Sam
December 9, 2013 at 3:56 pm #258942Mine has the same problem just worse… The splash panel sits too low and on the driver side it is bent up to fit over the steering box. I have thought about molding a piece to glass in over the steering box, but it is not high on my priority list so it’ll have to wait.
You can see that the PO of mine also cut a hole (not very well obviously since it still hits it and needs to be enlarged where the sharpie is)Something i’ve seen on electrical junction boxes are thread in plugs that are very short but an inch or so diameter. Something like this one HERE. A metal one would tap into the fiberglass better though I would think.December 9, 2013 at 4:22 pm #258943Derek, mine looked almost exactly like yours. An ugly oblong, hole that was not really big enough. I guess my fix was good enough since no one has ever mentioned it at the shows. (At least it is not the weak link.)
December 9, 2013 at 4:56 pm #258944I never noticed it, Roy. And it’s not even paint-matched!
December 9, 2013 at 5:47 pm #258945I cut a rectangular piece of fiberglass and painted to match and attached with machine screws. Fiberglass is fairly thick in this area and I taped the fiberglass to receive the screws.
Al Greig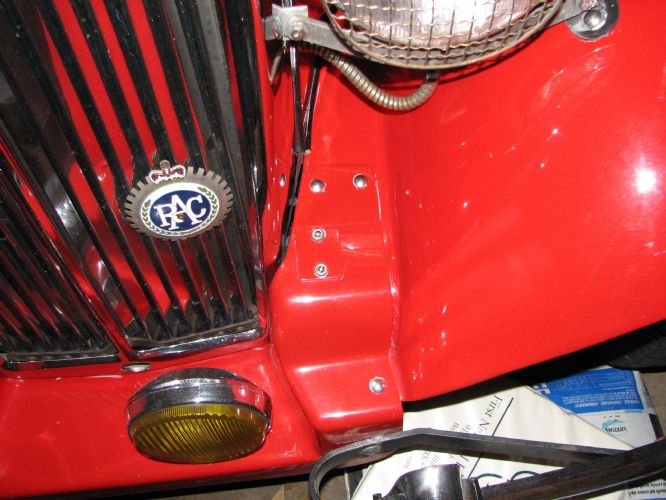 December 9, 2013 at 5:57 pm #258946
That’s a nicer fix Al. My adjustment screw sticks up above the fiberglass about 3/8″ so it wouldn’t have been so easy. Truth is, mine was a hasty fix thrown on before Carlisle 2012 and I haven’t even thought about it since. – til now.
January 2, 2014 at 5:05 pm #258947Well, I got the carpet done in the Benz and finally was able to do the steering box access job for the MG.
After removing the steering arm bolt, the bolts to the steering column, and the steering box clamp the steering box easily rotated forward and came out.
As I suspected the adjustment screw was rubbing through the fiberglass from underneath. So I taped the top to minimize splintering and drilled the pilot hole from underneath.
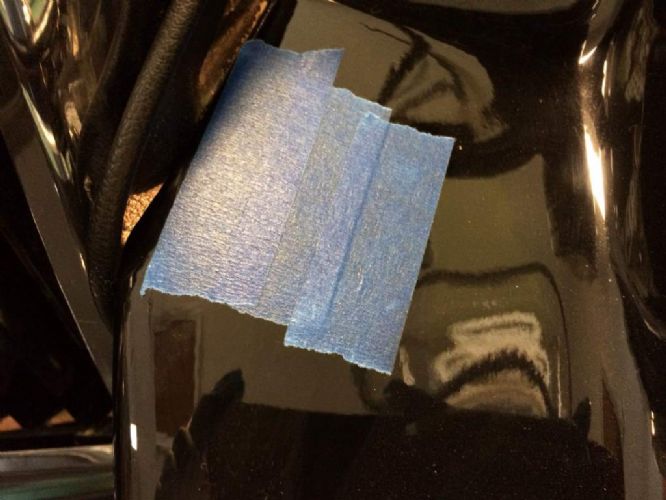
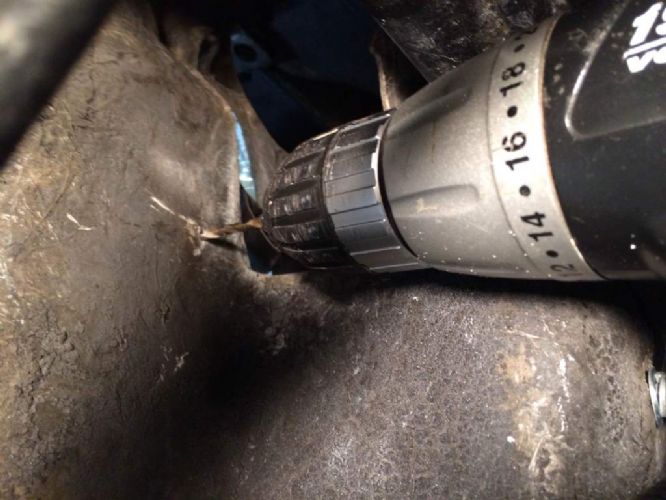
Since the plastic cap I was going to use was 3/4″ I sharpened up my 3/4″ paddle bit and SLOWLY drilled the hole from the top. PERFECT!! Right in the center!
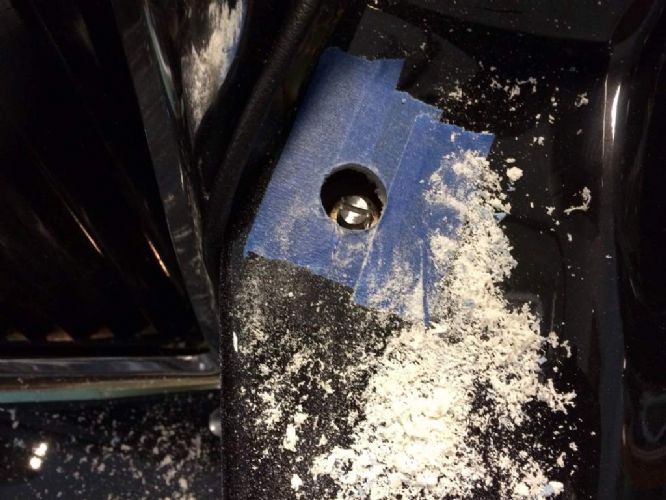
And the cap fit perfectly.
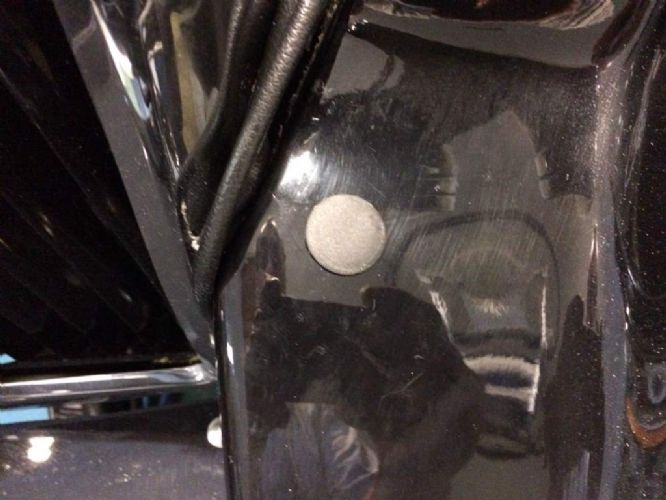
Getting it all back together was a little more challenging. Once I had the box back in place and the clamps back on I had to crow bar the arm back onto the steering box. It took me several tries to realign the grooves but I finally got it inched back on.
So then, of course, I went to adjust my steering. As you can see (one end of the blue tape to the other) I have almost 2 full inches of play. That’s actually less than I thought but still feel dangerous over 45 mph.
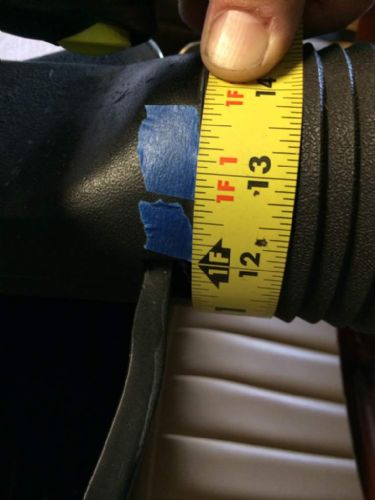
I made the adjustments to the screw and could only remove about 1/4″. So I worked on the worm gear adjustment.
I took the hint of someone on Samba and used a 24mm nut and a pair of vise grips as my adjustment tool.
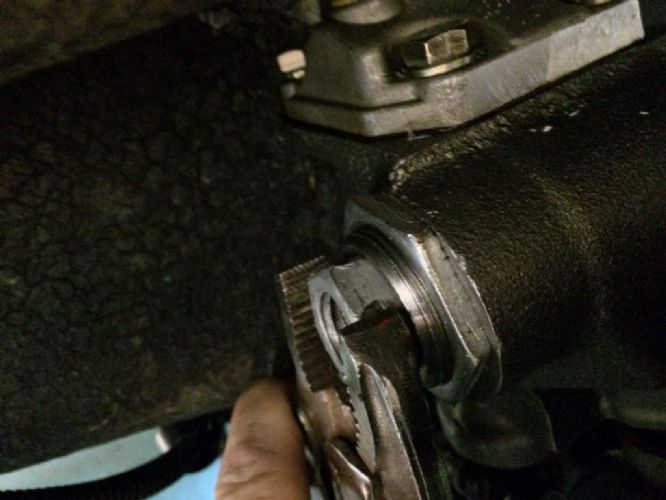
But I still couldn’t get any more play out of it.
So then, with the tires off the ground I grabbed the tire and started moving it back and forth while looking to see where the play was.
It turns out that I had not tightened the steering arm bolt firmly. Once I grunted it down I was down to 1/2″ of play (just below the silver mark). That I can live with.
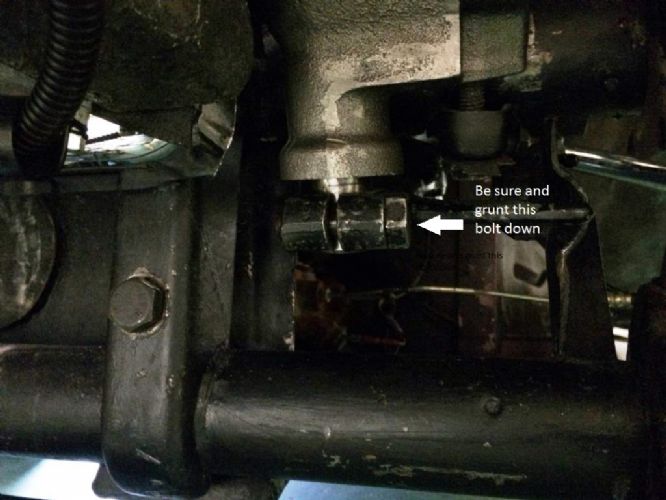
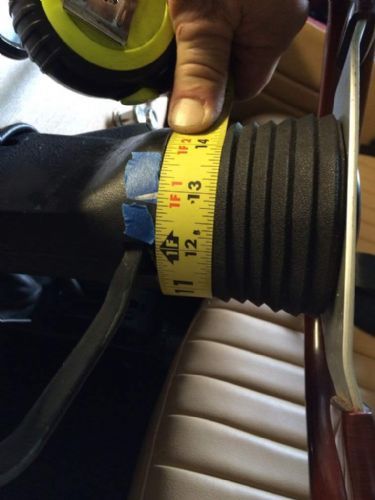
A little more frustration and time than I expected but overall it went well and I got my desired results.Now if it will just stop raining I’ll get her on the road for a test.
edsnova2014-01-02 21:11:12
January 13, 2014 at 10:25 am #258948So it finally stopped raining and I’m back in town so I took her out yesterday to see how the steering was after my adjustments.
On the positive side, there is almost no play!! Perfect.
On the downside, I tightened the worm screw too much and overall the steering is too tight and does not return to center.
One more adjustment and I should be good.

When I get back in town…again…I’ll make the adjustment and all should be good.
Next will be rejetting the weber carb.
January 13, 2014 at 3:16 pm #258949This is why Muir advised against monkeying with the worm screw on the steering box, I think. Hope you can easily set it back close to where it was.
And a good lesson for all: check every other thing first! Ball joints, rod-ends, rag joint…and that blasted bolt that holds the pitman arm to the steering shaft! Reminds me I gotta take a look at mine too, “while I’m in there…”.
-
AuthorPosts
- You must be logged in to reply to this topic.
