
Home › Forums › MGTD Kit Cars › My Project › vinyl dash
- This topic has 4 replies, 4 voices, and was last updated 13 years, 6 months ago by
Rick.
-
AuthorPosts
-
August 11, 2012 at 6:51 pm #234257
Anonymous
InactiveHas anyone covered their dash with vinal material? Am thinking of covering my old dash with vinal material to use while making new dash board. It should be relative quick to do
and keep going forward on car.Was wondering what type of glue to use. Warm in California, what glue would hold up to the California sun?Dash will be of wood and vinyl. dash covered with vinyl with a wood insert.Thanks.August 11, 2012 at 8:36 pm #2513723m makes a”super” vinyl trim adhesive designed for use on vinyl roofs. That should take the heat. You probably just need their regular auto trim adhesive though.
The original TD had a “rexine” (pre-vinyl) material covering the dash. It’s a cool look and should be easy to replicate on any of our dash boards. I’d do it like this:
1. take out the gauges & switches, being sure to mark all the wires as to where they go. I’d make a diagram and number each wire AND take pics.
2. remove the dash, clean it nice according to the adhesive makers instructions. Might have to paint it but probably not.
3. roll out some vinyl, lay the dash face down on the back, mark the material with about 1.5-3 inches (depending on the dash board’s thickness) leeway all around.
4. Cut the material.
5. spray adhesive on the material and the dashboard, let ’em both dry tackt then lay dash down on the material & roll it over the edges, slicing where necessary with an exacto or razer so it confroms to the curves. Staple it on the back. Let it dry.
6. carefully cut out the gauge & switch holes. Same thing w/ the screw holes.
7. find a length of clothesline or similar rope– 4 foot or so. Cut another strip of vinyl the same length and about 4 inches wide, spray it with glue and wrap it around the rope, to create a bead. Fold the ends over so the cut edge is buried inside. Staple that if you can.
8. loose mount the dash in its screw holes with screws. Use longer ones than original if needed. Remember those oval washers they came with…
9. Tuck in that rope/vinyl windlace thingie you made, between the dash and the fiberglass you’re mounting the dash to. Leave the ropy part sticking up above the dash line. Cut wedges in it so it conforms to inside curves and lies down flat as possible between the boards.
10. Reinstall gauges, switches, test everything and tighten it up.
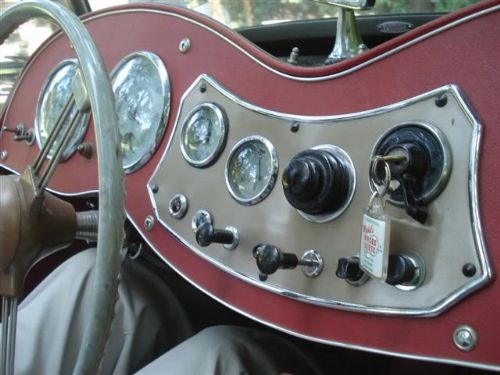
Not sure how to replicate the chrome bead on the edge of the dash, but the rest is cake.
edsnova2012-08-11 20:39:18
August 11, 2012 at 9:17 pm #251373Most excellent instructions Ed. I think the saying goes “You da man!”

Allen Caron
VW based 53MGTD - "MoneyPenny"
"If one thing matters, everything matters" - from the book The ShackAugust 12, 2012 at 10:51 am #251374InactiveEd: Thanks for Info on glue to use and how to do it. Similiar to what I had planned to do. Now to fill up a couple of un wanted holes and cover the dash.
Dash is currently on hold geting ready to go to Colorado to see daughter and grand kids there. Taking grand daughter of another daughter with me we are going by train. Grand daughter likes the train trip. She is 10 and doesn’t like to fly. I lost my liking of flying with the strip searches.August 12, 2012 at 4:41 pm #251375I too am considering using the vinyl approach. Thanks for the details.
-
AuthorPosts
- You must be logged in to reply to this topic.