
Home › Forums › MGTD Kit Cars › VW Based Kits › Adjustable beam job
- This topic has 32 replies, 10 voices, and was last updated 15 years, 1 month ago by
chuck schmit.
-
AuthorPosts
-
November 28, 2010 at 3:17 pm #233252
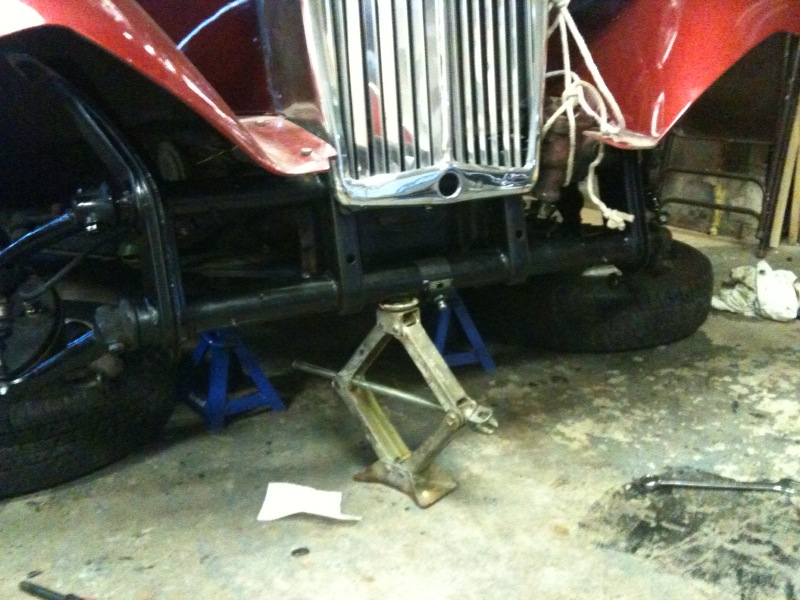
So I’ve finally gone and ripped the front axle out of Bridget. Trickier job than I thought, given that the steering coupler bolts seem to be frozen/painted on & the grill grabbed one of the two upper bolts when i tried to drop the beam.
Seem to have the old one out now.

So now wondering how to get the sway bar off it.
And also a lot of other stuff. Like, is there a tried and true technique for getting the new beam in without detaching the steering box from the shaft?
And…what parts do I need to reassemble/make new the new adjustable beam? (urethane inner and outers, right? Or do I really have to replace the old needle bearing(?) in the existing beam? And what about those top bushings that crumbled off the old one?)
Etc.
Basically hoping anyone whose done it can tutor me.
Mmmm, greasy!
 November 28, 2010 at 6:02 pm #243065
Not sure what your asking but if you remove the whole thing invest in a urethane bushing kit,check your spindles, front bearings. My good friend Glauten Klause says you can struggle to get this all back in and attach pieces as you go. But he prefers to rebuild the entire front end whilst he has it out. then invite a friend over for a green bottle(in my garage there generally brown unless Glauten stops then I must serve those upscale green ones) and have them help re install the sterring rod should slide back into the box and the four bolts should find their way home back in the shock horn. Don’t forget your going to want to shim the King pins and Torsion arm pins. It should be a total of 8 shims per pin just how the camber should be set is ver important. Glauten has an offset table for this if you need help. Glauten again says replace every bushing from right to left anf any othe worn parts. you don’t want to do this again next year. Of course Glauten has told me You aren’t a motor builder buy a new crated one.
November 28, 2010 at 6:35 pm #243066Thanks, Richard.
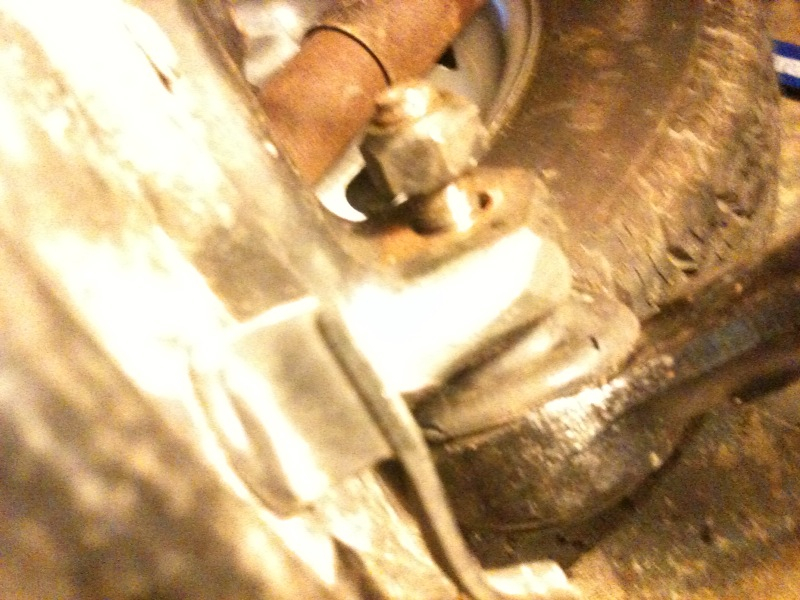
I got the sway bar off. Turns out the bushing holders for those are two-piece construction.

Problem now is, bushings or bearings? People say those urethane buggers squeak. The Speedster guys have an elaborate fix for that involving double-tapping the bushings for zirks; I’d rather just go with the OE stuff if possible.
But is it possible?
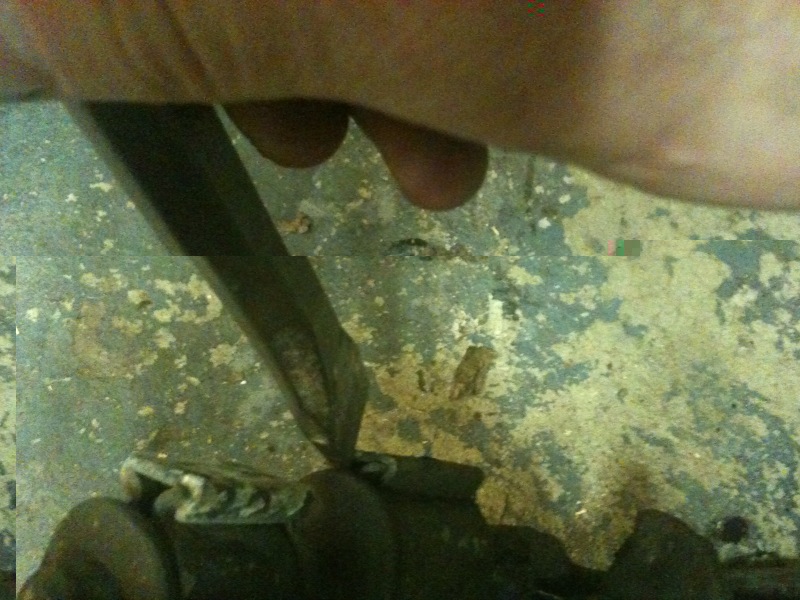
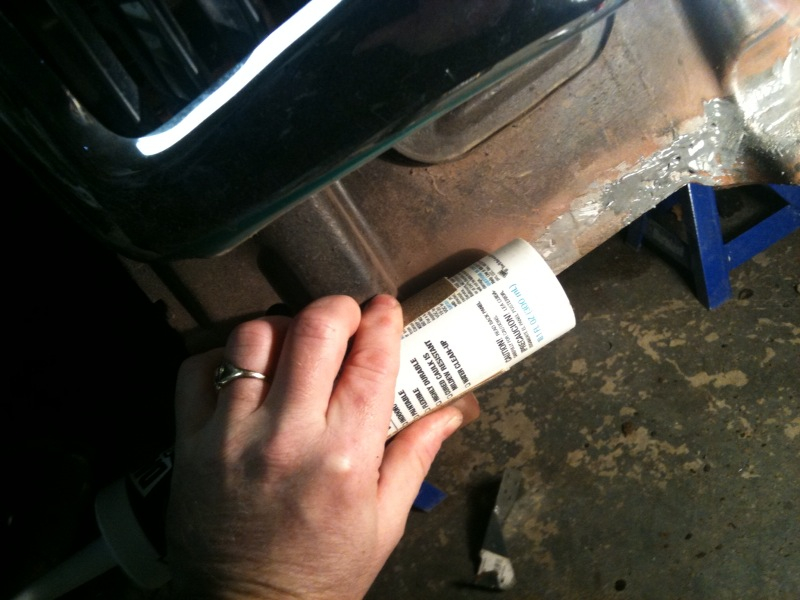
Meanwhile, trouble. Figured I’d clean some surface rust off the frame head where it met the beam. . . cranked up the wire brush and:

crap!
edsnova40510.7751273148
November 28, 2010 at 7:36 pm #243067Ed, I just rebuilt and installed a 69 ghia beam on my car. I replaced everything, yes everything with new stock parts. I used rubber not ureathane as I wanted the softest and quietest ride. I also removed all but the main four leaves in the upper and lower beam. I did not put an adjuster on either beam and was hoping for the best. I used the oil filled stock shocks and omitted the sway bar. The bar was just restricting side to side movement too much, too stiff not enough flex. All the buggy guys seem to follow this formula, you know there isn’t much weight up front anymore. When done, the ride height was perfect I prolly just lucked out.
I researched all this in the previous write ups on suspension here as I’m sure you have. Just getting the nerve to go for it, was the tough part and you are over that already. One thing my local builder suggested was a shim for the bottom tube. it pushes the botom out a hair which somehow helps all the techy part of alignment. Plus the bonus for you is it may aid in helping solidfy that rusty hole part you discovered. Also after I finished assembly I found a really good front end alignment guy and he said the shim is a really good idea to aid in alignment. After all that the missus took the car for a drive and was completely sold on the result of the effort. And really, if she can tell it’s better and likes it………………Anyway here is a link to the shim.
http://www2.cip1.com/ProductDetails.asp?ProductCode=ACC%2DC1 0%2D4190
November 28, 2010 at 10:26 pm #243068Ed,
The procedure to replace the front beam is the same between Ghia and Bugs provided you’re using the same type beam (ball joint to ball joint; link pin to link pin.) I decided not to mess with replacing individual pieces of the front beam and ordered an adjustable beam from CIP1. They were very helpful and the beam assembly is bolt off/bolt on. When I get the chassis for my TD I’m going to swap the beam from the Beetle for the adjustable beam for the TD. Check amazon.com for a Robert Bentley VW manual. Best on the market. I believe you’ll need the Orange Bentley manual if you have a 69 or later chassis.
Allen Caron
VW based 53MGTD - "MoneyPenny"
"If one thing matters, everything matters" - from the book The ShackNovember 29, 2010 at 8:33 am #243069Thanks, guys. FYI, yeah, this is a ’69 Beetle beam, ball joints. I got those shims in my shopping cart at CIP1. The rust damage seems minor–just a sheet metal “skin” between the beefier parts. Might just epoxy those shims in there and call it good.
Still pondering the bushing v. bearing question. Seems so easy to just buy that $30 urethane bushing kit & be done with it.
Meanwhile, can’t find the anti-squeak how-to tutorial on the Speedster forum. As I recall it, they just install the bushings, mark them through the zirk hole, drill them at the mark, reinstall and then install “long-reach” grease fittings to lock ’em in place. Supposedly that solves the squeaking issue, as long as one remembers to come along with the grease gun on occasion.
I still like needle bearings better. Don’t have a slide hammer yet to aid in removal of the old ones. Someone on the Samba or somewhere said that pulling them out that way ruins ’em anyway, so maybe I’ll just buy new.
Had no idea that the internals on these axles were so complicated.
December 4, 2010 at 5:41 pm #243070Sooooo. Hows it going
December 4, 2010 at 5:59 pm #243071Hanging Christmas decorations today. And cleaned out the gutters. Also bought a chipper/shredder for $100.
In other words, waiting on parts. New bushings, and caster shims.
Thanks for asking.
December 4, 2010 at 6:52 pm #243072Update: I am stupid. The new beam already has new bearings & etc. I hadn’t even took off the dust caps to look.
Still need the shims though. If anyone wants a new set of urethane bushings I’ll sell them to you at cost. Otherwise, back they go.
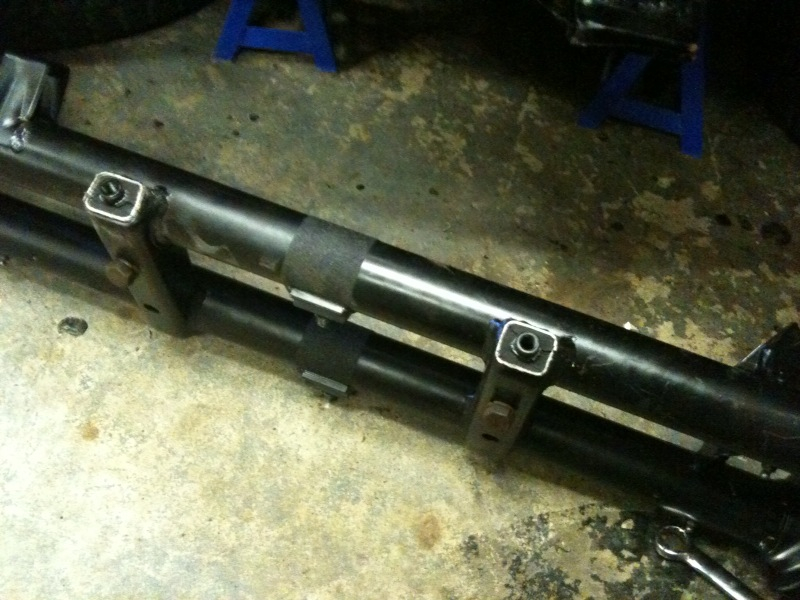
December 12, 2010 at 9:39 pm #243073And the new beam is back together. Took some doing. Turns out you can put the springs in backwards. I did that on the top beam and discovered it only after putting the lower control arms on. The uppers wanted to face about 180 degrees away from the lowers. Had to pull the springs and turn them end-to-end. Anyone who has done this job knows it’s a PITA.
Anyway, I took out all 6 little leaves on both beams. Installed the zerks. Greased up the needle bearings, installed new grease seals, got the grub screws back on and centered.

new stuff. Again, anyone wants red urethane innards for a ball joint beam, let me know. Otherwise it all goes back this week.
more grease. ’cause you can never have too much grease, right?
one of these leaf packs is in wrong. Very hard to take cell phone pics whilst working on this.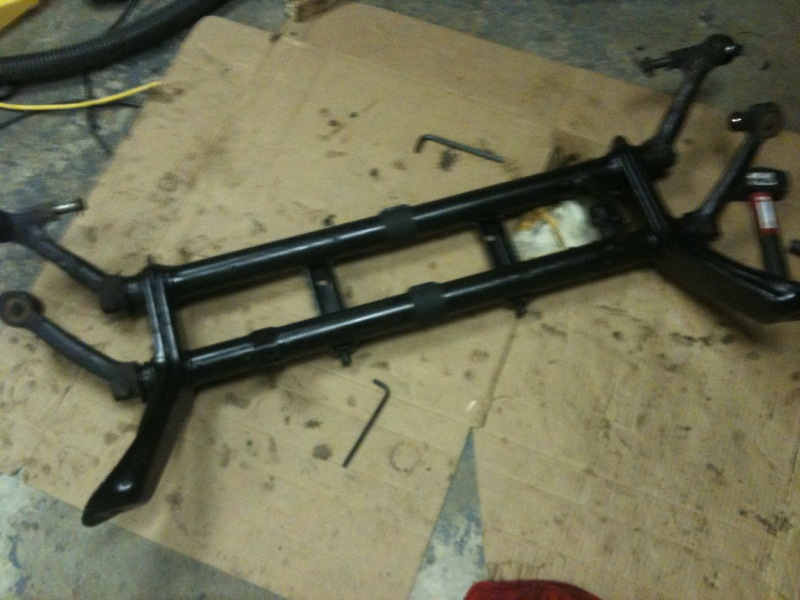
And this, I hope, will work. Gonna put the sway bar on it too.Still gotta fix the rust holes in the frame head.
And since I took everything–but everything (except the steering box)–apart, I’m guessing I’ll have to do a meatball home shop alignment just to get it good enough to drive to the alignment shop next spring. Please, fellas, don’t let me forget to do that.
December 13, 2010 at 11:07 am #243074Ed, don’t think it matters how the leaves go into the tubes….it only matters that they go through the center “alignment” square.
To get them in, I actually assembled the control arm and bushing on one end of the leaf stack, snugged the snub nut and inserted them into the tubes. Then I put the seals and control arm on the other side.
Don’t tighten the center snub nuts until the control arms/bushings are all reinstalled. Then, with an adjustable beam, estimate the ride height and snug them down.
As far as alignment, toe is all you can adjust…don’t waste your $$ at a shop, do it on the floor of your garage…chalk, a straight edge and a tape measure will do as good as the shop will.
I’ve done a few of these…it’s greasy, but not all that hard.
December 13, 2010 at 12:26 pm #243075I had the divot for the center grub screw right, but the ones on the ends were opposite what they needed to be (?) So I pulled the springs out, swapped them end for end and reinserted. Then the divots and grub screws lined up right everywhere. Logically, this made no sense to me either, but it worked.
As for alignment. Hmm. I’ll for sure do it in the shop, check toe (1/8 inch or so) with the two flat sticks method. But I do believe there’s a place for the alignment shop in these cars. The shims will give a couple degrees more positive caster, which should be a good thing, but should also change the camber just a bit which, by the way, appears to be adjustable too via an eccentric cam in the control arms (upper, as I recall it.) I may have disturbed those settings pulling everything apart.
December 13, 2010 at 5:07 pm #243076I doubt if many shops today will know how to adjust the camber using the upper ball joints. If you didn’t remove the ball joints from the trail arms, you probably didn’t disturb the camber.
However, you are correct in the caster change when using the lower beam tube shims. So, almost any shop can tell you what the caster and camber is and set the toe. Good luck!
BTW: With the crowned roads of the Northeast, more caster is added to the one side of the vehicle than the other side…makes the car track straight on the crowned roads. That’s almost impossible with these beam front ends.
December 13, 2010 at 7:27 pm #243077Good to know.
December 22, 2010 at 9:51 pm #243078Slowly but surely making progress on the beam. Turns out I had the last upper arm in wrong–off by about five degrees. Not sure how the leaves got in it that way, but when I went to tighten everything up the other day, noticed the grub screw on that one was out about a quarter inch. And the arm was turned just a bit tighter–closer to the lower arm–than the one on the other side. Took the 5-lb sledge to get it off. It went back on with no hammer required, and the leaves looked fine. The grub screw tightened right in the hole.
I cleaned everything up and painted it, including the sway bar. The sway bar bushings look fine. Not replacing those.

So the big holdup has been the rust repair on the frame head. Still not welding (and not wanting to warp the cradles) I decided to do the whole thing with JB Weld and bits of cut stock. All you guys who know what you’re doing are going to laugh at this, so consider the following photos as a comic interlude:

first, bend a bit of metal to conform to the missing shape.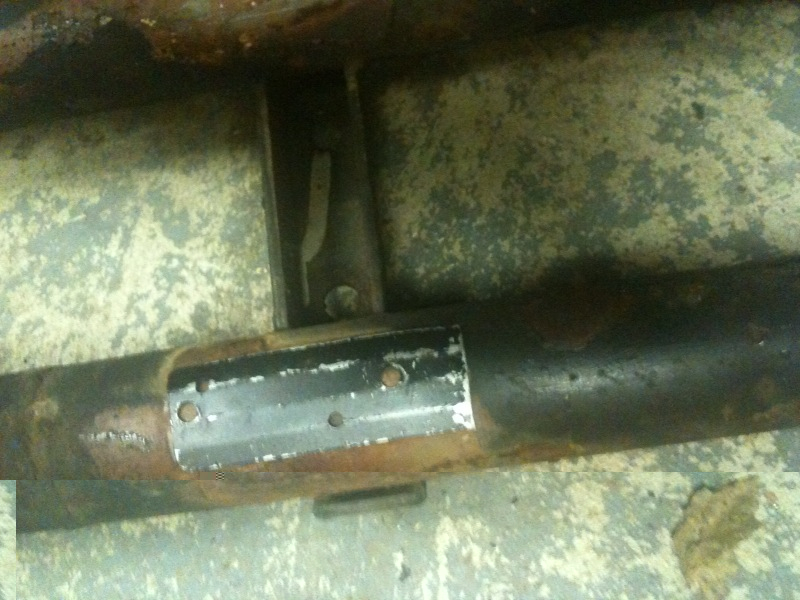
that’s abut right. Next, cut it to fit the hole:
Then, fashion a mechanical system to hold it in place from the front:
…and install: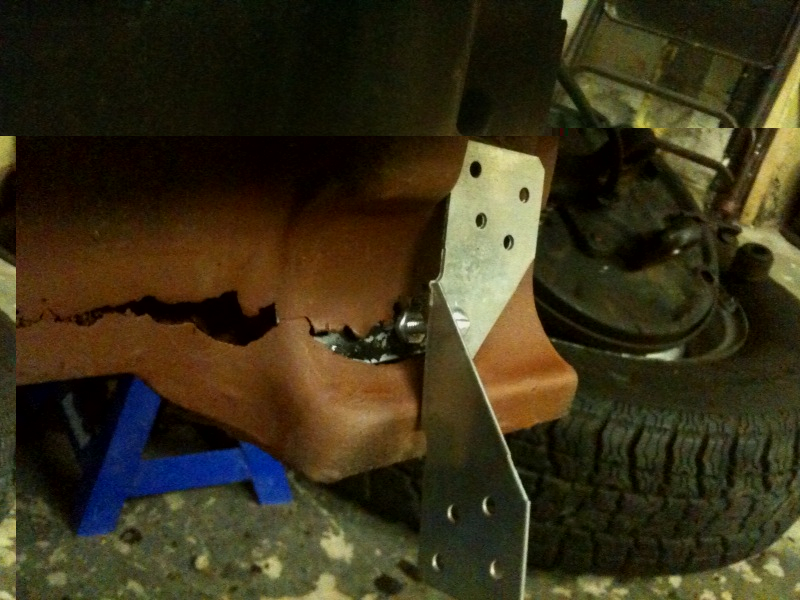
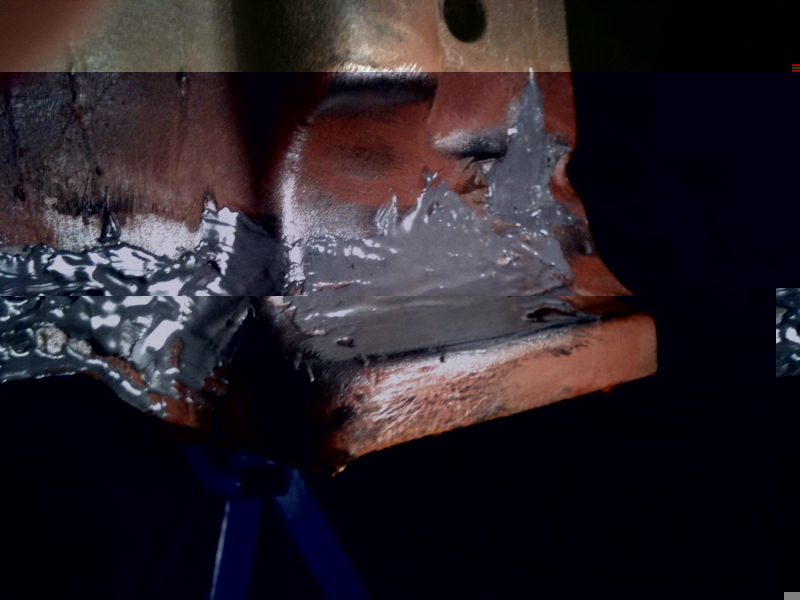
don’t weld it…JB it:

…rinse…
…and repeat. Ad infinitum. Particularly when the shop temp is about 35 degrees. So the stuff slumps something awful & takes 12 hours to get hard enough to sand or shape….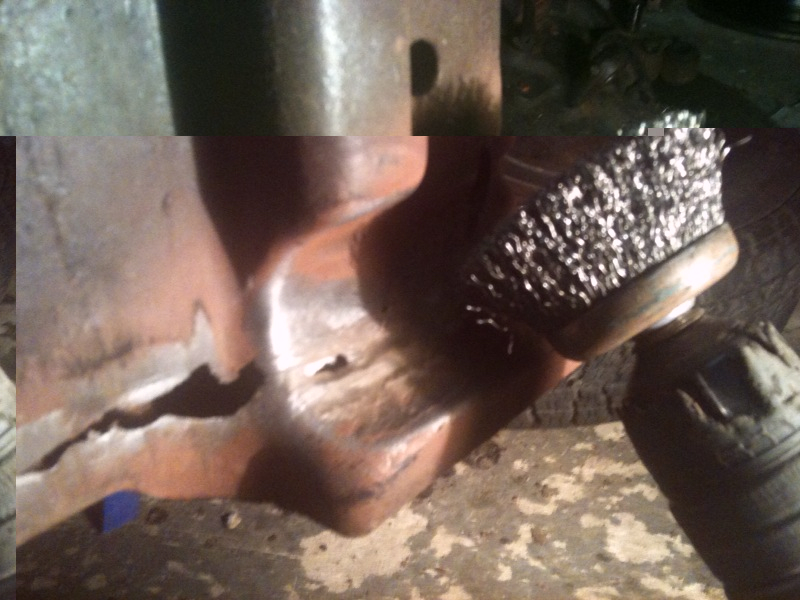

Just keep gluing in little pieces.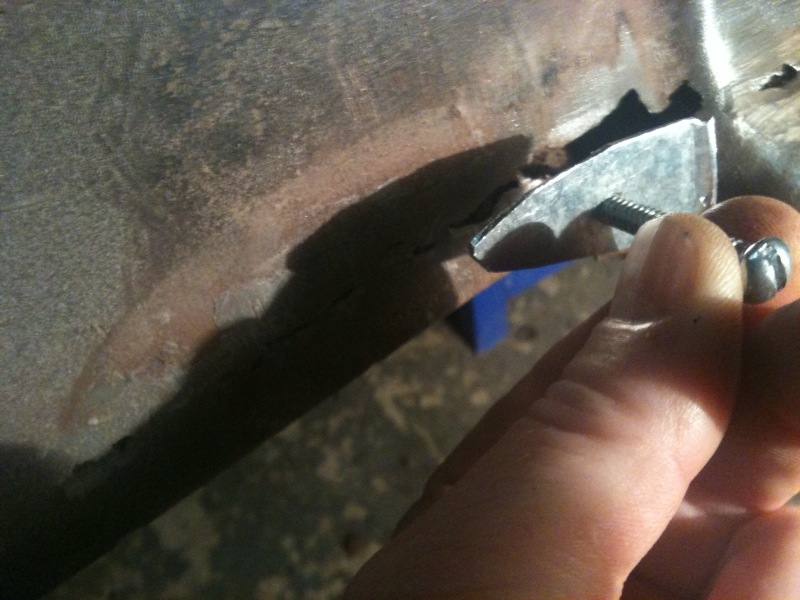
…and more little pieces…
…and yet other little pieces…
See? Told you it was funny:

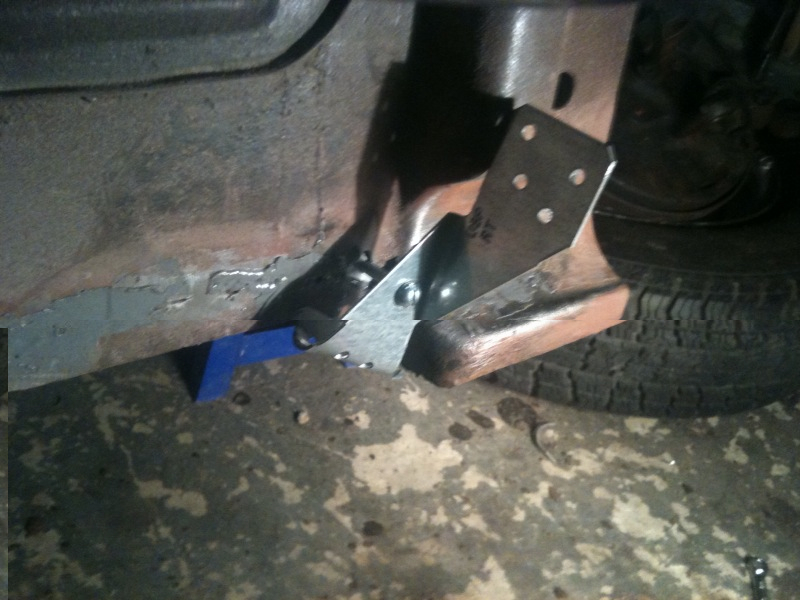
Eventually got around to trying to remove the runny epoxy so that the shims could fit where the beam used to–without being out on one side or the other. I ground it away with the wire brush and then went to the hand rasp:

This was earlier today. Before breakfast. Needed one more coat of JB.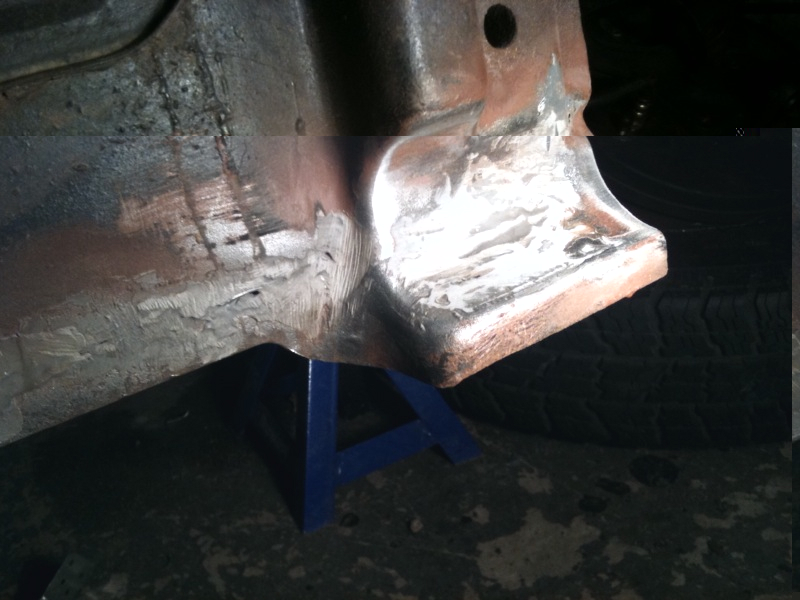
By this time I’d taken to mixing it in the kitchen and applying it to cold metal, then waiting two or three hours before putting a 75-watt incandescent bulb up close to it. That got the setting time down to about 12 hours. Which brings me up to an hour ago:
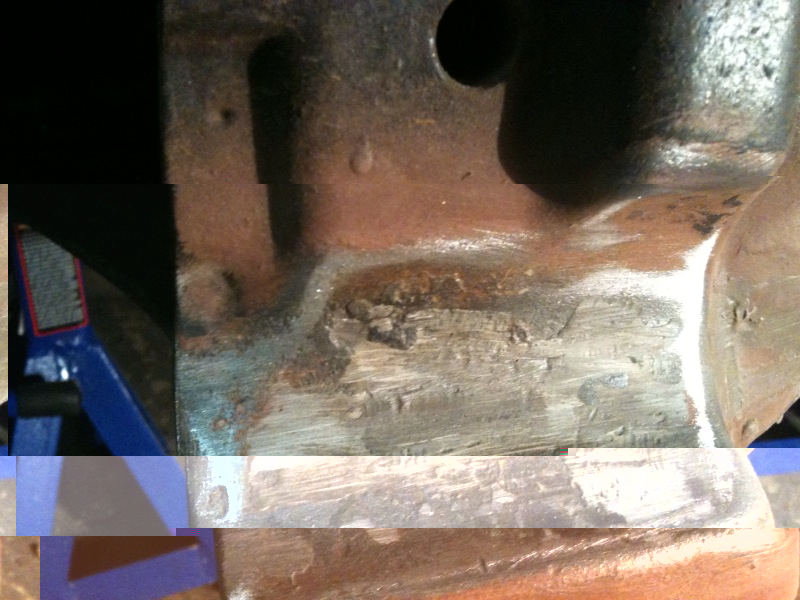
Tested again with the shims. Got ’em so they weren’t rocking and so that original metal was showing on at least three points. Then shot it over and under with frame epoxy.
My daddy’s probably turning over in his grave–not just cause I did it this way, but cause I then admitted it. But turns out I’m not alone. Found quite several other internet boasts and brags about using various epoxies in place of welds, particularly on non-stressed members (these breaks appeared to be thin metal “skin” between beefier, and less rusty structural stuff).So would I recommend this to anyone else?
Nope. Took all week. Welding, by a competent pro, would’ve taken about two hours, I’ll guess. Filling with a real body filler (All Metal, for example) would’ve been easier on the knees and looked better in the end.
Still, at 3940 psi tensile strength, and about $6 for the tube(s), JB Weld gave pretty good bang for the buck. And since I also plugged up the little hole underneath this repair (which apparently allowed all the rust-making moisture in), I’m hoping I won’t soon have to go buy one of these & take the body off the car to do the job “right.”
December 22, 2010 at 11:21 pm #243079Ed, Way to go man. I’m pretty sure that fix will hold on pride alone. Makes me proud to be along for the ride.
January 24, 2011 at 8:43 pm #243080Update: beam is back in. Had to tie off the steering box and curl/press the assembled beam into place. Some of you know I’m a little guy and sit at a desk for a living & so this was not as much fun as I had hoped.

But, after a couple hours wrestling with it, there it is.

The problem then? Ball joint boots = NG. Can’t believe I didn’t notice I’d ripped them all up–or maybe they already had rips.
Not wanting to replace the ball joints (needs like a 40 ton press) and having noticed zero shimmy or looseness in the front end previously I just ordered new boots.

So, this Sunday, shop temp 30 degrees. Lit the propane heater and got the new ball joint boots installed and fingers crossed. Shop temp at the end of the hour: 43 degrees.

Ordered tie rod ends too, cause, what the hell…
Someday this simple little weekend job is gonna end.
January 24, 2011 at 9:29 pm #243081Ed, Thanks for the photos and job description. These jobs seldom turn out to be easy, but you hung in there and got her done even tho you had to shed blood to finish the project. That always adds value and a personal touch to the completed task.
January 25, 2011 at 5:15 pm #243082What a great job of documenting this job!
My young friend did it on his first car and commented that it was a PITA and there was LOTS of grease!
I was going to raise my front end an inch or 2, but after seeing what you went through I’ll be happy with the way it is.
I reversed or “flipped” my tie rod ends to improve the geometry and give me more upward travel without the tie rods hitting the body and that helped a lot.
I also put gas shocks on the rear (a great big no-no) and got an inch more travel. The rear was bottoming out a lot giving a rough ride. It’s much better now.
Thanks for all the info!
chuck
January 25, 2011 at 10:43 pm #243083Ed,
Nice work and congrats. You are going to be very happy with all the improvements you’ve made.
Craigo
February 5, 2011 at 9:14 pm #243084Back at it today, 4 p.m. Temp in the garage a balmy

40 degrees F. Decided it was time to do the tie rod ends:
Went surprisingly smoove. Here’s the driver’s side:

Original stuff, looks like, and plenny of play in them both, along with the torn boots. I measured the full length of it and then made the new one almost an eighth longer, on account of when I had the tires on, they looked like the fronts of the tires were out way farther than the backs. I’ll do a quick & dirty toe-in of them later.
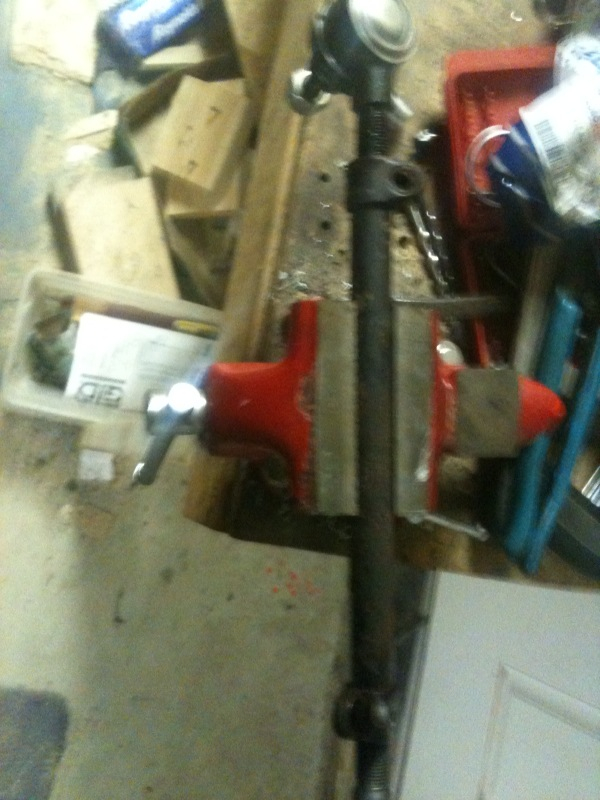


Passenger side–piece of cake. But bigger.


Whole thing went so fast I had time to pop the swaybar back on as well…


progress…
February 6, 2011 at 1:51 am #243085I helped do one of these several years ago with a buddy on his bug. My biggest memory of it was it was not fun at all and before we was done we was wondering what we had got ourselves into and why we had done so. Job well done I know guys that turn a wrench regularly and they would shy away from what you just acomplished. I don’t know that I have ever used J-B but it looks to me that it worked, what a way to think outside of the box.
February 6, 2011 at 9:40 am #243086Thanks, Duck. Yeah, the “rust repair” is an embarrassment. I may have bought myself a year or two with it, but really what needs to happen–and I should’ve figured this out this before I bought the car–is the body’s got to come off the pan and the pan has to be re-done with new metal. Most everything up front there is questionable, at best, with bits of fiberglas mat peeling off here and there. You know what’s gotta be underneath that.

Both floor pans are ‘glassed from below as well.
When I saw it the seller was like, “this looks like a fiberglass pan but don’t worry, it’s metal and it passed inspection.”
I’m the son of a body & fender guy and I take the guy’s word without stopping to consider the scenario or asking any questions.

Doofus!
Anyway, with any luck & good weather Bridget will have a viable suspension & good brakes this season, plus a nifty re-done dash. She’ll look wonderful. It’ll be our little secret that she’s a total rust bucket.
Unless she breaks in half on the cruise to Carlisle or something!
February 6, 2011 at 1:13 pm #243087Don’t worry Ed.
It is highly unlikely that she’ll break in half.
The center tunnel is a strong back-bone and can hold the car together.
Now, the front end may fall off, like happened to a friend’s Type 1 when I was in high school.
Or your feet may drop through the floor pan (wear old shoes!).
But she won’t snap in half!
And don’t bother to thank me! I’m glad to offer encouragement and support!

PMOSSBERG40580.5514930556
Paul Mossberg
Former Owner of a 1981 Classic Roadsters Ltd. Duchess (VW)
2005 Intermeccanica RoadsterIf you own a TDr and are not in the Registry, please go to https://tdreplica.com/forums/topic/mg-td-replica-registry/ and register (you need to copy and paste the link)
February 6, 2011 at 3:38 pm #243088HAR!
I was shocked to find my toe-in guess when I put the new tie rod ends
on was spot-on. She was an eighth toed in, according to my trusty
sticks, no adjustment needed……of the toe-in anyway. Looks like I somehow got positive camber on at least the driver’s side. Very hard to measure this using my iPhone level though… So I will be turning her over to an alignment shop come spring.
At least I got the beam all done and, dang, that bugger was a lot more pliable, spring-wise.
Was, I say, until I bolted the shocks back in & took her for a ride today. All that work. Turns out the shocks are bottoming.
The friggin’ shocks are bottoming out! Means they been doing that the whole time I’ve had the car. Means maybe what I thought was way-too-hard spring rates were, quite possibly, way-too-hard non-springs ’cause the shocks were at full inward travel and so my suspension, at the extreme, consisted of the rubber shock bushings squirming under their keepers. That’s gotta be good for, what, a quarter inch of travel? Three-eighths, maybe?
Ordered new shocks–shorter versions from Cip1. Excellent fun I’m having here.
At least I got to drive her around the block.
–Hey and BTW, anyone go with a narrowed beam in these? I almost went for the 2-inch narrowed from Cip1 before I bought the stock beam. Sort of wish I had, as my driver’s front wheel is just proud of the fender. An inch less width would make it look almost right.
The real correct look, though, would be a 3 or 4-inch narrowed beam, which would just about center the tires neath the fenders. Four inches would nicely snug the shock mounts up under the inside of the fenders as well. I’m thinking three inch narrow with drums or four inch with front disks would be the ticket for these cars. Or for mine, anyway.
Too late now, for me.
Anyone have any experience with the narrowed beams?
-
AuthorPosts
- You must be logged in to reply to this topic.