Home › Forums › MGTD Kit Cars › My Project › Another project reported
- This topic has 224 replies, 22 voices, and was last updated 13 years, 6 months ago by
 ray10.
-
AuthorPosts
-
February 28, 2012 at 8:22 pm #244717
This is a real rod, Scott. Nice job. Keep going!
February 28, 2012 at 8:28 pm #244718ScottGood Idea on West Marine Brightside paint.. but I know from experience(X WM Store Mgr) that the paint cost more than $50. hahahagreat job!February 28, 2012 at 9:09 pm #244719Man you been bussssy!!!!! It looks like it shined up nice? Cuirious as to how many coats of paint do you need to put on it ?
I have seen several sites that claim you can paint a car with Rustolum paint . Yes I did part of a chevy truck that I have and it cost about 50.00 dollars just for the paint and materials (I painted the front cab area and the fenders.) It shinned up nice ,not sure how it will last. Just wanted to see what would happen, I use it on equipment all the time to clean them up.TDREPLICA Map
http://www.arcgis.com/home/webmap/viewer.html?webmap=7f9174ad614e43b680deba085b0abf48
February 28, 2012 at 11:45 pm #244720For the people that think that I’m nuts for painting a car with rustolium, Check this out
by the way yes i’m nuts but nut crazy yet. (wife and kids are working on that.)also I sprayed it ,I didn’t roll it, didn’t like the finnishray102012-02-28 23:50:14
TDREPLICA Map
http://www.arcgis.com/home/webmap/viewer.html?webmap=7f9174ad614e43b680deba085b0abf48
February 29, 2012 at 4:10 am #244721Anonymous
Inactive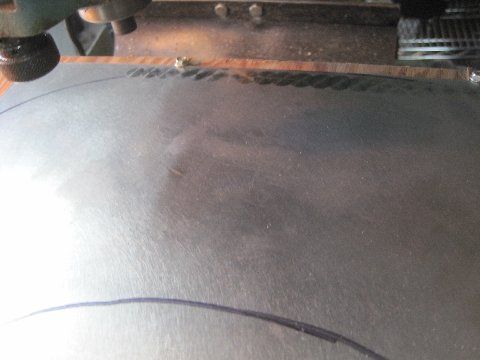
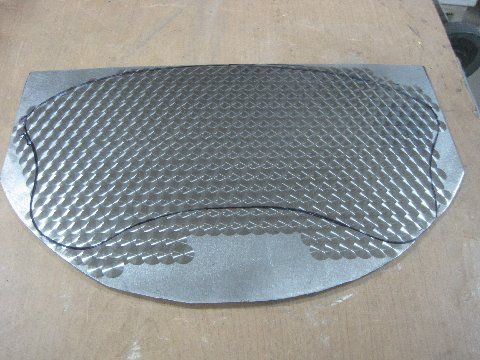
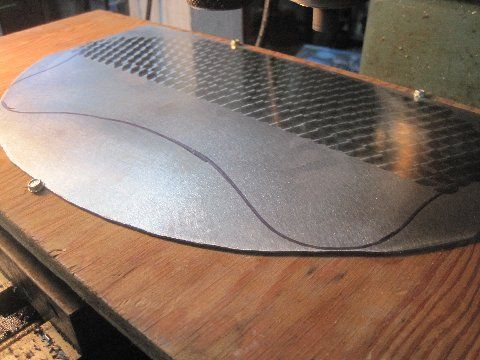
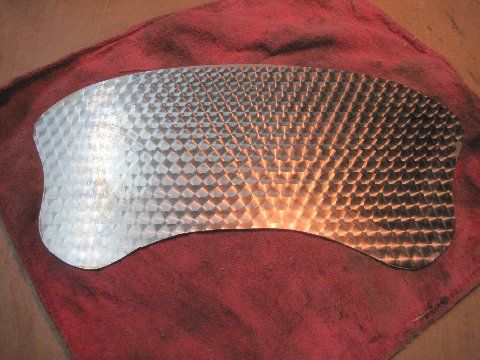
Anyone recognize the transmission tunnel cutout piece from the firewall? This piece of stainless was left over from making the firewall. Oh what could we do with that? Another bucket list item, “Engine Turning.” This process is similar to polishing an aluminum intake manifold, once started you probably think, “once is enough.” Figure I would pretty up the dash a bit with an engine turned stainless insert. Fill work waiting for warmer painting temps.
Chucked up a 1/2″ diameter Cratex rubberized abrasive stick in a bench mill. Mounted the metal on a sheet of plywood for support. Started in the upper left corner and made contact. This produces a 1/2″ swirl like mark. Cranked the mill feed handle 4 revs and made another swirl slightly overlapping the first swirl. Cranked the feed handle 4 revs and made another. Repeat several hundred times.This insert will be left to finish when the dash is finished so the right number of holes can be made in the right places.February 29, 2012 at 4:45 am #244722I know what I like. That engine turned stainless is beautiful.
February 29, 2012 at 5:09 am #244723Anonymous
InactiveRay Thanks for the input. The Brightside paint was $44 a quart. Roll and tip application there is no over spray loss. You do lose some though sanding between coats. I only have one coat on waiting for warmer weather. Its cold in Nor Cal with threats of rain. Interlux says humidity will make permanent cloudy condition on the glossy ness of their paint. Seems like wait and see on number of coats. Most said two coats, some said three.February 29, 2012 at 8:10 am #244724Very nice, Scott. Love the engine turn insert. Some guys go with the whole dash and I think it’s a bit too much. You got taste.
And Ray! Kudos on that Corvair. That looks like it was painted by a pro.
Neighbors of mine Rustoleum’d their ’65 Nova wagon when I was a kid. Family affair; the kids helped. It was a brush job and looked it. Kind of a cool look, really. They arranged the brush marks more or less symmetrically.
Theirs could never pass like what you guys did though. I am intrigued.
February 29, 2012 at 3:56 pm #244725Anonymous
Inactive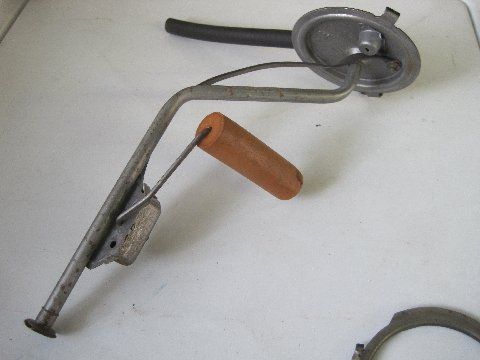
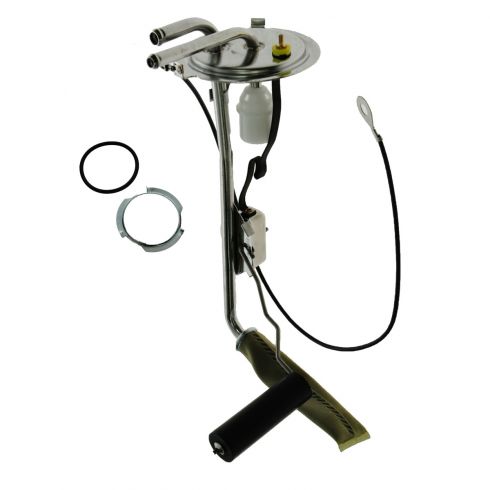
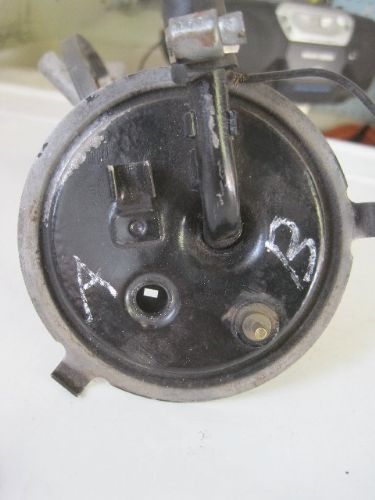 Getting ready to run fuel and brake lines. Pulled fuel pick up/sending unit from what I imagine is a Chevette fuel tank. In the second picture the “A” hole is missing something. Maybe just a vent? There is a clip next to the hole, like another hose went to it. Anyone got a picture? Also is there supposed to be a screen at the bottom of the fuel pick up inside the tank. Picture?I have the Haynes and Chilton Chevette books and neither has this info. Yikes!February 29, 2012 at 5:00 pm #244726
Did some searching around and cannot find a Chevette sending unit.
But parts like this are often used across vehicle lines. And a pickup/sending unit for an early 70’s Chevy truck shows two lines coming out the top.I suspect one line is the vent line.And I’m almost certain you should have a filter sock for the pickup tube. Every Chevy pickup I saw did.PMOSSBERG2012-02-29 17:06:48
Paul Mossberg
Former Owner of a 1981 Classic Roadsters Ltd. Duchess (VW)
2005 Intermeccanica RoadsterIf you own a TDr and are not in the Registry, please go to https://tdreplica.com/forums/topic/mg-td-replica-registry/ and register (you need to copy and paste the link)
February 29, 2012 at 6:43 pm #244727Nice work!!
I painted my headlight domes with Rustoleum and they came out great but not sure how long they will last. I’m going to spay the body with epoxy because my son has access to a spray booth. If that wasn’t the case I was going to roll it on and work it til it shined. So it’s cool to see someone take that approach.
Keep up the good work. I’m watching and learning
February 29, 2012 at 7:17 pm #244728Anonymous
InactivePaulThank you, thank you thank you! This stuff is crazy making when you have never seen it before and can’t find a sample of what SHOULD be there. That picture is exactly what I need. I can now start my had lines for fuel. ScottFebruary 29, 2012 at 9:11 pm #244729On my TD I have the chevette gas tank with the same fuel sender unit .one is fuel the other is a vent line ,that’s the good news . the bad news is that they(Chevy) stop making the sender units and all replacement parts . I got lucky with the dutches ,when we got it the fuel sender didn’t work ,but i had bought a parts car for my other TD so i swaped it out. And yes I spent a week trying to find a new one . even tried Rickdrake the chevette man . one more thing yes their should be a screen on the bottom ,e-bay has them.but no replacement parts.
one more thing you should have a ground wire on it too. ray102012-02-29 21:13:32
TDREPLICA Map
http://www.arcgis.com/home/webmap/viewer.html?webmap=7f9174ad614e43b680deba085b0abf48
February 29, 2012 at 11:31 pm #244730Scott,
I would take some measurements and see if one of the Chevy truck sending units could be adapted to fit.
The hole size and spacing on the nuts, I could almost guarantee, will be correct.
And I’m equally sure the ohm rating on the truck unit will be the same. There’s no reason for Chevy to make those different across models.
Not sure about the Chevy, but on a VW the sending unit grounds to the tank itself. The only wire is the hot wire, and of course the wire to the fuel gauge.
Back to the sending unit…a funny story about parts interchangeability….
I have a ’65 Plymouth Satellite. I wanted to install an original windshield washer tank and pump.
If you can find one, the pump for a ’65 Plymouth sells for around $100 to $150…for a REPRODUCTION!
However, you can buy a repro washer pump for a late 1950’s Ford pick-up truck for about $35.
And guess what? SAME PART!
So take a look at other Chevy sending units. You may be surprised.
Paul Mossberg
Former Owner of a 1981 Classic Roadsters Ltd. Duchess (VW)
2005 Intermeccanica RoadsterIf you own a TDr and are not in the Registry, please go to https://tdreplica.com/forums/topic/mg-td-replica-registry/ and register (you need to copy and paste the link)
March 1, 2012 at 1:01 am #244731Anonymous
InactivePaulThanks for the input. There is a Chevy guy locally I can check with. I had a 65 Satellite with 318. Remember it as trouble free. Your washer story rings a bell. Knowledge is power and can save $$$$.March 1, 2012 at 11:29 am #244732That’s what I have. 1965 Satellite convertible, 318 poly, 727 auto trans.
I can almost keep the TD in the trunk for emergencies!Paul Mossberg
Former Owner of a 1981 Classic Roadsters Ltd. Duchess (VW)
2005 Intermeccanica RoadsterIf you own a TDr and are not in the Registry, please go to https://tdreplica.com/forums/topic/mg-td-replica-registry/ and register (you need to copy and paste the link)
March 1, 2012 at 6:59 pm #244733Anonymous
Inactive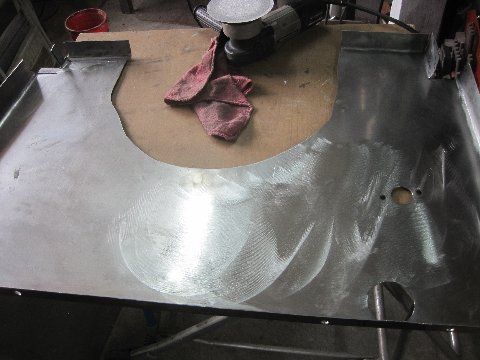
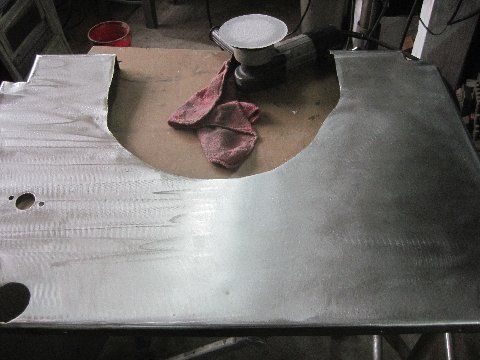 @
@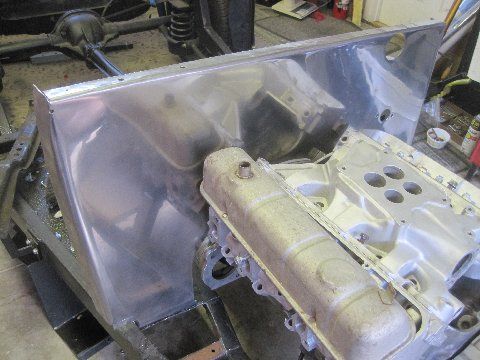 While waiting for painting weather, took some time to clean up the stainless firewall. The steel had some deep scratches in it and it had been outside for some time. Guess this would qualify as a clean firewall. Why do grown men do stuff like this?March 2, 2012 at 9:44 am #244734
Love seeing the progress!
How many hours will it take to engine turn the firewall?
PMOSSBERG2012-03-02 09:44:48
Paul Mossberg
Former Owner of a 1981 Classic Roadsters Ltd. Duchess (VW)
2005 Intermeccanica RoadsterIf you own a TDr and are not in the Registry, please go to https://tdreplica.com/forums/topic/mg-td-replica-registry/ and register (you need to copy and paste the link)
March 2, 2012 at 10:58 am #244735Anonymous
InactiveNot hours—days. Think I will pass on that one. Supposed to get painting weather the next two days. Just maybe slap some more paint on.Brake hoses came in three days from Rockauto.com. About half what Autozone charges. If the paint doesn’t happen then the brake lines should. Have to learn how to double flare brake lines.Back to school!March 2, 2012 at 8:17 pm #244736Anonymous
Inactive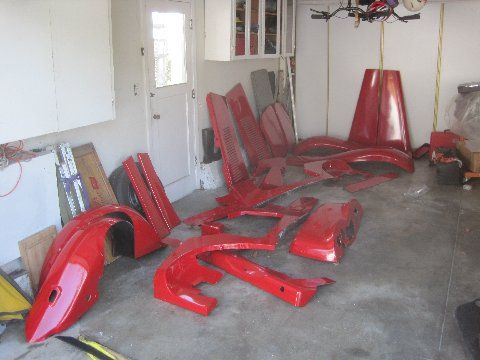
 March 2, 2012 at 8:24 pm #244737
Anonymous
Inactive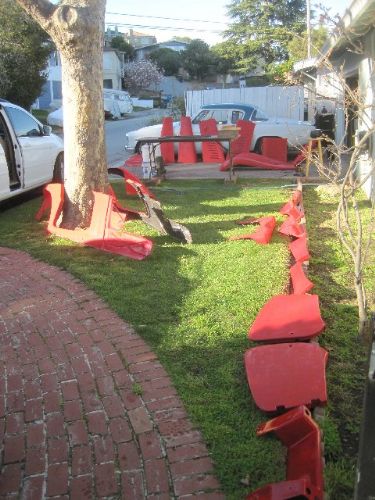
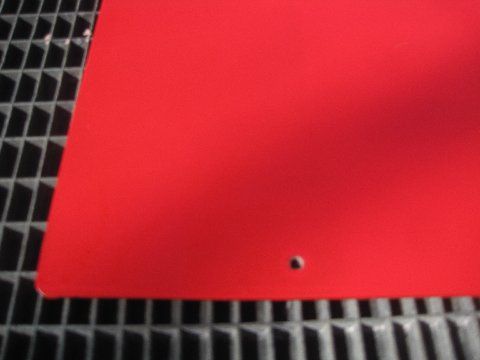
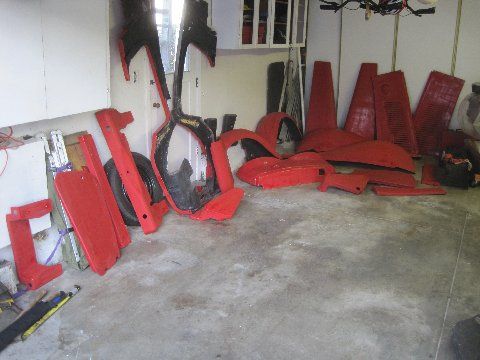 With the promise of painting weather tomorrow everyone got sanded with 320 grit. First picture previous post is glossy 1st coat. Second was an effort to show a close up of first coat. Directly above this post is the wet sanding station in the front yard. 54 Stude. Lastly the dull pieces back in the garage waiting for their second coat tomorrow. Some say two coats, some say three. Wait and see.March 3, 2012 at 7:39 pm #244738
Anonymous
InactiveNo pictures today. Got all the fiberglass painted with the second coat. Had to buy the second quart of Interlux Briteside $44. The second quart of paint seemed much thinner than the first and I will be anxious to see the coverage tomorrow when dry. Blew out the garage with the leaf blower and set a box fan with furnace filter in the garage window. Just cracked the garage door for exhaust. Seems to have cut the dust factor out. Weather tomorrow supposed to be painting weather if 3rd coat required. Have to wait and see tomorrow.March 3, 2012 at 10:26 pm #244739Scott, I just went back and reread this whole build thread. What a spectacular learning/teaching experience. I am inspired, and also in awe.
Thanks for posting all this brilliant detail.
March 6, 2012 at 10:31 am #244740Anonymous
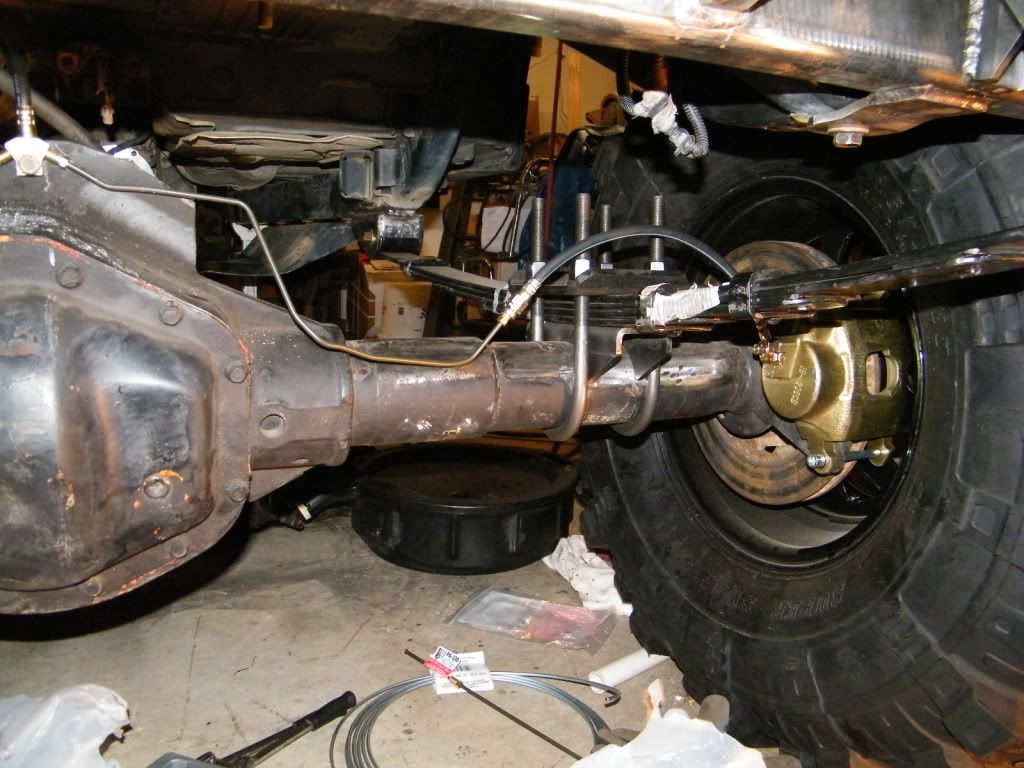
InactiveStarting to run the brake lines. The Chevette rear end has a hard brake line coming from both backing plates toward the center. (I have to guess as they are missing.) Somewhere they must meet and transition into a single rubber line that allows the rear end to move up and down and still be hooked up to the brake system that runs forward to the master cylinder. I guess it would involve some kind of block with three connections, two from the backing plates and one for the rubber flexible hose.HELP REQUESTED. I have two manuals and neither shows this detail. If someone could take a picture of this three way connection I would know what I am missing and where it goes. BIG thanks in advance for help.March 6, 2012 at 11:49 am #244741The owner of this picture says it is a Chevette rear, despite those big tires. Looks like rubber lines to the drums, and a three way block at the top of the rear end, with a rubber line going into the top:
Paul Mossberg
Former Owner of a 1981 Classic Roadsters Ltd. Duchess (VW)
2005 Intermeccanica RoadsterIf you own a TDr and are not in the Registry, please go to https://tdreplica.com/forums/topic/mg-td-replica-registry/ and register (you need to copy and paste the link)
-
AuthorPosts
- You must be logged in to reply to this topic.

