
Home › Forums › MGTD Kit Cars › My Project › Phoenix… my revival project
- This topic has 105 replies, 12 voices, and was last updated 10 years, 3 months ago by
 KentT.
-
AuthorPosts
-
February 26, 2016 at 7:34 pm #255996
Oh, I’ve repaired far worse rot, but was typically limited to the battery area.
If this were a Bug, it would be far easier to repair. But since the narrower TDr front, from about the front of the door opening, sits inboard of the original mounting flanges, piecing in large sections of pan is not a good option. The remaining metal is so thin in spots that welding in pieces would be a challenge – you’d likely burn through, since you’d be butt-welding. The only way to do it right is to completely remove the body and weld in complete new floorpans. That is likely close to a $1000 repair (and a couple month setback/delay in ever getting this thing on the road.)
Surprisingly there’s only one hole on the passenger’s side and it should be easy to patch. Then coat that whole side. The driver’s side, in front of where the TDr seat mounted, is much thinner with more holes. I’ll need to add a layer of fiberglass cloth over a much larger area. I think I can make a repair that will last several years, at least. I’m not concerned about structural rigidity, because I’m going to go ahead and install the frame stiffeners I ordered long ago, and coat them while I’m working underneath it. That, plus the 1.5″ steel tube under the seat mounts reduces any concern over the weaker pan.
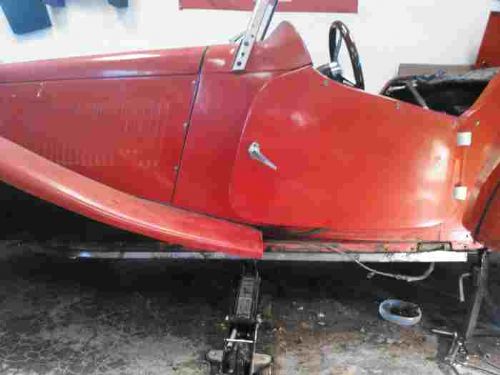
KentT2016-02-27 08:36:48Early FF TDr on 69 VW pan
Slowly coming back from the ashes...February 26, 2016 at 9:03 pm #255997I’ll be very keen to hear how that frame-stiffener install goes.
February 27, 2016 at 6:59 am #255998I’m interested on hearing about the frame-stiffener install too. I’ve been thinking about doing it too.
Vicenç - (bee sense)
Pembroke Pines, FL
1986 Aston - BCW Model 52 - "Montse II"(1983 FiberFab MiGi II - "Montse")
February 28, 2016 at 1:17 pm #255999First trial fit of a frame stiffener, as I try to get everything ready to start the POR 15 cleaning and prepping process. I want to coat the stiffeners before installing them, then topcoat once installed.
First, a bottom view of the front of a stiffener. They are 1″ x 3″ tubing preshaped and predrilled. The two holes on the left are for bolting up underneath the very front of the floorpan, using the existing holes. All other holes are also predrilled to align with the original VW body mounting locations.

This is a view of the provided long Allen head capscrews and the machined aluminum inserts.
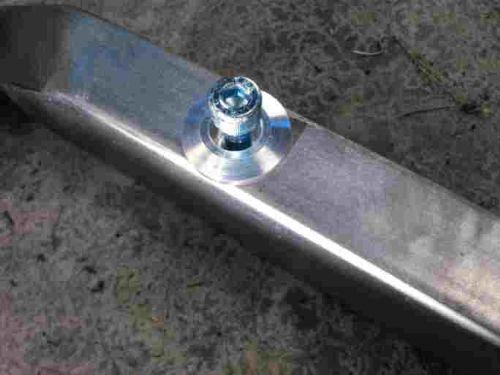
The holes on the bottom of the stiffener are much larger than the ones on top, for using those aluminum inserts that serve as a washer, recess the capscrews, and help prevent collapsing the tubing when you bolt it in.

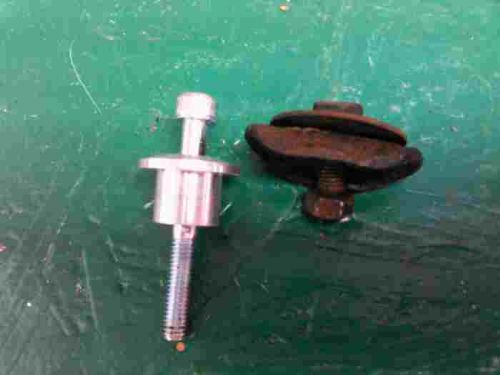
A comparison of the provided capscrews and the original VW mounting bolts and hardware.
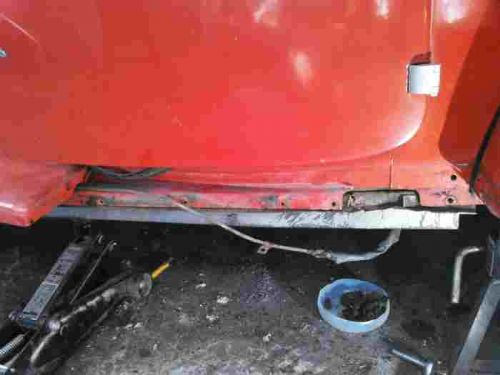
The OB had not removed my original VW jackpoints from the pan, so I had to remove the running boards and cut those out. Removing the running boards was by far the hardest part of the chore so far, because the OB used 1/4″ SAE bolts that were so close to the ends/top of the running board that it was difficult to get a socket or boxed end wrench on them, and so rusted that they didn’t want to come apart. Even after soaking in both PB Blaster and Kroil, some twisted off, and I had to cut two off…
Note that the TDr tub flange had been trimmed to go around the jackpoints. The jackpoints MUST be removed to install these stiffeners, since they bridge the channel that the stiffener recesses into. (My pan shows the typical stress cracks and rust on these jackpoints, and will be treated with POR 15.)
Most importantly, note that the OB did not reuse the original VW mounting bolts in this area underneath the door openings. (There’s no access from the top, with the running boards installed.) Instead, he used five large hex-head sheet metal screws that screwed through the face of the tub flange onto the frame rail of the pan. You can see the holes where I removed them. This was likely done because the running boards were installed before the body was set on the pan initially. Looking closely, I can for sure use one more of the original mounting holes on the left, the capscrews provided with the stiffener, and put a fender washer and nut on top. On my old Fiberfab kit, I can access the top of the rearmost mounting hole from the back, in front of the torsion bar tube. That will allow me to put a nut and fender washer on top there. That leaves only two original VW body mounting holes that don’t have good access from the top. I MAY be able to use one more toward the left (third one from the rear), but there is not enough flat surface on the tub’s flange to use a large flat-washer. My current plan is to not cut access holes into the fiberglass tub for either of those two mounting bolts – but instead to install new, longer hex-head self-tapping sheet metal screws into the face of the mounting flange (after drilling pilot holes) where the OB had used them originally, screwing through the fiberglass flange and the side of the channel in the pan, and into these new stiffeners.
Note that the details of your specific kit and the builder’s methods will determine how easily you could install these stiffeners on your TDr. I found only about six small sheet metal screws on mine that had been screwed down from the top into the channel where this stiffener mounts. I think they likely were just to keep the body/pan gasket in place while mounting the body onto the pan. (1) There’s no access from the top once the body is on, here at the rear of the door, (2) they were too small in diameter to really hold anything, and (3) they were not limited to just this blind access area, but were widely spaced all the way from front to back.
I simply ground the protruding ends of those small sheet metal screws off flush with the bottom of the channel in the floorpan. The details of your TDr may and likely will vary…
Here’s a front view of the test fit, without forcing the stiffener up into the channel. There’s still dirt, grime and undercoating that’s preventing it from going all the way up and in. There was some slight bending of the edge of the channel at the jackpoint that also was preventing that. This was just to see how the holes lined up (they do). The stiffener still needs to go on up at least 3/4″ into the channel, but I didn’t want to jack/bang it in and then have to remove it. So, I’ll clean the channel and coat it, while coating the stiffener before final installation.
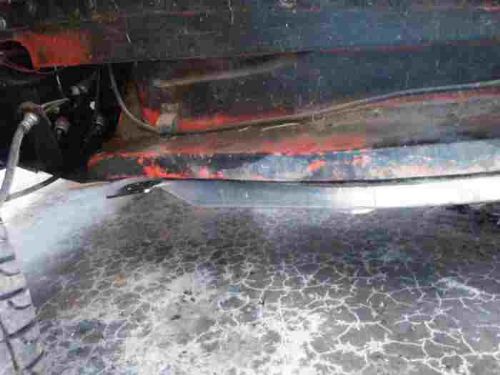
Wide angle view of the test-fit. There will be about 1.5″ of the stiffener visibile, oncee finally installed, and much of that will be hidden underneath the running boards.
Will likely tack weld on a small pieces of plate to cover each the two bottom mounting holes that I won’t be using (where I’ll be screwing into the face instead), to prevent water/crud from getting inside the stiffeners. That would be more permanent, and less likely to leak than trying to JB Weld the aluminum inserts in to plug the holes. I’ve never seen sheet metal screws with Allen-heads, but that would be an option also.
Now, onto the other side… Just thought I’d post this update since a couple of you voiced interest in these stiffeners. Unfortunately I won’t be able to provide before/after driving impressions, since there won’t be any before for me — I’ve yet to drive it under its own power…
KentT2016-02-28 13:25:25
Early FF TDr on 69 VW pan
Slowly coming back from the ashes...February 28, 2016 at 6:38 pm #256000Very helpful post!
February 28, 2016 at 8:00 pm #256001edsnova wrote:Very helpful post!Thanks! If you have any specific questions, just ask, and I’ll do my best to illustrate with a pic or answer your question.KentT2016-02-28 22:22:10
Early FF TDr on 69 VW pan
Slowly coming back from the ashes... -
AuthorPosts
- You must be logged in to reply to this topic.