
Home › Forums › General Discussion › Spyder work
Tagged: Answer
- This topic has 125 replies, 12 voices, and was last updated 5 years, 3 months ago by
 Paul Mossberg.
-
AuthorPosts
-
November 22, 2017 at 9:25 pm #304318
Swept out the garage and took Spydy off the lift because my neighbor wants to use it.
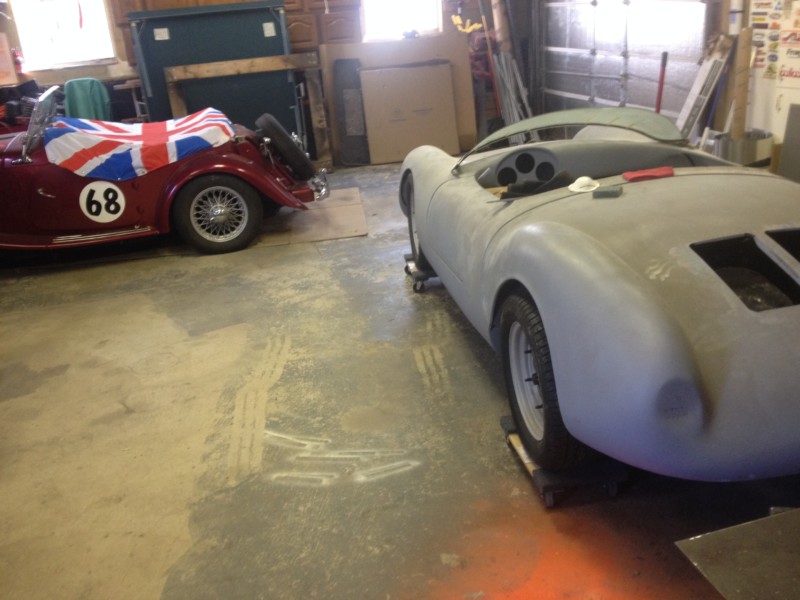
Gonna be working up front, finishing the horn mounts, welding in the frame extensions (probably weld in the rear jack points too) and then the air box for the oil cooler.
After that: more aluminum! Floor, firewall, wheel wells, inner door panels—all that jazz.
I found a big piece of what must be 16 gauge stainless sheet in the shed and wondering if that (instead of thin aluminum sheet) ought to be the piece I put under the seats in this car. What’s everyone think of that idea?
November 22, 2017 at 9:47 pm #304320Considerables not considered: Workablity of materials. Originality. Cost. Relative strength. Your penchant for adding lightness.
Stainless Steel wins! (I’m an ardent fan, but I’m a Nuclear Engineer, so that should be expected.)
November 23, 2017 at 7:59 am #304322The whole piece weighs maybe 20 pounds and I’d be using less than half of it. So 10 pounds at the lowest point of the middle of the car.
I’m trying to remove the whole floor to wrap it in aluminum. I’ve drilled out a lot of the rivets but it’s been glued onto the frame tubes with what looks like Liquid Nails, so I’m going to have to slice that free too if I’m to get this all done.
That would allow me to rivet the stainless to the frame tubes as well; that’s the A1 plan. I’d cut the stainless (it’s hard but it’s the same stuff I used for Bridget’s fan shroud; at the time I thought it was aluminum and wondered why it was so hard to work!), rough it on the bottom and then use a marine epoxy to bond it to the fiberglass, then finish the aluminum on the rest and glue and rivet the whole piece back where it was using the same holes.
I’m thinking if I can get the floor off it will give me some nice (temporary) access to the area under the dash, allow me to mount the pedals and do some other work under there as well.
December 3, 2017 at 7:59 pm #304408Jack points welded, horn pockets installed, grill connected, air boxes made, etc.
Wish me luck on the steering column (up soon!), since that seems to be something of an Achilles Heel for members of this group.
December 3, 2017 at 8:50 pm #304409Looking good, Ed.
So much time involved in all that stuff that won’t really be seen. The finished collective should be nice. 👍
Bill Ascheman
Fiberfab Ford
Modified 5.0, 5sp., 4:11
Autocross & Hillclimb
"Drive Happy"December 4, 2017 at 9:03 am #304410Well, stuff in the frunk will be visible whenever the front lid is lifted. (Wait till you see what I do with the gas tank!) Stuff under the clam will be very much on display whenever the back deck’s propped-up, which will be most of the time the car is parked in public.
I am hoping that my attention to detail will be rewarded by the car’s buyer—and by the car itself, which if I’m lucky and fastidious will be relatively easy to sort.
There are important things that will not usually be seen (or noticed), including
Braided-stainless oil lines, front to back, with AN fittings
Full-flowed engine case
Balanced internals
Engle W125 cam; .460 lift/262 duration on 108 degree lobe centers
Erco 3.44 ring & pinion
super diff, hardened keys, welded 3rd and 4th gears
4-wheel disc brakes (hidden by aluminum “drum skins”)
braided nylon wire looms
Battery and fuel cutoff switches in cockpit
etc…
Some of this stuff might be noticed if it were not installed.
December 7, 2017 at 3:22 pm #304426Ed,
Whoever buys your completed Spyder is going to be getting a great car as well as about $386,542.43 worth of “Ed Labor” and about $1,000,000 worth of “Ed love Of Project Perfection”… 🙂
Let mw know when I’ll be able to place my bid…….Happy Jack
December 13, 2017 at 6:04 pm #304466The Spyder gauges came yesterday. 914 units re-done entirely (and at significant expense) by North Hollywood Speedometer. Purely European spec: 250 kph speedometer, oil temperature reading in Celsius. As is correct for Porsche 550-0051.

I agonized about doing this. The kit came with a new set of 356-style Chinese repops, which fit the pre-cut holes in the dash perfectly (while these will require glassing-in and re-cutting).
But the 356 gauges are not-quite-correct. They’re all the same size, for starters (550 tachs were a little bigger). They have those central trim rings that 550s lack. There are no numbers on the oil temperature gauge. And they only go to 130 mph, and 6000 rpm. There are several other subtler differences.
Since I signed-up to do this car maximally (for personal reasons that will, in the fullness of time, likely prove to be a poor business decision), the damn gauges had to be just right. Not my usual “close enough.”
For some reason (probably due to harried pre-layoff work schedule and my general stupidity), I may have instructed the refurbishers, when they called on some deadline-day afternoon, NOT to reset the odometer back to zero on these completely-renewed-with-all-VDO-innerds Porsche clockworks. And so the odo reads 28,277 as delivered. Hmmm.
It is my understanding that 550-0051, upon its early 2000s skin-down overhaul, sported an odometer reading of approximately 22,500.
what to do….
December 13, 2017 at 9:43 pm #304467Hey Ed,
Love the new gauges — the car will definitely warrant the extra effort of glassing in this setup!!
I also like the fact that the odometer shows “actual milage” at the last rebuild. It makes a great way to talk about the car’s pedigree, history, and your restoration/enhancement. Go forward and glass & resin & gel………and forget about that extra work and extra $$ for the gauge rebuild….
Jack
December 23, 2017 at 12:33 pm #304508Long update on the Spyder work. Here we have the tub, aluminum-clad (mostly). Waiting on rivets now and preparing to travel for Christmas. Happy holidays to all!
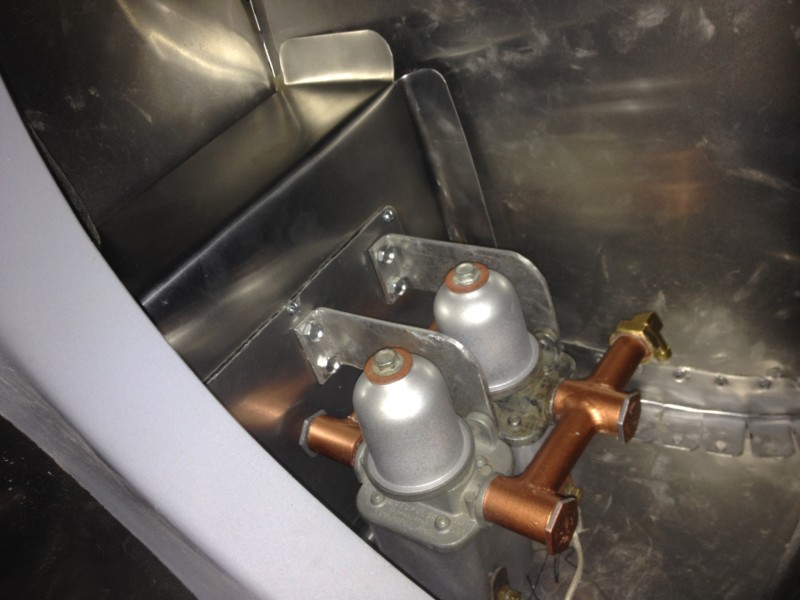
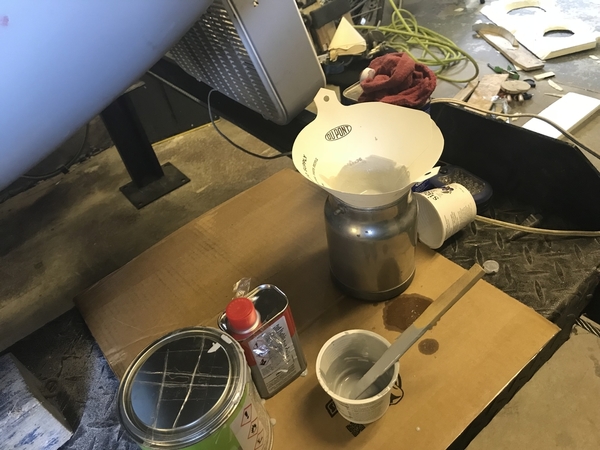
January 13, 2018 at 10:06 pm #304557Spent the past several days making two six-inch long manifolds to link my fuel pumps—which don’t even work and are strictly for looks. Here’s the very long, lavishly-illustrated story of that.
Here’s what we got now:
 February 15, 2018 at 6:43 pm #304630
Aluminum underpan is almost done. The driver’s footwell is removable to facilitate access to the pedal set & under the dash.
 February 25, 2018 at 9:40 pm #304686March 9, 2018 at 9:16 pm #304777
I unpacked the wiring harness last week and started marking the wires to their respective fixtures. I got what I guess is the easy half. Looking for some color-coded early VW wiring diagrams now to aid with the rest. The car came with the early Bug (6-wire) signal switch (which does not have the high beam switch integral). That’s cool; I already bought and installed the foot switch, but it’s just one of many potential differences between the way the car is going to go together and the Thunder Ranch instruction manual/pre-made wire harness. So to avoid mucking too much with that this week I finished off my inner dust shields instead.
The last 20 or so 550s made (and a couple others, most notably 0051, on which I’m basing this build), all had their dust shields connected to the frame.

The inner dust shields are just one more thing you never see on a Spyder replica. I roughed-in the lower parts months ago but because the Thunder Ranch cars have this cross brace between the shock towers, I couldn’t close off the tops properly.

On the originals, the clams close down on them with a bit of rubber gasketry to seal. Like

You see that riveted brace that rolls around the front of the inner fender? Yeah, I couldn’t make that. I tried three times, about four different ways. I thought the bead roller would cinch it, but no way.
And I realized that, even if I could replicate that piece, I’d still be lacking a functional dust shield, since the tops of mine are open to account for the cross brace. Even though the cross brace is non-standard for real 550s, I don’t want to remove it, as it adds rigidity to the rear of the frame. It was a puzzle.
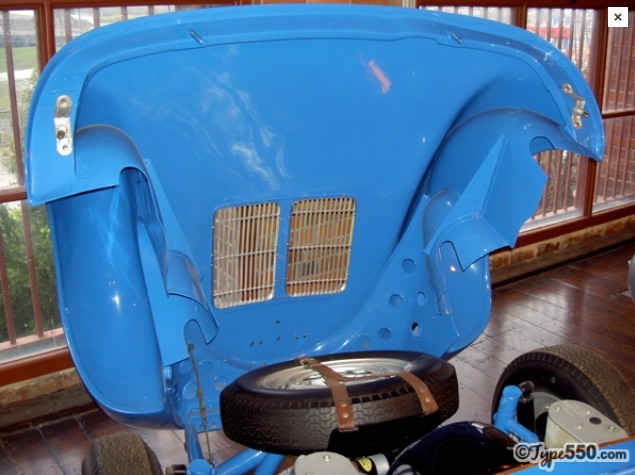
Then I discovered that most of the first 70 or so original Spyders had the full dust shields integrated into the clam, with Jetsons-style aluminum stiffening brace riveted to the inner fender surface. Looked like
The cross brace on my car completely negates this design, since there would have to be a slot all the way up the middle of it. But, I thought: what if I make a hybrid of the early and later cars? And so:


Those cups up top meet with the lower dust shields and cover the gap in the top. A bit of fettling, a little rubber gasketry and it’ll work perfect.

I know it’s the sort of thing a lot of folks won’t notice at all, and it’s now nothing like what any original Spyder came with, but it is in the spirit of the original cars: that is, made of aluminum, with rivets. And it helped me avoid wiring for a couple days, so that’s a bloody win!
March 31, 2018 at 9:58 pm #304822Brake lines are in, clutch lines too. I modded the shifter housing today and set that where it needs to go, along with the e-brake handle, and checked for fit with the seats. This thing will be a car yet.
 April 1, 2018 at 3:39 am #304823
Really looking forward to seeing this in person. Come on, Carlisle!
Bill Ascheman
Fiberfab Ford
Modified 5.0, 5sp., 4:11
Autocross & Hillclimb
"Drive Happy"April 1, 2018 at 8:13 pm #304825Not looking likely at this point. But I’ll keep hustling & maybe get lucky.
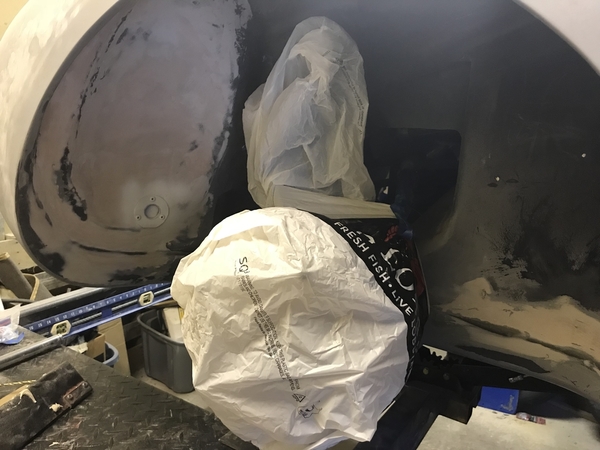
July 14, 2018 at 6:05 pm #305195Update on the Spyder build.
Basically cracking away at things as time permits. We’re getting into paint and final finish now.
July 14, 2018 at 8:22 pm #305198Great post Ed — You have become the de facto expert on all things Spyder……..
Sorry to hear about your (out of warranty) lift piston. But in true Ed fashion, you took the lemons and made lemonade — or was it Por 15? and made a slurry?
I bet the garage will crumble 100 years from now but the lift will still be lifting.
Keep working and posting
Happy Jack
July 15, 2018 at 10:39 am #305199Ed. Nice work on the Spyder. Listen…if you get tired of cars, we have a B-17 at the Warner Robins Museum of Aviation that we’re restoring that could use your sheetmetal work! No prior aircraft or military service required.
-
This reply was modified 7 years, 9 months ago by
newkitman.
Allen Caron
VW based 53MGTD - "MoneyPenny"
"If one thing matters, everything matters" - from the book The ShackJuly 15, 2018 at 8:23 pm #305201Very cool. I got a ride in “Memphis Belle” (the movie version, also a B-17 G, I believe) a few years ago and it was a definite career highlight. I’d love to be able to work on one!
July 15, 2018 at 8:30 pm #305202Ed, your attention to detail would drive me crazy. I understand it as you’re planning on selling it, but DAMN!
Bill Ascheman
Fiberfab Ford
Modified 5.0, 5sp., 4:11
Autocross & Hillclimb
"Drive Happy"July 15, 2018 at 10:35 pm #305203Bill,
“but DAMN” for sure. I’ll see your “but DAMN” and raise you one. I told Jack that he didn’t need no stinking wiring loom. Wire it up yourself. Then I tried to figure out why it was taking Jack so long to wire the TD. I had explained to him that the originals had only two (as I remember) fuses. Two; for the whole darn car. Two! Now, I’ll grant that two is not enough, but 18? (I really lost count at 18, or so). You ought to see Jack’s bank of relays….and to order more spade lugs because the only ones he had left were a different color?
Some day, we should “Roast” Jack and Ed they were cut from the same cloth.
Really guys: They are replicas! I believe in building it so it looks good and it works well. Everything else is “but DAMN” – for sure.
If Jack ever decides to “build” another anything, I’m going to first burn the stinking assembly manual. As your advice in another post “When I began assembling panels the first time and following the instructions it had me starting at the front. Nothing lined up. I called the factory and was told to forget the instruction manual and start from the back. Strangely, everything went together without a hitch.”
“but DAMN”
-
This reply was modified 7 years, 9 months ago by
 Royal.
July 16, 2018 at 8:18 pm #305205I really should have a look at the manual. For some reason, I get off on these little details, and making it to sell gives me another excuse (as if I needed one) to work them out.
Bill and Roy are right, though, it’s the big stuff that really matters: get the engine right, the trans square and tight, all the suspension bits. Bridget is gonna need all the suspension bits pretty soon (if not three years ago), and that’s going to be a fun job.
Spyder stuff is all new (or NOS by now), so fingers crossed that those all-important items are in working(ish) order and will perform when called upon.
Meanwhile, here’s pics of my Spyder wheel wells. Please note the simulated hammer marks in the driver’s front:
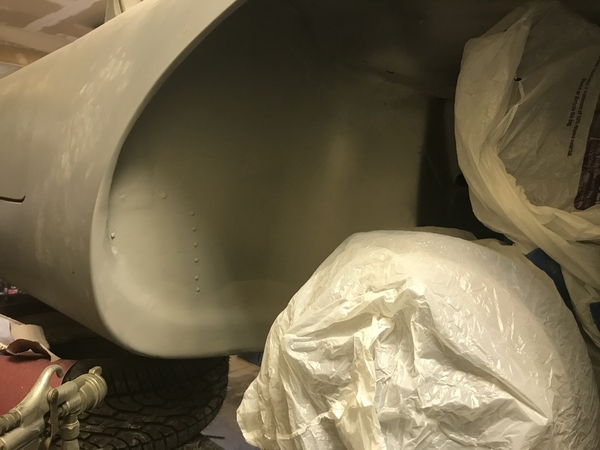
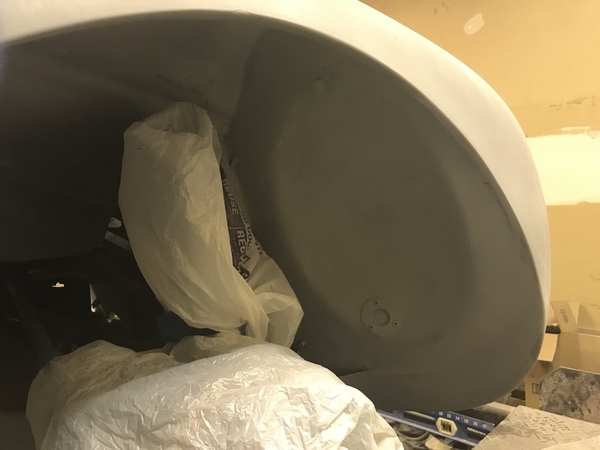
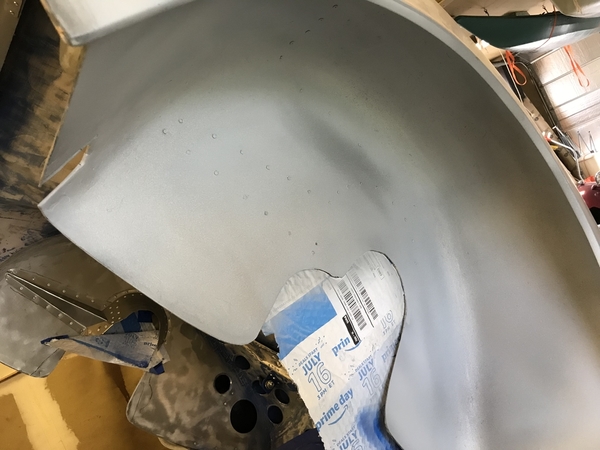
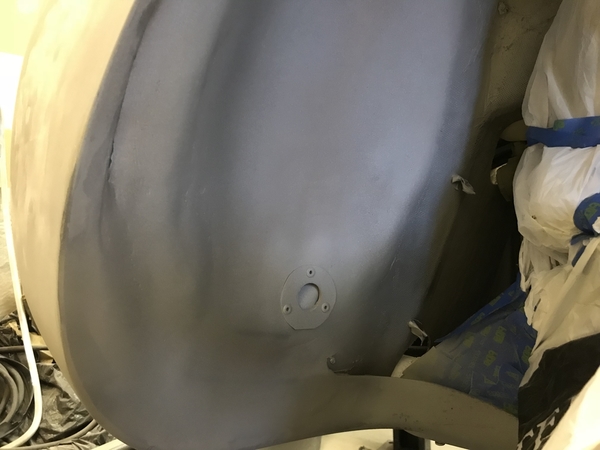
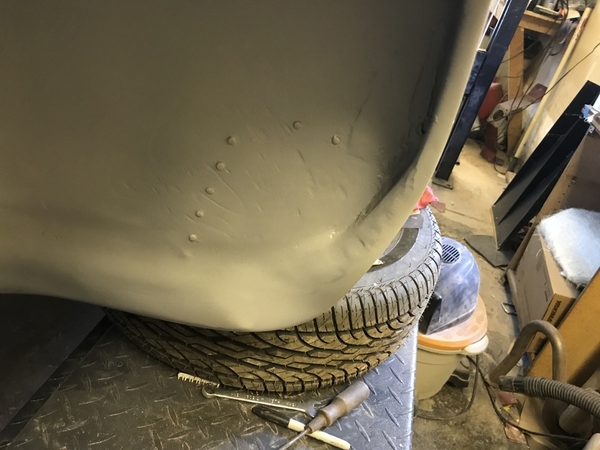
(Here’s a shot of the same spot on the almost-real, all-aluminum copy of 550-0090 by The Spyder Factory):

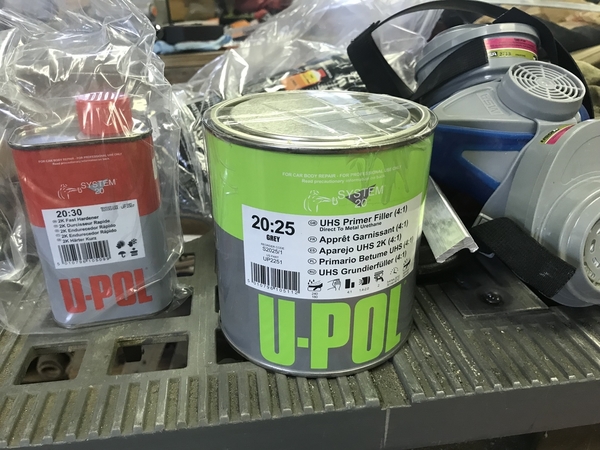
I won’t be closing up my front fenders like this because I’ve got a ball jointed beam instead of the correct king pin style. Not sure yet how I’m going to sort the sway bar either. But it’s good enough. The silver truck bed liner is 2-part urethane and, as such, should play well with the blue top coat and 2K clear coat that come next.
July 16, 2018 at 8:45 pm #305207Ed. For vintage color VW wiring diagrams, go to http://www.thesamba.com and click on the technical tab and then wiring diagrams. They cover type 1, 2, 3, 4, Ghia, Thing and K70 whatever that was. Hope this helps ya.
-
This reply was modified 7 years, 9 months ago by
-
This reply was modified 7 years, 9 months ago by
-
This reply was modified 7 years, 9 months ago by
Allen Caron
VW based 53MGTD - "MoneyPenny"
"If one thing matters, everything matters" - from the book The Shack -
This reply was modified 7 years, 9 months ago by
-
AuthorPosts

- You must be logged in to reply to this topic.