Home › Forums › MGTD Kit Cars › My Project › Phoenix… my revival project
- This topic has 105 replies, 12 voices, and was last updated 9 years, 11 months ago by
 KentT.
-
AuthorPosts
-
January 22, 2014 at 12:58 pm #255946
Well, since I now have posts about what I’m planning for this thing scattered all over this place — though I didn’t originally plan on a detailed “revival” thread. So, I thought I’d try to gather some of them together, because some of you may be wondering WTF is he doing…. As I described to Ed last night in a PM, I’m planning on retiring next month and trying to stockpile planned materials for the projects I have in mind for this “Red Phoenix” before I go into retirement, living on a smaller, fixed income.
1. Knowing I need to address how to seal up at least the rear of the engine bay to keep exhaust heat out, I’ve bought an original TD (or it may be a repro, but I don’t care) rear splash pan to try to see if it will work better than my hacked fiberglass one. That link is here:2. After much discussion about seats and alternatives last summer, including buying a pair of Midget buckets that needed redone, I bought a complete unused red interior kit (seat upholstery, door panels, and carpet) from Gabe, when he decided to go with new ones on his beautifully done build. This will be one of the last things on my list, to keep it clean and fresh, once installed. But, she’ll eventually be red with a red interior — a somewhat unusual color combo for either a TD or TDr (though I’ve seen pics online of a TD that way). MgMagic no longer sells red carpet — if they ever did….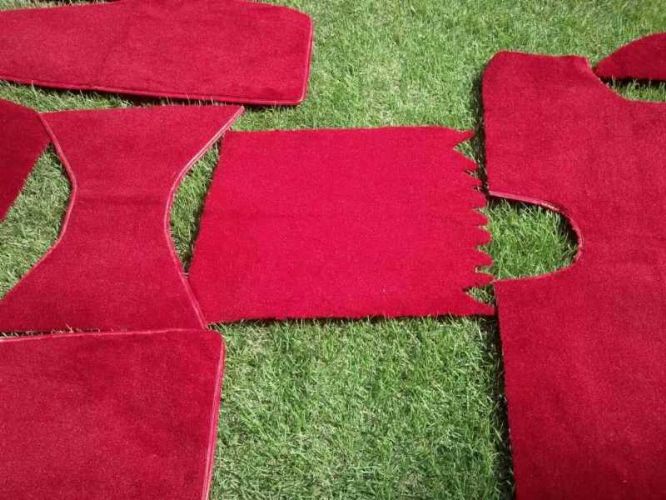
 3. When Mark earlier put his lightly used top (installed about 3 times and never installed the side curtains) up for sale, I jumped on them also. So, she’ll eventually get a new black top to replace the old one. That link is here:4. As discussed recently in the TDr Suspension topic, I’ve picked up locally a nice straight used ball-joint beam with no trailing arms or hubs, but it has the torsion spring stacks and a pair of used oil shocks of unknown aftermarket origin. I’ve ordered the Sway-Away type adjusters for it, a bolt-on disc brake kit (from SoCal, same place HappyJack got his and documented here), and will remove the short stack of leaves and install it after I get this engine build completed. (I’m still waiting on new oil filter/pump, oil sump, solid rocker kit, and shroud — all those pieces should arrive this week.) I hope to get this new-to-me beam built this winter, and ready to install shortly after the newly-built engine, so I can actually start test-driving this thing, and break the engine in. The Suspension topic and that discussion is here:5. As discussed in that topic, I’ve also ordered a pair of KYB Gas-Adjust shocks to go on the rear. I’ll install them when I finish the long-ago started brake job (now backtracking to put front discs on), and use the larger, new front brake cylinders to increase rear braking. I could stand for the rear to be slightly higher, for more clearance for the quiet pack muffler and oil sump. I also have now three sets of front shocks that I can use to sort out this new front beam and handling, once I get it on the road: (a) the used oil shocks on this new-to-me beam, (b) a new set of short Empi gas-shocks that I tried on my current beam, but were too short, and (c) a new set of standard-length Empi gas shocks that are currently installed on my front beam. A potentially useful tip that I found on Samba from a buggy owner who’s running gas shocks on all 4 corners was to set up the adjustable beam, ride height and stiffness, to incorporate these stiffer gas shocks. You can do that by adjusting the two torsion tubes (and their spring stacks) separately, letting the top beam and stiffer shocks carry most of the initial load at rest or on smooth pavement. Then the spring stack on the bottom beam comes into play on sharp turns, during braking, or when you hit a bump — i.e. the spring rate is more progressive… I can handle FIRM ride, but I want it to be controllable and predictable.6. After cogitating over it, and trading PMs with Ed, I bit the bullet and ordered a floor pan stiffener kit this morning (also linked and mentioned in the Suspension topic above). The stiffeners will be built in the next few days, then shipped from the left coast. They’ll get installed after this thing is on the road. I had initially “shopped for” TDrs with full frames yet VW suspension for parts availabliity (rather than just a VW floorpan or full-custom frame) underneath them, knowing that I wanted to try turning this thing into a “real” sports car if I can, but ended up going for this closer, cheaper VW floorpan-based kit. These bolt-on floorpan stiffeners will kind of combine both, and hopefully give me the best of both worlds. I’ll install them once I get the shocks and front beam adjustment initially sorted out after its on the road:
 They should really tighten up the handling and increase predictability, especially over bumps, and during fast turns. If nothing else, they’ll add some needed weight to the front, down low and below the center of gravity. I can’t see any way that they’d make things worse, and can only be an overall improvement in ride and handling.7. Next, I got a good deal on the MUCH stiffer Empi heavy-duty sway bars — 7/8″ front, and 3/4″ rear — that a lot of Sportster owners seem to run on their replicas. So, I bought both front and rear for about $175 delivered in a sale on Amazon. At that price, I can recoup most of the money, if I find they don’t work on these light TDrs, or the ride is simply too harsh…
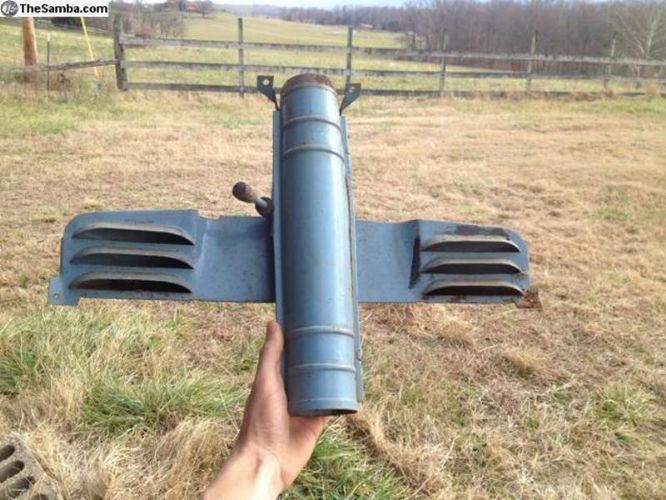
 8. And the final thing — prior to installing the new carpet and interior — is to sort out all the wiring and address the cabin heat issue before I cover it with new carpet and uphostery. As I’ve mentioned elsewhere, the builder/PO has run heat from the passenger’s side heater box into the frame tunnel under the passenger’s seat. It exits up under the dash out of the old shifter location. I understand that introducing this airflow into the tunnel may increase the chance of rust there, and that any cutting of the tunnel weakens the structure — but I am adding frame stiffeners and will likely get some reinforcing plates welded to the side of the tunnel. So, I’ve been thinking about what to do with this partially-completed mod (the driver’s side heater box isn’t even ducted into the cabin). I’m thinking of bringing it in and routing it to the tunnel also — because I took the opportunity to pick up an early (’68 — ’70) VW bay-window bus “heater tree” from the guy I bought my new front beam from. I want to try installing this heater tree up under the dash, to direct hot air from the tunnel to both footwells in addition to a defroster vent that I need to install. It has a lever-operated valve to control the mix between heat and defrost. I’ll need to shorten it a bit, but I think I can make it work. And, with all the hot air from both heater boxes, I think I should have plenty of heat in addition to defrost, without needing to add a bilge pump fan or whatever. Note also that my original heater controls and emergency brake have already been relocated behind the new shifter location — where they should be, for ease of use… Note also later-model busses used a cable-operated defroster control rather than this lever — but I think I can install this one so the lever is still easily reached, without the added complexity of running a cable.
 So, I think I have enough projects planned to keep me busy in retirement for a while putzing with this thing… and if the 5-acre mountain tract that I’d originally bought for building my retirement home ever sells, I’ll have the funds to build somewhere warmer to work on them, rather than under a temporary metal carport…
KentT2014-01-22 16:20:22
Early FF TDr on 69 VW pan
Slowly coming back from the ashes...January 22, 2014 at 1:57 pm #255947Never understood why the Speedster guys run their hot air through the tunnel, where it cools off, potentially carries moisture into the tunnel, and likely ends up with less airflow. IT all seems unecessarily complicated, with several major deficiencies.
The ducts from my heater box outlets run direcly into the pasenger compartment, under the seats.If the roof is up and curtains are on, it gets TOO hot inside if I open the heater boxes all the way.I have a small blower under the dash piped to ducts along the base of the windshield. Air flow is strong enough to defog the windshield. It won’t melt ice or snow, but I tend to leave the MG in the grage on those days!Paul Mossberg
Former Owner of a 1981 Classic Roadsters Ltd. Duchess (VW)
2005 Intermeccanica RoadsterIf you own a TDr and are not in the Registry, please go to https://tdreplica.com/forums/topic/mg-td-replica-registry/ and register (you need to copy and paste the link)
January 22, 2014 at 2:05 pm #255948Well, mine had already started in that direction, and I thought I’d just try to carry it to completion and make it work…
Even if the air cools some from passing through the tunnel, I think I can still get plenty of airflow by using both heater boxes to heat this small space.Plus, I’m now planning 6×9 speaker boxes hidden under the seats where TDr heat is normally routed…😉 KentT2014-01-22 14:23:43
Early FF TDr on 69 VW pan
Slowly coming back from the ashes...January 22, 2014 at 4:17 pm #255949Mine was made with a through-the-tunnel system. No sign of rust there (that I could see) and the heat worked good.
I do think it weakened it though, and will plate-over all the holes.
January 22, 2014 at 5:12 pm #255950I tend to agree, Ed, on both counts.
1. I’ve seen no signs of rust on mine so far, either through the access plate nor underneath the shifter in its new location. Further, most of the rust-throughs that I have seen in the lower VW body appeared to have originated elsewhere, whether road salt and water coming in from the outside (leaking main body seal?) or originating at the floor-board where salt and moisture can be trapped in wet carpets, battery acid can get there from under the back seat, etc. I’ve seen bodies that the heater tubes were basically the only things holding them together… I don’t recall ever seeing a heater tube rusted through from the inside.2. I plan on having my nephew weld on plate reinforcement wherever I think is needed, at the same time I have him weld up angle-iron seat mounts to get rid of these “fiberglass boxes”… Who knows, I may want to redo some of what was done during the original pan prep. I haven’t yanked the carpet out yet to see what that looks like… but I’m not encouraged by some of the other build issues I’ve seen.Early FF TDr on 69 VW pan
Slowly coming back from the ashes...January 27, 2014 at 1:11 pm #255951Not sure what had happened to the pics above, and I can no longer edit that old of a topic to try to fix them… But, I uploaded them again in this Reply (then deleted them) and it seems to have solved this issue. Meanwhile, I ran across a pic from the web that I’d stored that shows a real red TD with red seats and black dash, though black carpet. My carpet will be red also…
 Meanwhile, the remaining engine parts arrived today. So, now it’s time to modify the shroud and install the thermostat flaps, then get on with completing the build…
KentT2014-01-27 14:15:29
Early FF TDr on 69 VW pan
Slowly coming back from the ashes...October 21, 2014 at 7:18 am #255952Long time, no update. Not a lot has been done recently on the TDr, since I’ve been distracted, preparing to build a new home for it… (Combine that with the fact that I’ve added another revival project — a 1995 Winnebago Rialta with VW running gear.)
Trying to find an affordable way to get it built, pricing “pole barns” and alternate construction methods, and after “wasting” all summer waiting on an old HS bud to move forward with this, I gave up. Got a younger, “hungrier” guy to take the lead as GC.
13,000lb excavator with 24″ bucket and rock teeth. Big enough to get the job done, yet small enough to maneuver around on these hillsides.

Trying to save as much room as possible on my ridgetop, final positioning calls for about at 8′ rear foundation wall, in the far, right corner.

Going with 24″ wide x 12″ deep footers. Foundation walls will be 12″ poured concrete, with lots of rebar, stepping down to 8″ up higher. As it is, foundation, with stone backfill and slab is 1/3 of the total budget. You guys with flat ground don’t know how lucky you are, at least in this instance…

24’x44′ footprint, 24’x34′ concrete pad with workshop in the left 10′ shed and gravel in the 10′ open shed for storing tractor and ATV. 2’x6″ stud-wall conventional construction, insulated and finished, 50-year metal roof, vinyl siding.
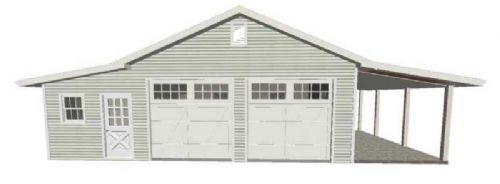
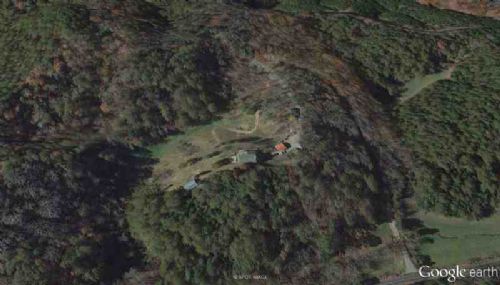
Much of the challenge has been dealing with the building site. It’s going adjacent to the red-roofed metal carport (now removed) in the pic below.
Total estimated timeline is 8 weeks, more-or-less, dependent on weather. Hope to be moving stuff in about Christmas….
Look forward to being able to have an insulated, heated workspace for the TDr. Maybe, just maybe, I can have it on the road by spring time.
KentT2014-10-21 08:25:45
Early FF TDr on 69 VW pan
Slowly coming back from the ashes...October 21, 2014 at 7:52 am #255953Kent, I’m very jealous. I hope you planned enough ceiling height for an eventual lift.
October 21, 2014 at 8:00 am #255954Sadly, Roy, I couldn’t stretch the budget that far. It will have 10’4″ finished ceiling height – but at least has oversized 9’x9′ garage doors. Looked at insulated “cathedral” ceiling, to give me more height, but it still would’ve placed the lift in the very center, which obviously doesn’t work… Higher sidewalls and flat ceiling also blew the budget.
KentT2014-10-21 08:29:01
Early FF TDr on 69 VW pan
Slowly coming back from the ashes...October 21, 2014 at 10:21 am #255955BUMMER. I don’t own a lift either, for the same reason.
October 21, 2014 at 8:01 pm #255956Hmm. TDr is under 4 feet high; you could raise it 6 feet in that place, which would give you room enough to park any car and most light trucks ‘neath it.
Just sayin’.October 21, 2014 at 9:17 pm #255957I’m planning on installing a lift eventually in the new garage even though the ceiling is only 10 feet high.
 October 21, 2014 at 10:44 pm #255958
As much as I’d love to have a lift, it would be hard for me to justify the expense if it was limited to just the TDr… As it is, a concrete floor and ability to heat it is a major step up from what I’ve been dealing with since I moved here a couple years ago.
Early FF TDr on 69 VW pan
Slowly coming back from the ashes...December 29, 2015 at 4:05 pm #255959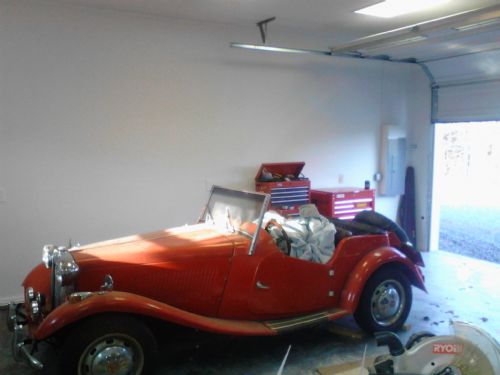
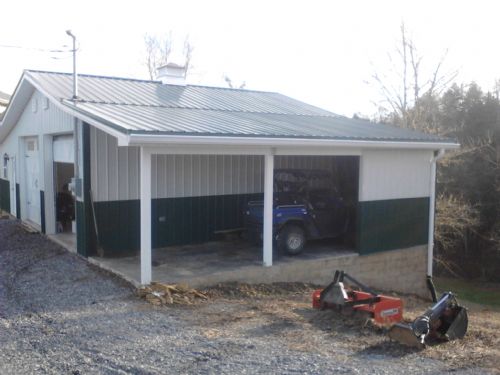
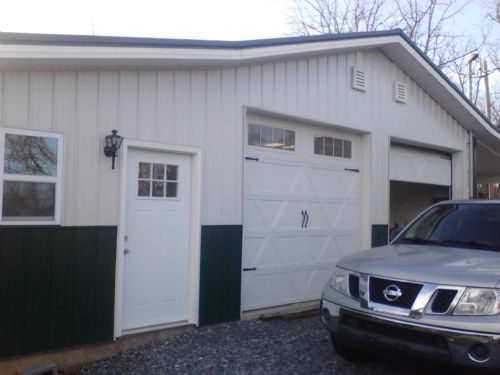
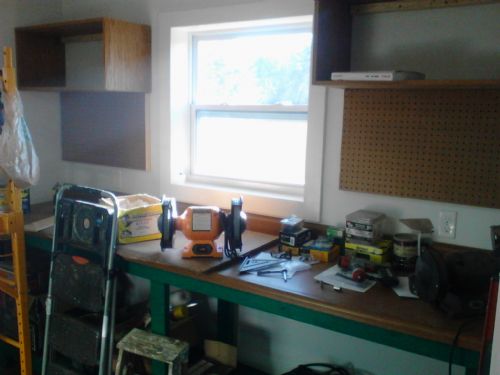
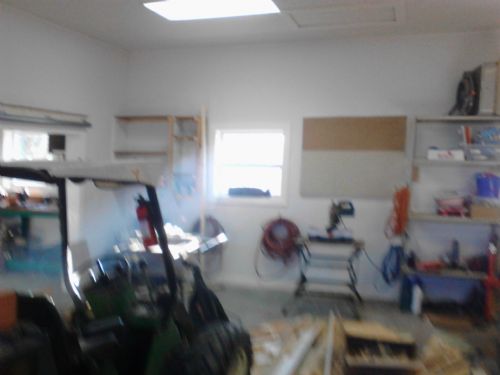
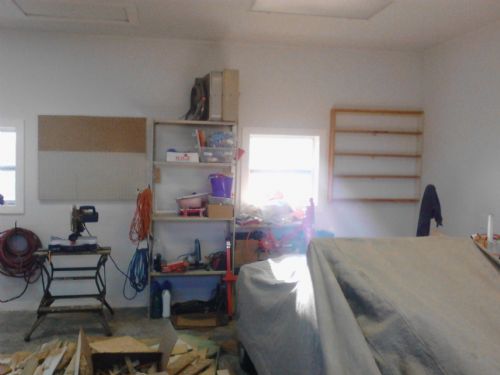
Garage still isn’t complete – still need mre gravel, and I’m just now mounting pegboard, mounting shelves, etc. But, today was a major milestone, as I finally got my air compressor and toolboxes moved in. I’ll work around things as I must, but wanted to get them in before the weather turns bad.
Early FF TDr on 69 VW pan
Slowly coming back from the ashes...December 29, 2015 at 7:20 pm #255960Nice!
Great progress Kent!
Paul Mossberg
Former Owner of a 1981 Classic Roadsters Ltd. Duchess (VW)
2005 Intermeccanica RoadsterIf you own a TDr and are not in the Registry, please go to https://tdreplica.com/forums/topic/mg-td-replica-registry/ and register (you need to copy and paste the link)
December 29, 2015 at 9:36 pm #255961Just now seen your new garage, talk of it was going on half year before I joined here.
I would love to have one like that, spacious with workshop. I’m on just as hilly a place, even moreso, but the real problem here is the rocks. Some parts of the ground have solid slabs going all across the hilltop, almost certain to require blasting for the location I would like to use.Wish I could have suggested this before you got your garage built:oil/grease pit in the floor. Could have just excavated out a small section on the high end, probably some at low end too. No need for a lift… well, less need anyhow. In fact a door could have been put around back going in to it.Hope that isn’t going to bother you to think about it now!LRH2015-12-29 21:37:50
December 29, 2015 at 10:10 pm #255962No problem!
I also have a lot of slate rock to deal with. The garage is built on several major veins that were at surface level. Outcroppings in my gravel driveway determined the final grade of the slab, to go 4″ above them.
I couldn’t have put an oil change pit under the garage bays without blasting or jackhammering a hole. We simply notched out a cut in those veins for the rear foudation wall, so tie the footers in. I could have made a small cellar under the left rear corner, where my 10×12 workshop is. I’ve often regretted not doing that… But, I’m happy just to have it as is, to work in.KentT2015-12-29 23:17:42
Early FF TDr on 69 VW pan
Slowly coming back from the ashes...December 29, 2015 at 11:10 pm #255963Now I have garage envy! Very nice.
Vicenç - (bee sense)
Pembroke Pines, FL
1986 Aston - BCW Model 52 - "Montse II"(1983 FiberFab MiGi II - "Montse")
December 30, 2015 at 7:33 am #255964Kent, very beautiful! Only a true kindred spirit truly understands our need for our garage/man caves. Like Ed’s extensive garage remodel last year, your start from scratch project has almost coaxed me into emptying my garage and starting over on my 2-1/2 car mess that draws daily complaints from my wife since all our neighbors and friends could “eat off their garage floors”. I have that old corner service station “been there since the Model T” look, complete with a couple of comfy old chairs and a 37″ HDTV. (And I’ve only lived in this house for 9 years) But, sadly, no “pit” (zoning) nor lift (head height and $$).
Garage envy, indeed!Royal2015-12-30 07:35:45
December 31, 2015 at 1:38 am #255965KentT wrote:I also have a lot of slate rock to deal with.I was thinking there must be an abundance of rock, having been to Sevierville a few times, and I should have thought about shale. Although the land does smooth out up there northwest of Pigeon Forge, as I recall, so more dirt than rock I guess away from hills. Limestone there too. The rock here is limestone and jack hammering only a little of it out of my driveway was tough. Took lots of blasting to get a hundred feet of water pipe put into the ground.Must be great to have all that garage space now, try not to fill it up too soon!December 31, 2015 at 6:53 am #255966Very nice…Merry Christmas present to yourself. 😀

Bill Ascheman
Fiberfab Ford
Modified 5.0, 5sp., 4:11
Autocross & Hillclimb
"Drive Happy"January 11, 2016 at 7:26 pm #255967Took a bit of time off from building shelves and pegboard panels (had built a couple workbenches earlier)…
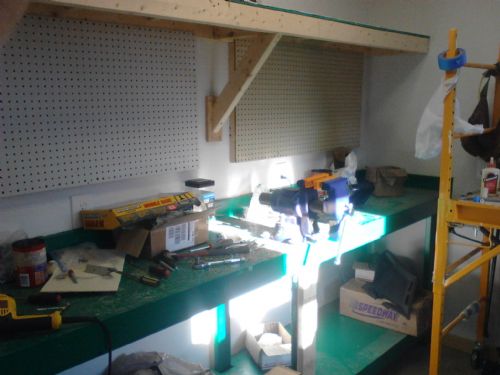
To unbox these, remove the old seats, and do a quick test fit:
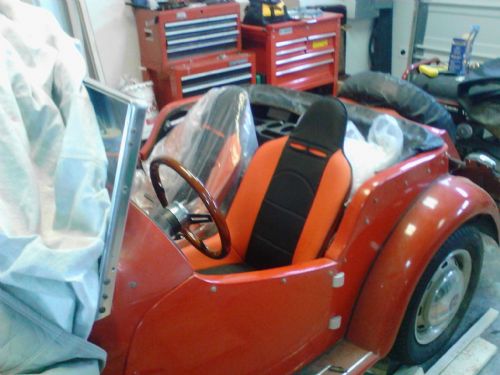
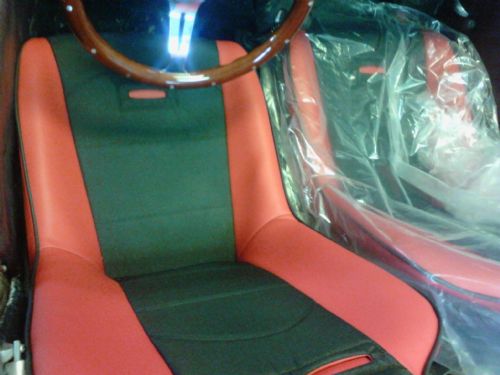
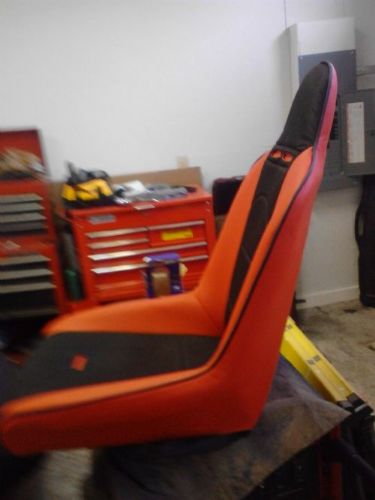
At 19″ wide, 26″ deep, and 31″ tall these PRP Roadster suspension racing seats will fit in there nicely. They’re sitting on universal bases from Speedway Motors. These universal bases are 5.5″ tall, and the associated sliders will add about another 1.5″ of height. But these universal bases are not sitting down on the bottom of the floorplan – they’re 14″ wide and I need to narrow them to 12″ to fit these Roadster seats. Then, they’ll fit down onto the bottom of the floorplan, offsetting the added height from the seat sliders, and end up back at about this level. So, the width and seat height will work.
Note that the color is off a bit in these pics – there’s no orange tone, only red, but not as deep and dark a red as the color of the TDr body. Hopefully, that red will match the red door panels and carpet that came with Gabe’s kit that I bought (pictured up earlier in this thread somewhere).
I decided on the red/black color scheme to tie in the color of my black dash, with black piping to match the black fender welting used all over the car and add a bit of pop. All the red is vinyl for durability, with black cordura center section for “breath ability” and durability. I could have gotten Empi Speedster seats which are similar size for a bit less money, but the color choices were limited to black vinyl backs and piping with gray, lack or beige tweed or vinyl seating surfaces, i.e. stocked colors and not all stores stock all colors. Instead, PRP seats are custom made to order with a much wider variety of colors, piping and materials – at no additional cost. PRP also offer a variety of additional cost options such as seat heaters, adjustable lumbar support, etc.
I decided to go with high backs (low backs are available at the same price, and adjustable headrests on the lowbacks are a $70/seat option). Though they certainly don’t look authentic, I decided on high backs because I can use either a 4 point or 5 point harness with them – and I still hope to add a rollbar with harness mounts at some point…
Now back to finishing the garage interior, including painting the raw wood and pegboard, and finally start wrenching on the TDr again…KentT2016-01-11 19:59:57
Early FF TDr on 69 VW pan
Slowly coming back from the ashes...January 11, 2016 at 8:43 pm #255968Well-considered. They look like the’dbe great for auto-cross.
January 11, 2016 at 9:28 pm #255969These narrow Roadsters don’t have nearly as tall of sides as their other, larger seats. But, they’re plenty tall enough to keep your butt from sliding around. They don’t have a whole lot of foam padding, but they seem to be quite comfortable since the seat and back surfaces are suspended from the tubular frame. Luckily I have narrow hips, so they’re plenty wide enough for me. The lower sides makes them easier to get in and out of. They’re about the width of a Porsche 914 seat, but more formed instead of flat, and yet the sides are shorter than Corbeaus or other racing seats.
Look forward to seeing how they feel after a couple hours seat time…
Early FF TDr on 69 VW pan
Slowly coming back from the ashes...February 2, 2016 at 8:11 pm #255970I’ve been taking advantage of the unseasonably nice weather to move stuff out of the sheds into the new garage, adding a few of the decorations I’ve collected over the years.
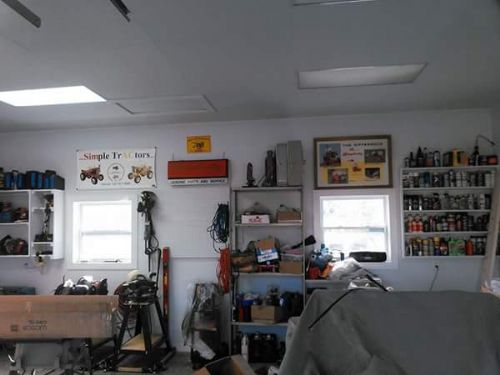
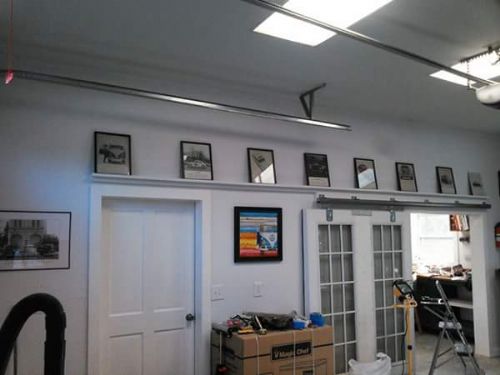
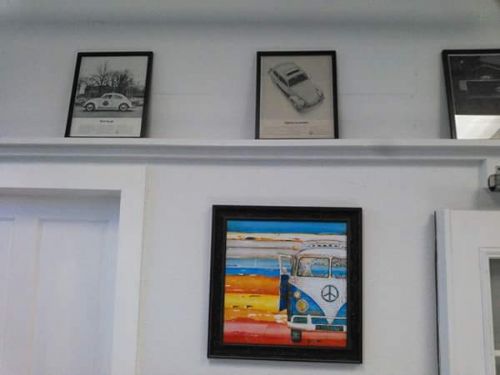
Most importantly, the new engine is about 50 yards closer to being in… 🙂
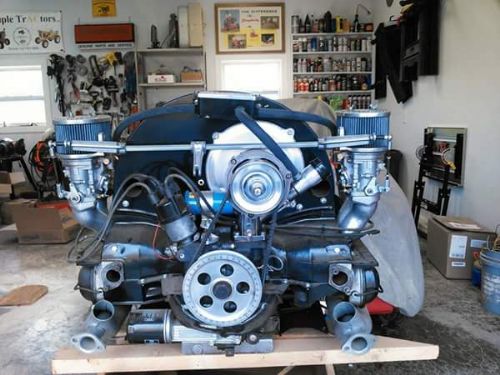
Hope to finish the unpacking and putting things away in the next few days, and back to wrenching on the TDr.KentT2016-02-02 23:26:42
Early FF TDr on 69 VW pan
Slowly coming back from the ashes... -
AuthorPosts
- You must be logged in to reply to this topic.
