
Home › Forums › MGTD Kit Cars › My Project › Juneybug MG TD build
- This topic has 48 replies, 14 voices, and was last updated 10 years, 2 months ago by
Mike Schumacher.
-
AuthorPosts
-
May 13, 2013 at 4:37 pm #234682
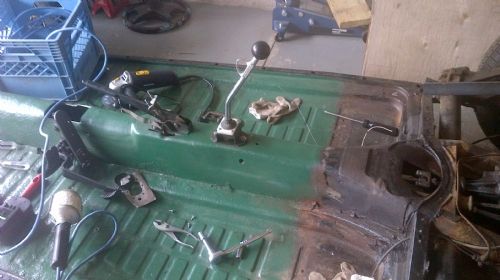
I purchased a bug restored in 2006 with a 72 body 68 pan and 70 1.6 engine. Excellent runner, showed my son how to drive a standard before I removed and sold the body. Bought a FF/CMC kit from the early 90’s? that was basically untouched. Fairly complete other than main rear angle iron frame, seat boxes, some gauges and almost no hardware. Next I will decamber rear wheels, move pedals and shifter back. As it ran very well and was recently restored I have no plan to upgrade anything till I have kit assembled and running. Retiring May 30 (13 more get ups) but golf, landscaping and serious honeydo list will limit kit progress a bit. Hoping for the fall of this year but you folks will have to keep me informed and from time to time motivated. Thanks in advance. Instructions for moving shifter back seem simple as soon as I find somebody with an 8 foot arm.
MikeMay 13, 2013 at 4:43 pm #255841I had downloaded both FF & CMC manuals but on suggestion downloaded Classic Roadster as well. Very good instructions on pedal and shifter relocate but also clear list of what to pull of donor body. i.e. wiper motor assy.
May 13, 2013 at 4:49 pm #255842if anybody can give me good measurements on the rear frame addition (U shaped main rear bumper frame) mine was missing from 20 yr old unassembled find. photos and tips also appreciated. Will also be looking for seat box dimensions and tips as they are also missing.
finally bought bug from a woman named June so inherited vanity plate – JUNEYBUGMay 13, 2013 at 6:15 pm #255843Anonymous
InactiveMike: measurments for the rear main bumper support are as follows.
Rear bar long made with 2 1/2″ x2 1/2″ 1/4″ angle iron. 32″ lond.Side pieces are made from 1 1/2 ” x1 1/2″ angle iron 3/16″ thick . They are 45″ long.Mounting brackets are1x1/2″ x1 1/2″ angle iron 3 16″ thick. they are 6″ long.Angle bracket is cut at a angle to taper leg to 3″ onone side. There is an elongated hole located 1/2 ” from the outer edge that is 1/2″ x1″ long. Edge of hole is 1/2″ from outer edge of bracket.Bracket is welded with flat side to edge of side piece. angle bracket flat side up and side bracket on flat surface. rear bracket is welded to side bracket with rear bracket with flat side of angle iron on ground. Side bracket flat goes on top of rear bar.Finished frame .May 13, 2013 at 9:44 pm #255844As our benefactor P Mossberg well knows, everything you need to know is already here. Between STGinc, newkitman and schu I have found the answer to a better question than I asked re seat dimensions. Thank you all and George Fisher as well. Will keep me busy for another month.
June 7, 2013 at 4:10 pm #255845
to decamber rear wheels manual says to pull spring plate off torsion bar. I have exerted enough pressure with pry bar to pause and ask advice. It is just not moving. Thanks
Mike
Really thought this was going to be easy chassis mod!June 7, 2013 at 4:52 pm #255846did you take out the 4 bolts on the other end of the plate? scribe them before taking out also pay attention to how many & whether inside or out the washers are
June 7, 2013 at 5:12 pm #255847Yes there were 4 at the torsion bar and 3 at the axle all out. even smacked the plate with a mallet. did scribe it as well thanks.
And now to answer my own question… when I took the 3 bolts off at the swing axle the expectation was it would slide off the spring plate and release the tension. It didn’t, but when I took off the shock and kicked the axle back it did releasing the tension and allowing the splined spring plate to slide off. Also had to disconnect parking brake cable.
Being someone who knows that if 1 is good 2 is better I wanted to rotate 2 splines. I didn’t and I think (hope) 1 will flatten the ride.
All in all 4 times as long to do 1 side. sound right?juneybug2013-06-08 12:05:18December 9, 2013 at 7:54 pm #255848Spent some time this summer cleaning top and bottom of floor pans, not ready for coating yet but closer, and I repaired all the holes I made smacking out the seat rails. Have the pedals relocated and the shift rod shortened but not yet installed. Want to go through the forums to avoid shifting problems later. softened the front end-posted what I learned in suspension thread. Couldn’t afford to pay for the advice I get here Thanks all. You are the difference between a pile of rusty VW parts and me telling my wife I shoulda been a mechanic.
December 9, 2013 at 11:05 pm #255849Awesome! Great news Mike!
Paul Mossberg
Former Owner of a 1981 Classic Roadsters Ltd. Duchess (VW)
2005 Intermeccanica RoadsterIf you own a TDr and are not in the Registry, please go to https://tdreplica.com/forums/topic/mg-td-replica-registry/ and register (you need to copy and paste the link)
December 9, 2013 at 11:53 pm #255850Mike, while you’re doing all this work to the floorpan and suspension, you may want to consider relocating the emergency brake handle also, or modifying it to be more upright and easier to reach.
There’s pics on here somewhere of the relatively easy mod to make it more upright.Luckily mine already had the E-brake handle moved behind the relocated gearshift, between the seats, where it really belongs. The PO had also modified the passenger’s side heater channel to run the heat up to the front of the cockpit and out the original shifter hole through the center tunnel — a mod that some don’t recommend because it can introduce additional moisture to the center tunnel. But, it works well to send the heat to the front, and out under the dash…Early FF TDr on 69 VW pan
Slowly coming back from the ashes...December 21, 2013 at 6:58 pm #255851Too cold for garage work so I am putting seats together. One thing I did to make the stretching easier and the folds smoother was to cut 1″ corners off the plywood backing. If I did it again I would cut 2″ radius on seat bottoms and back. On the subject has anybody thrown away the fiberglass seat bottoms and made them from wood and has anyone tried dense foam between the pan and seat bottom to avoid “numb bum”?
December 21, 2013 at 7:19 pm #255852My fiberglass boxes were dispatched ages ago. The seat bases now sits on 2″angle. Schu has a thread here on seat rebuilding to alleviate “numb bum “
Bill Ascheman
Fiberfab Ford
Modified 5.0, 5sp., 4:11
Autocross & Hillclimb
"Drive Happy"December 22, 2013 at 12:11 pm #255853Thanks – seen Schu’s furniture straps – will try it.
December 29, 2013 at 8:33 pm #255854Door hinge tip – screwed body part of hinges to a 2×3 to maintain correct distance (7 1/8″ in my case)and straight line between top and bottom hinge pins. Tight & blind nut bolt connections kept me very warm all afternoon. juneybug2013-12-29 20:35:34
December 30, 2013 at 6:11 am #255855Mike I did away with my original seat bases too. The bases I made of wood are now at about 3″ angle toward the back. I started with 2″ and gained quite a bit of room but rebuilt them last summer to gain more and add the webbing. A couple pic in forum picture area of the first bases I built, my number is 1235.
I have several more pictures of the new bases I built and the webbing I put under the bottom to cure “numb bun”. I covered the boxes with clack auto carpet before installation.Montie


 December 30, 2013 at 1:48 pm #255856
Has anyone who fabbed up seat boxes like this considered adding piano hinges or something so you can easily open them for the storage underneath?
Early FF TDr on 69 VW pan
Slowly coming back from the ashes...December 30, 2013 at 2:27 pm #255857Yep mine are hinged in the front, they tilt forward to access the storage.
June 1, 2014 at 5:30 pm #255858after a brutal winter and some other issues finally got my head back into the project. I ignored some good advice about moving the ebrake back as well and after fighting with the cable tubes realized it was not all extra work.
I found cross section of tunnel at thesamba. pretty useful.

Have a new master cylinder and all new lines, next!
juneybug2014-06-01 17:52:06
June 1, 2014 at 5:46 pm #255859Hey Mike,
While you have the car that far apart, you may want to consider moving the e-brake back aft of the shifter so that you can reach it easily. Ed has a really good post on how he did the move, and I have posted my results of moving the e-brake on my FiberFab kit. Now is the time…..take a look at the past posts — it will be much easier if you opt to do it now…….June 1, 2014 at 5:54 pm #255860Thanks Jack I know I should but progress is so slow I just don’t want to add 1 more item.
June 1, 2014 at 11:43 pm #255861I suggest you do it. Now is the best time. You will not be sorry. You likely will be sorry if you don’t.
PhilJuly 6, 2014 at 5:25 pm #255862how far can you stretch fiberglass?

the tub and pan contact at front and back but about an inch difference ahead of where running boards will start. Double up on gasket is my first thought.
juneybug2014-07-06 17:36:30
July 6, 2014 at 9:03 pm #255863Not sure where you are measuring the “difference” where the running boards will start.
Original TDs have spacers between the running boards and the rear fenders. Some kits replicated that spacing. Is this what you are seeing?

Paul Mossberg
Former Owner of a 1981 Classic Roadsters Ltd. Duchess (VW)
2005 Intermeccanica RoadsterIf you own a TDr and are not in the Registry, please go to https://tdreplica.com/forums/topic/mg-td-replica-registry/ and register (you need to copy and paste the link)
July 7, 2014 at 5:51 am #255864Where the body tub should rest on the pan perimeter there is a gap. You can see light in the footwell. There does seem to be a bit of flex in the tub and I think if I put the jack under the pan I can probably push it up a bit.
-
AuthorPosts
- You must be logged in to reply to this topic.